Overview: Entra ID Add-On
Seamlessly integrate your access control management with Microsoft's powerful identity and access management service. Entra ID (formerly Azure AD) centralises authentication, and Tapkey's dedicated Add-On now allows you to synchronise your Entra ID Groups directly with your Tapkey Person Groups. This powerful connection simplifies user management, streamlines access provisioning, and maintains the highest level of security for your smart locking system. Unlock efficient, unified access management today!
TABLE OF CONTENTS
- 1. Prerequisites
- 2. How the Integration Works
- 3. Installation
- 4. Activating Group Synchronisation
- 5. Optional: Real-Time Changes
- 6. Logging In
- 7. Additional actions
- 8. Best Practice
1. Prerequisites
Before starting to install Entra ID ensure that you have:
- An Entra ID tenant, and an Administrator account is required to install the Entra ID Add-On in Tapkey.
- Tapkey Smartlocks installed and Owner access to your Locking System.
2. How the Integration Works
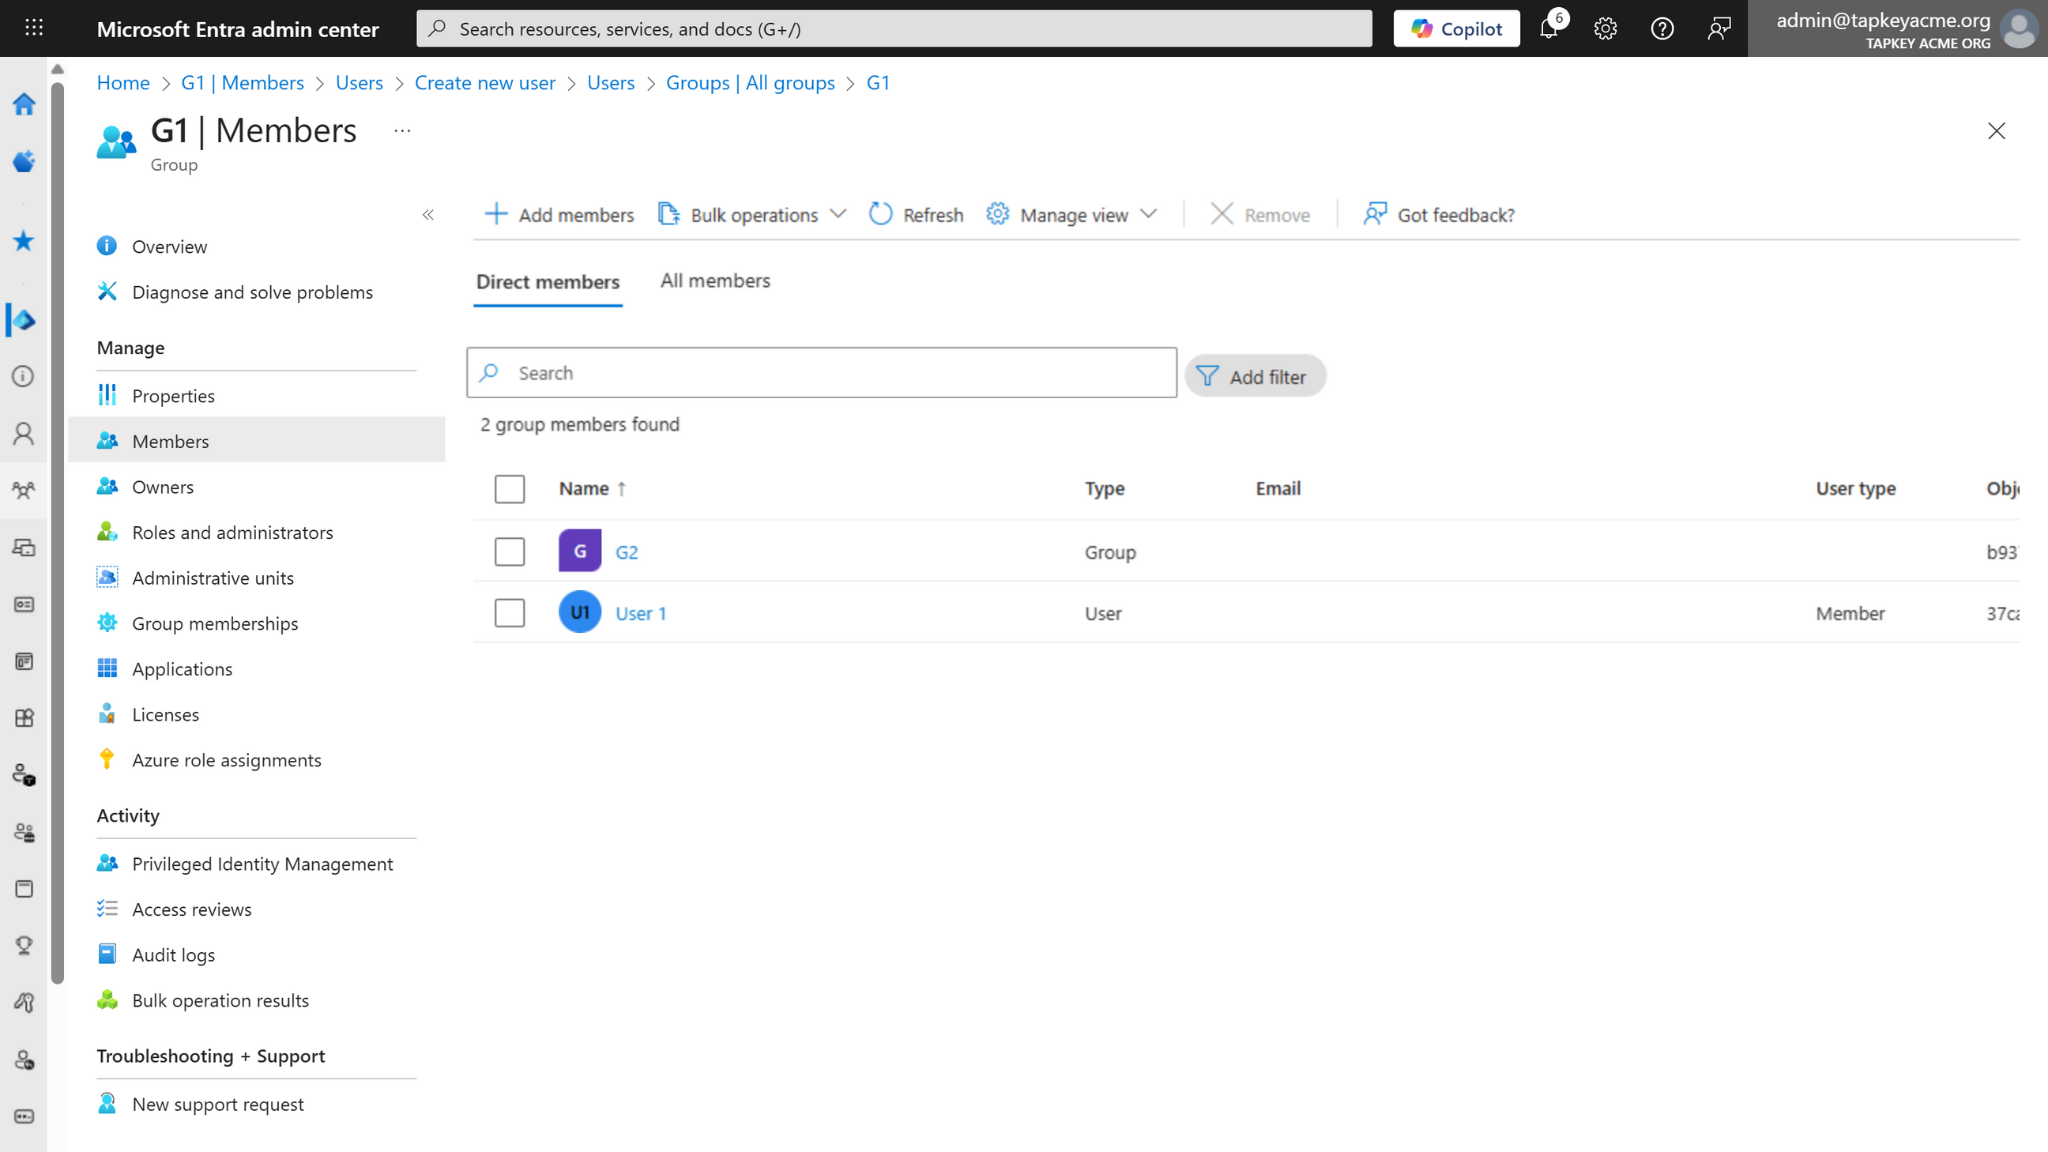
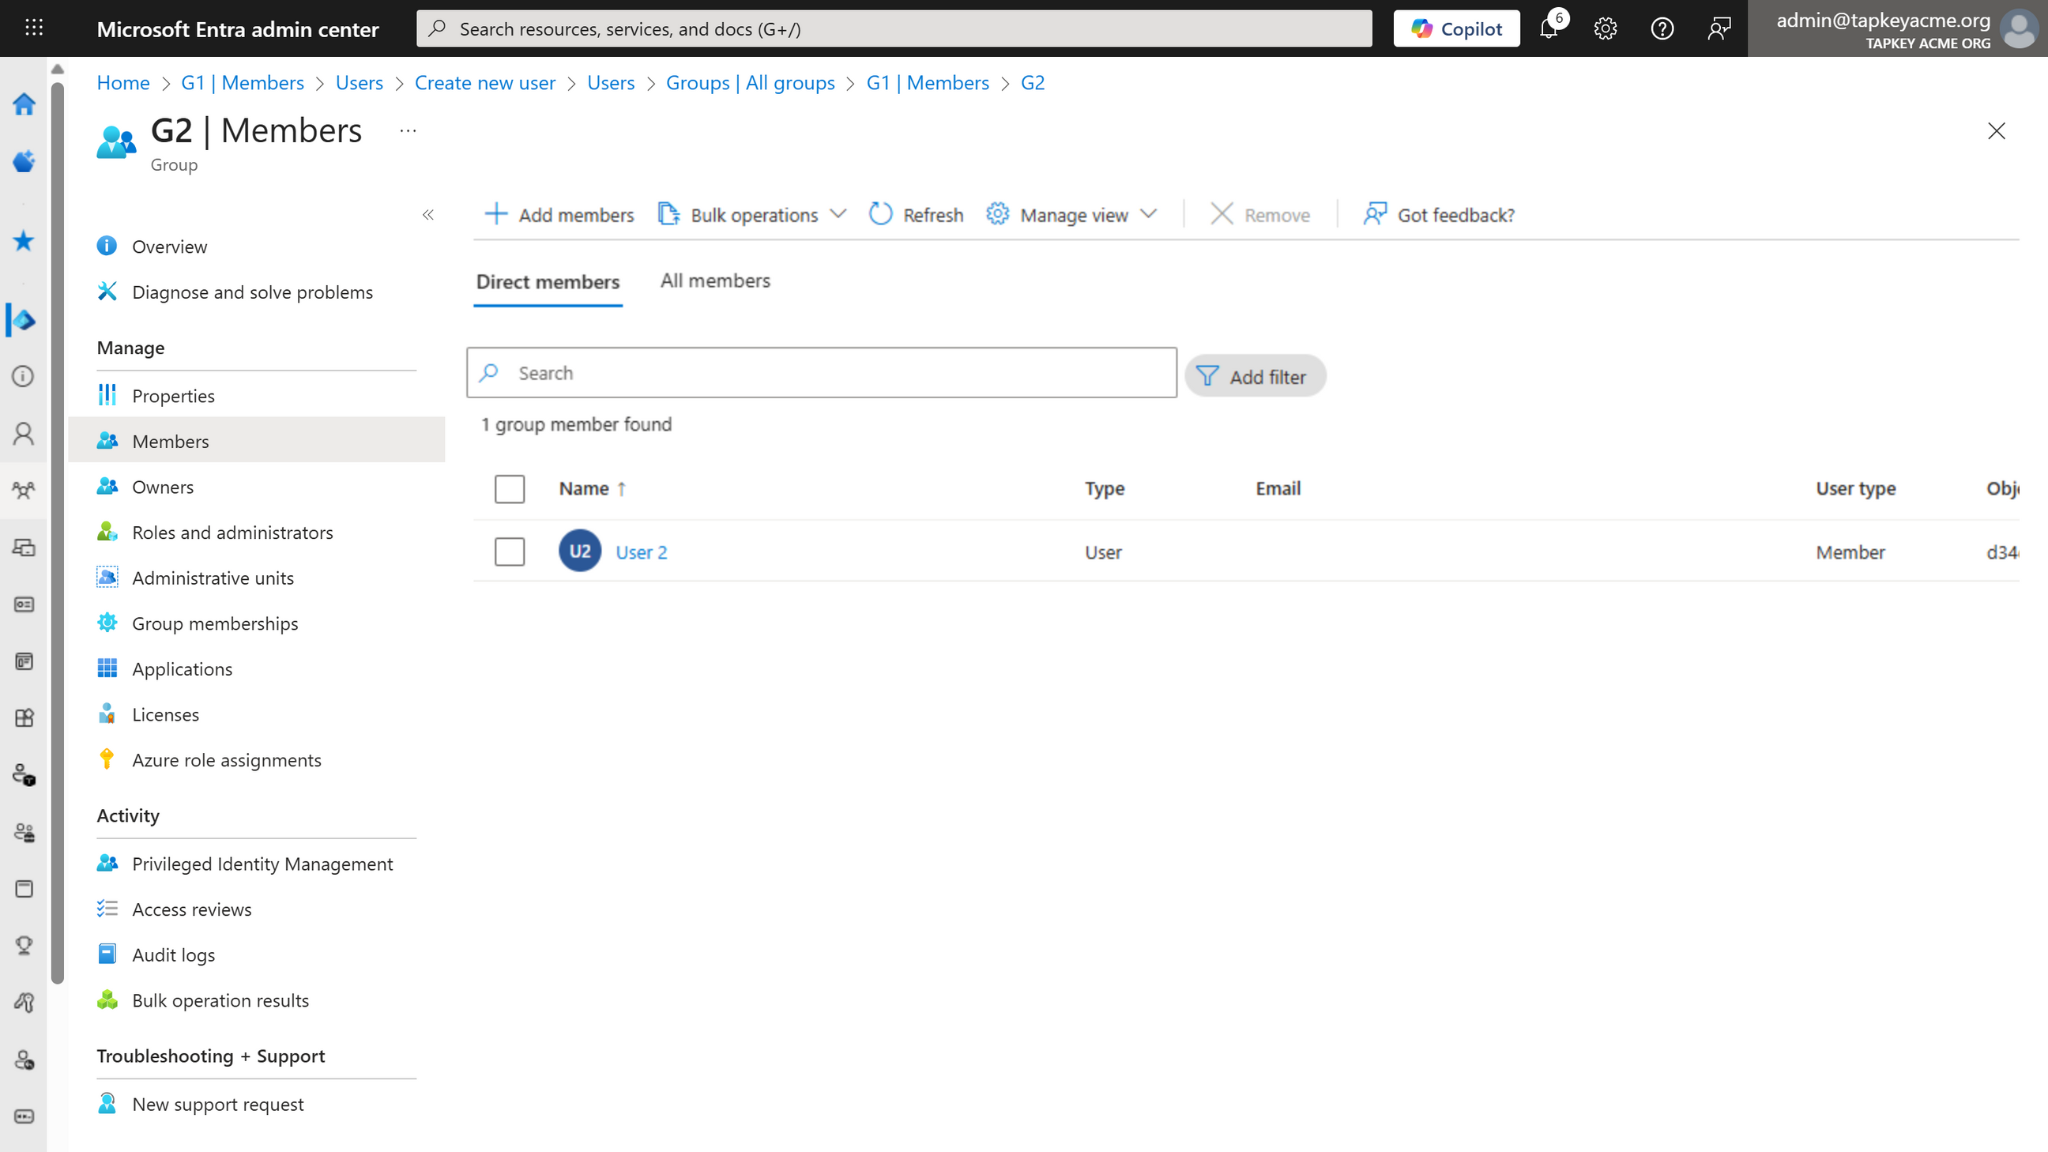
To make the examples easy to follow in this article, we used a simplified structure created in Entra ID:
Base configuration in Entra ID:
User 2 (user2@tapkeacme.org)
User 1 (user1@tapkeyacme.org)
G2 as a member.
Group Linearisation
When a group is synchronised with Tapkey, all direct members and all nested/transitive members are added to the corresponding Tapkey Person Group. This is one of the main concepts to keep in mind about how the Entra ID integration works as expected:
Example: If you enable synchronization for Group 1 (G1):
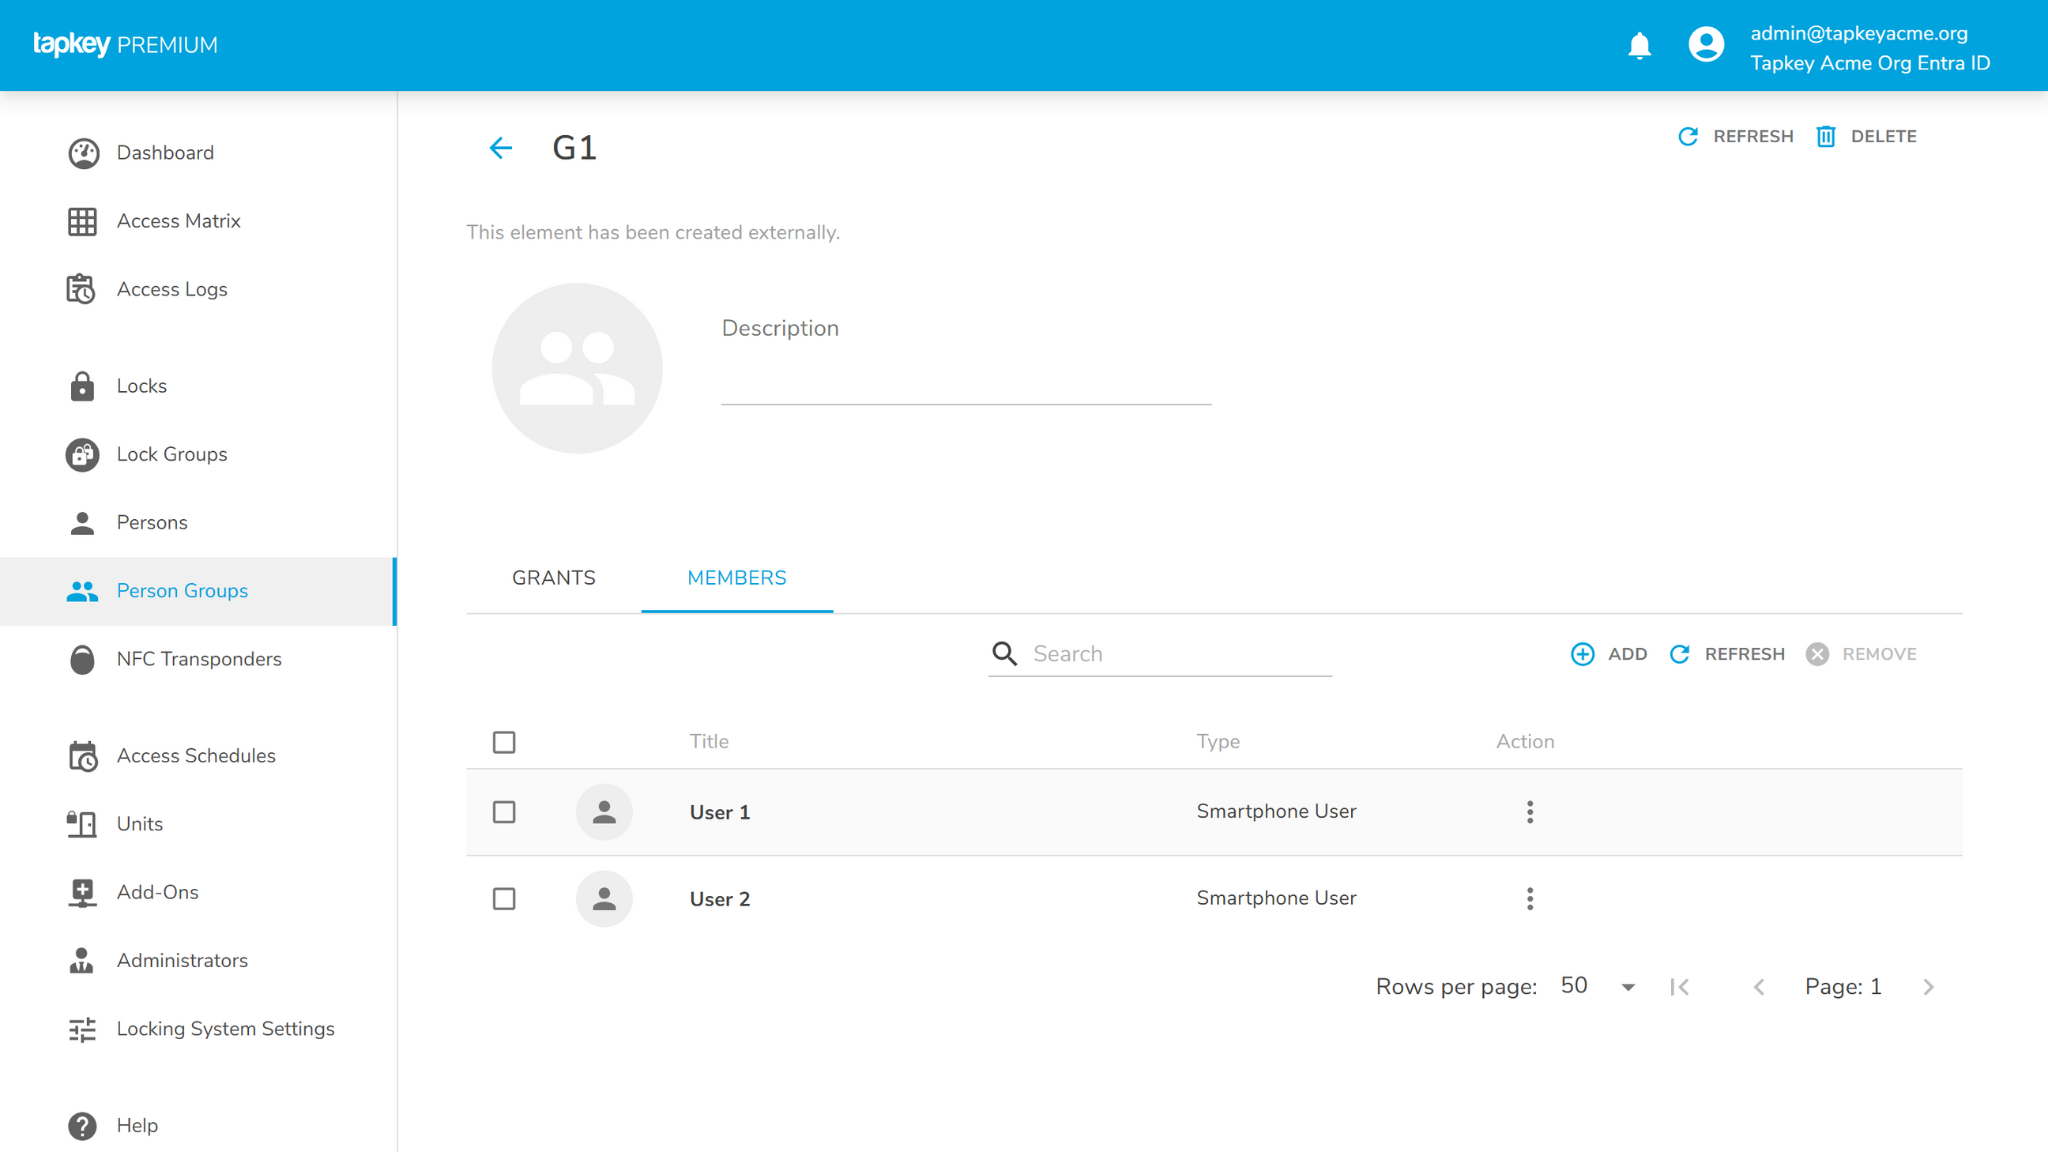
User 1 (a direct member of G1) will be created as a member of G1 in Tapkey.
User 2 (a member of Group 2 (G2), where G2 is a member of G1) is a transitive member of G1. User 2 will also be created as a member of G1 in Tapkey
Logging in Requirements
When the Add-On is active, users must log in to Tapkey with their work or school Microsoft account linked to your Entra ID tenant. This ensures organisational security and consistent identity management.
3. Installation
Follow the steps below to get everything up and running.
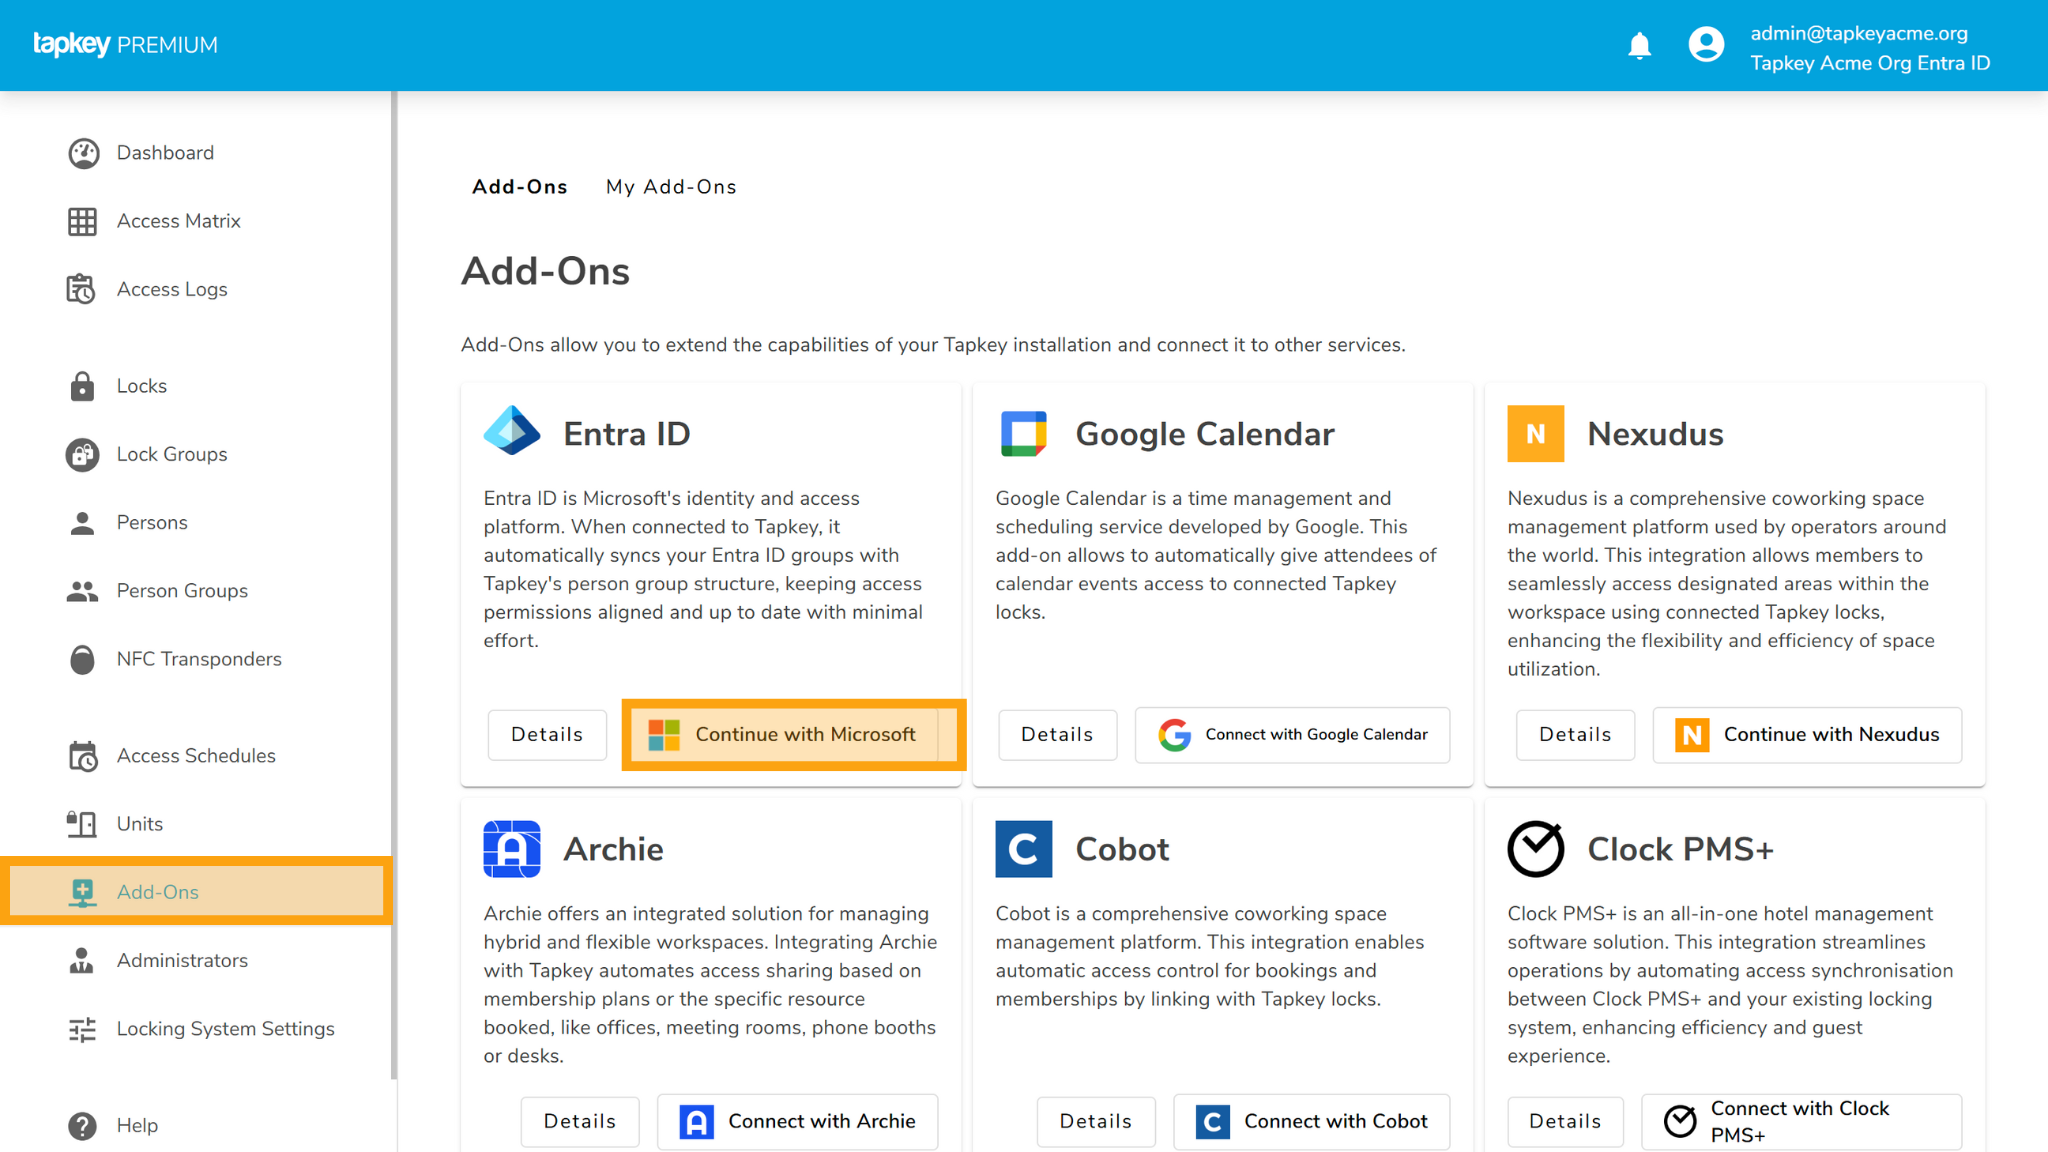
Open the Add-Ons section in the Tapkey Web Portal and find the Entra ID Add-On in the “All Add-Ons list. Click Connect with Microsoft to proceed.
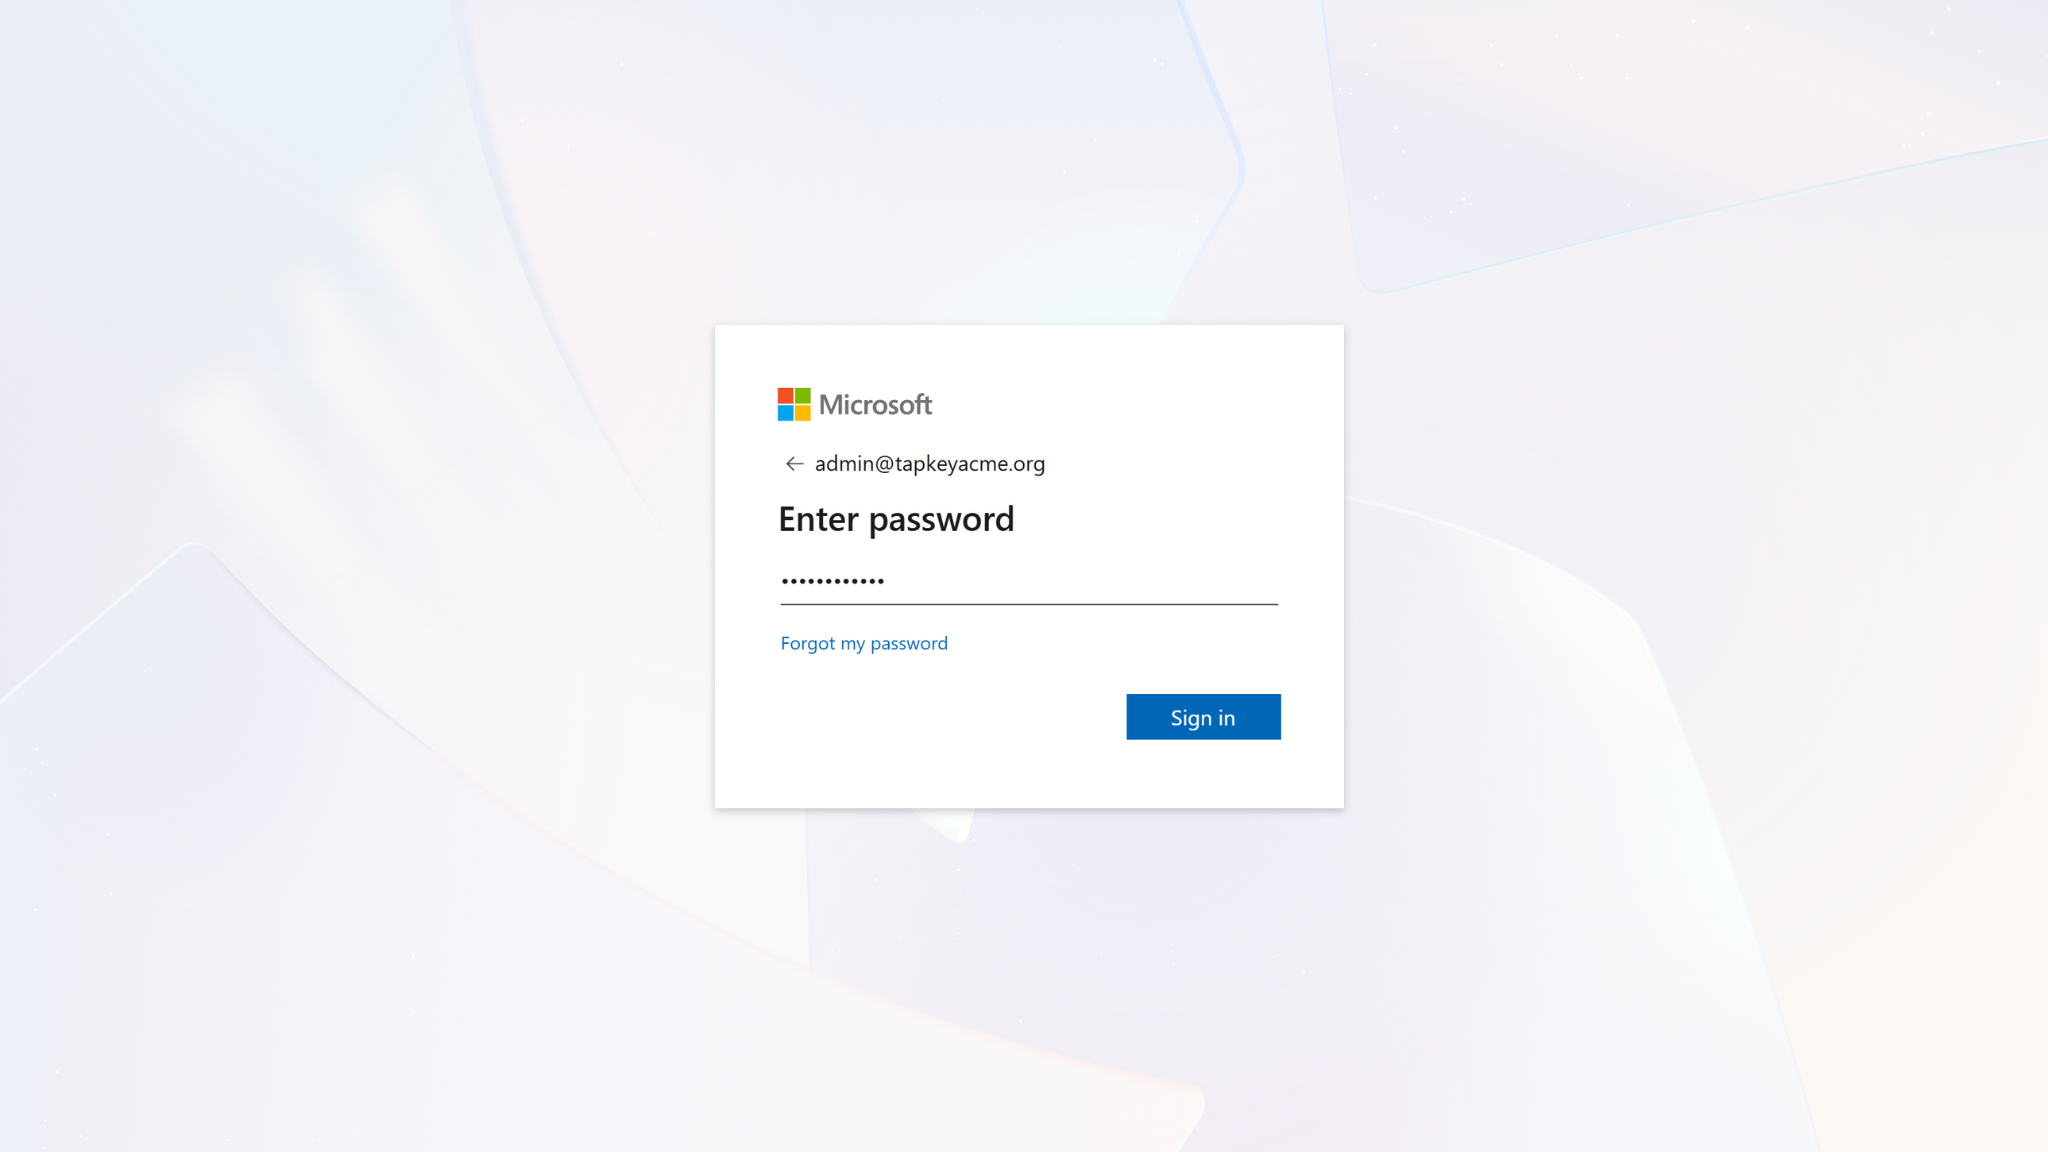
You will be redirected to Microsoft’s login and confirmation process. Additional confirmations are requested to allow the Tapkey Application to access information for your tenant.
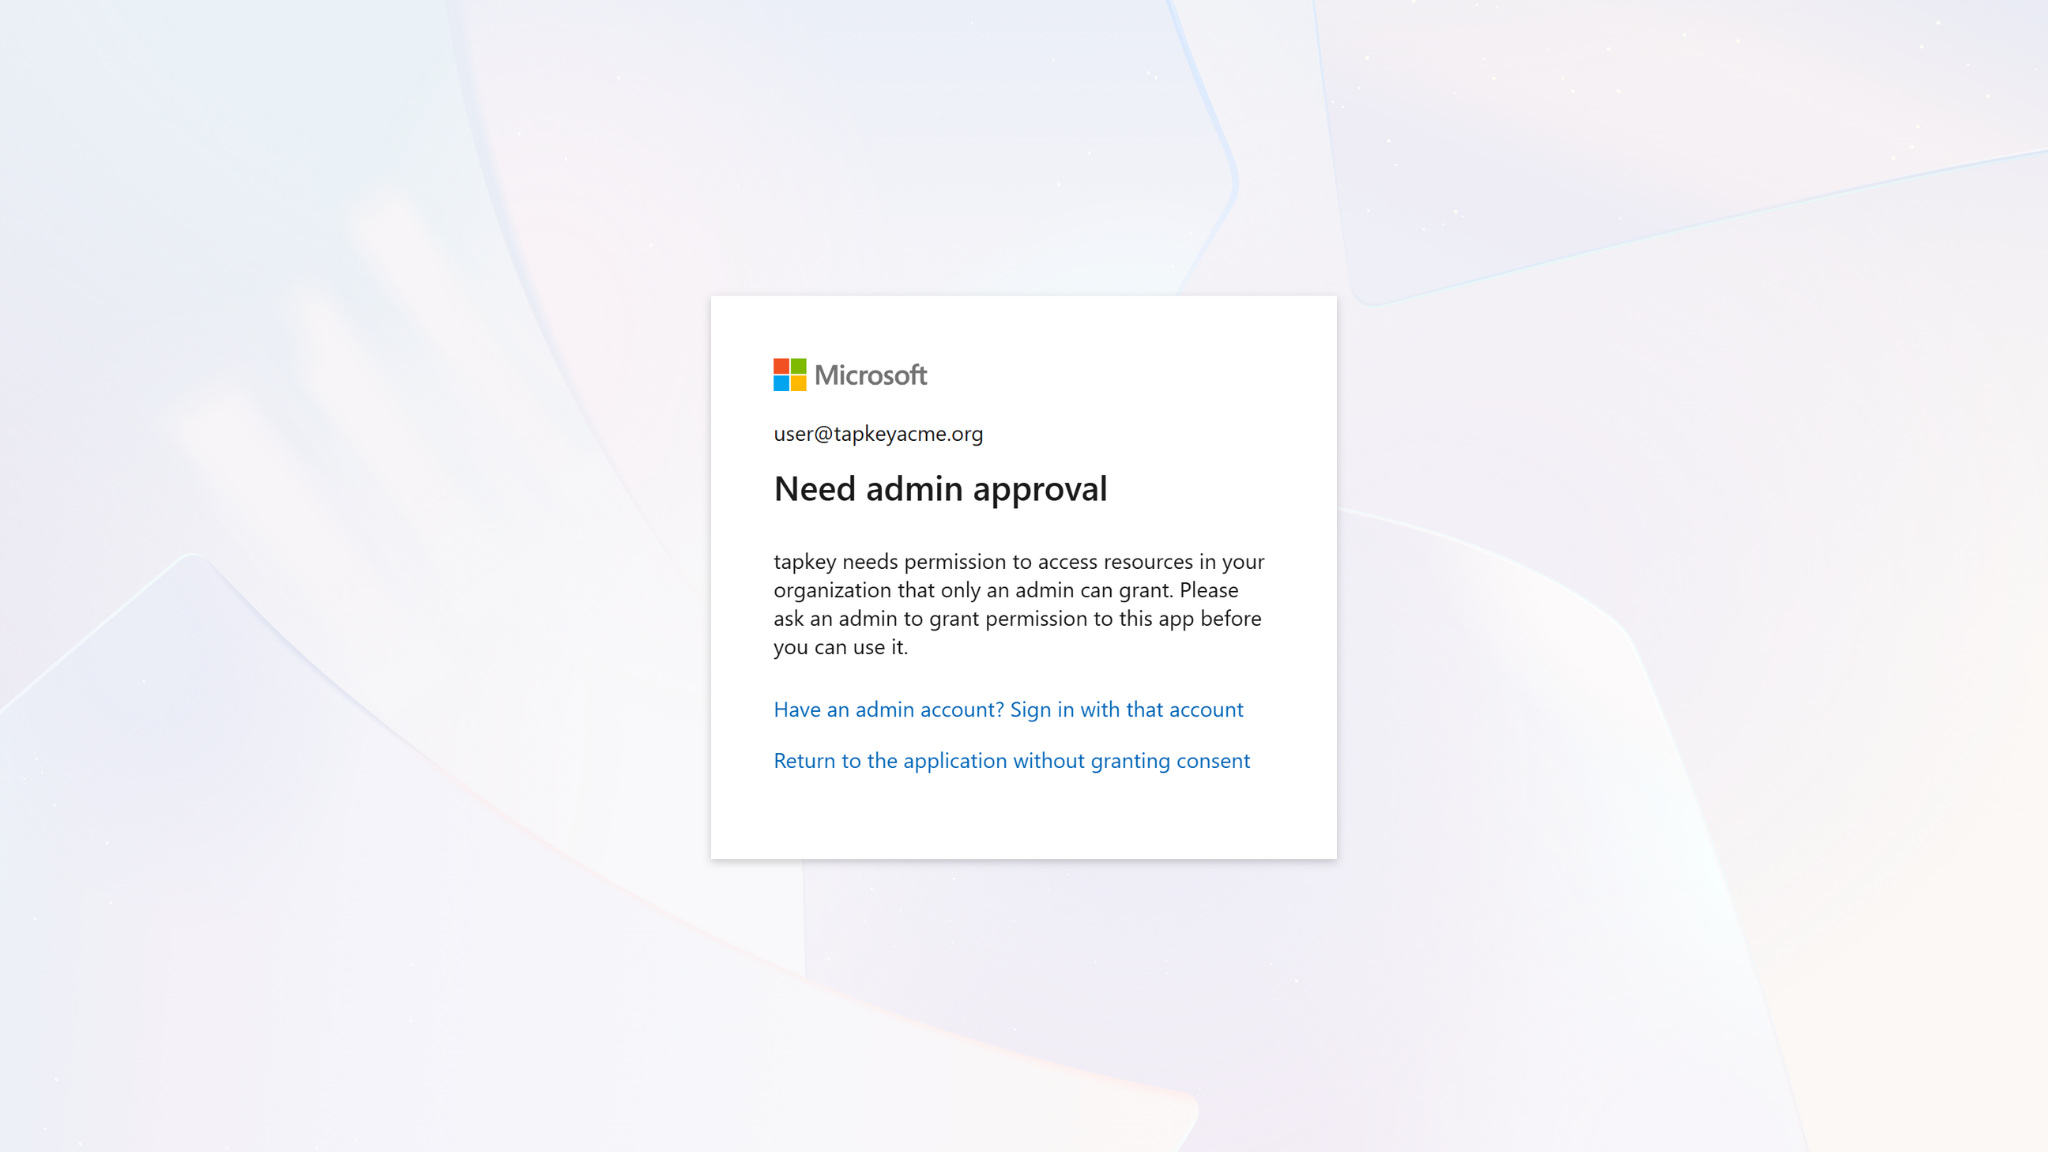
Important: If you see an admin approval request, the account you are using does not have the required privileges to connect with the Tapkey Add-On in your Entra ID tenant. More information can be found here.
4. Activating Group Synchronisation
Once finished, your Add-On is ready to use! We are going to proceed by activating some Groups to be synchronised with your Tapkey locking system. Once you enable sync for a group, Tapkey mirrors its structure and membership, ensuring your access control always reflects your organisation’s latest changes. Follow the steps below to activate synchronisation for your desired groups.
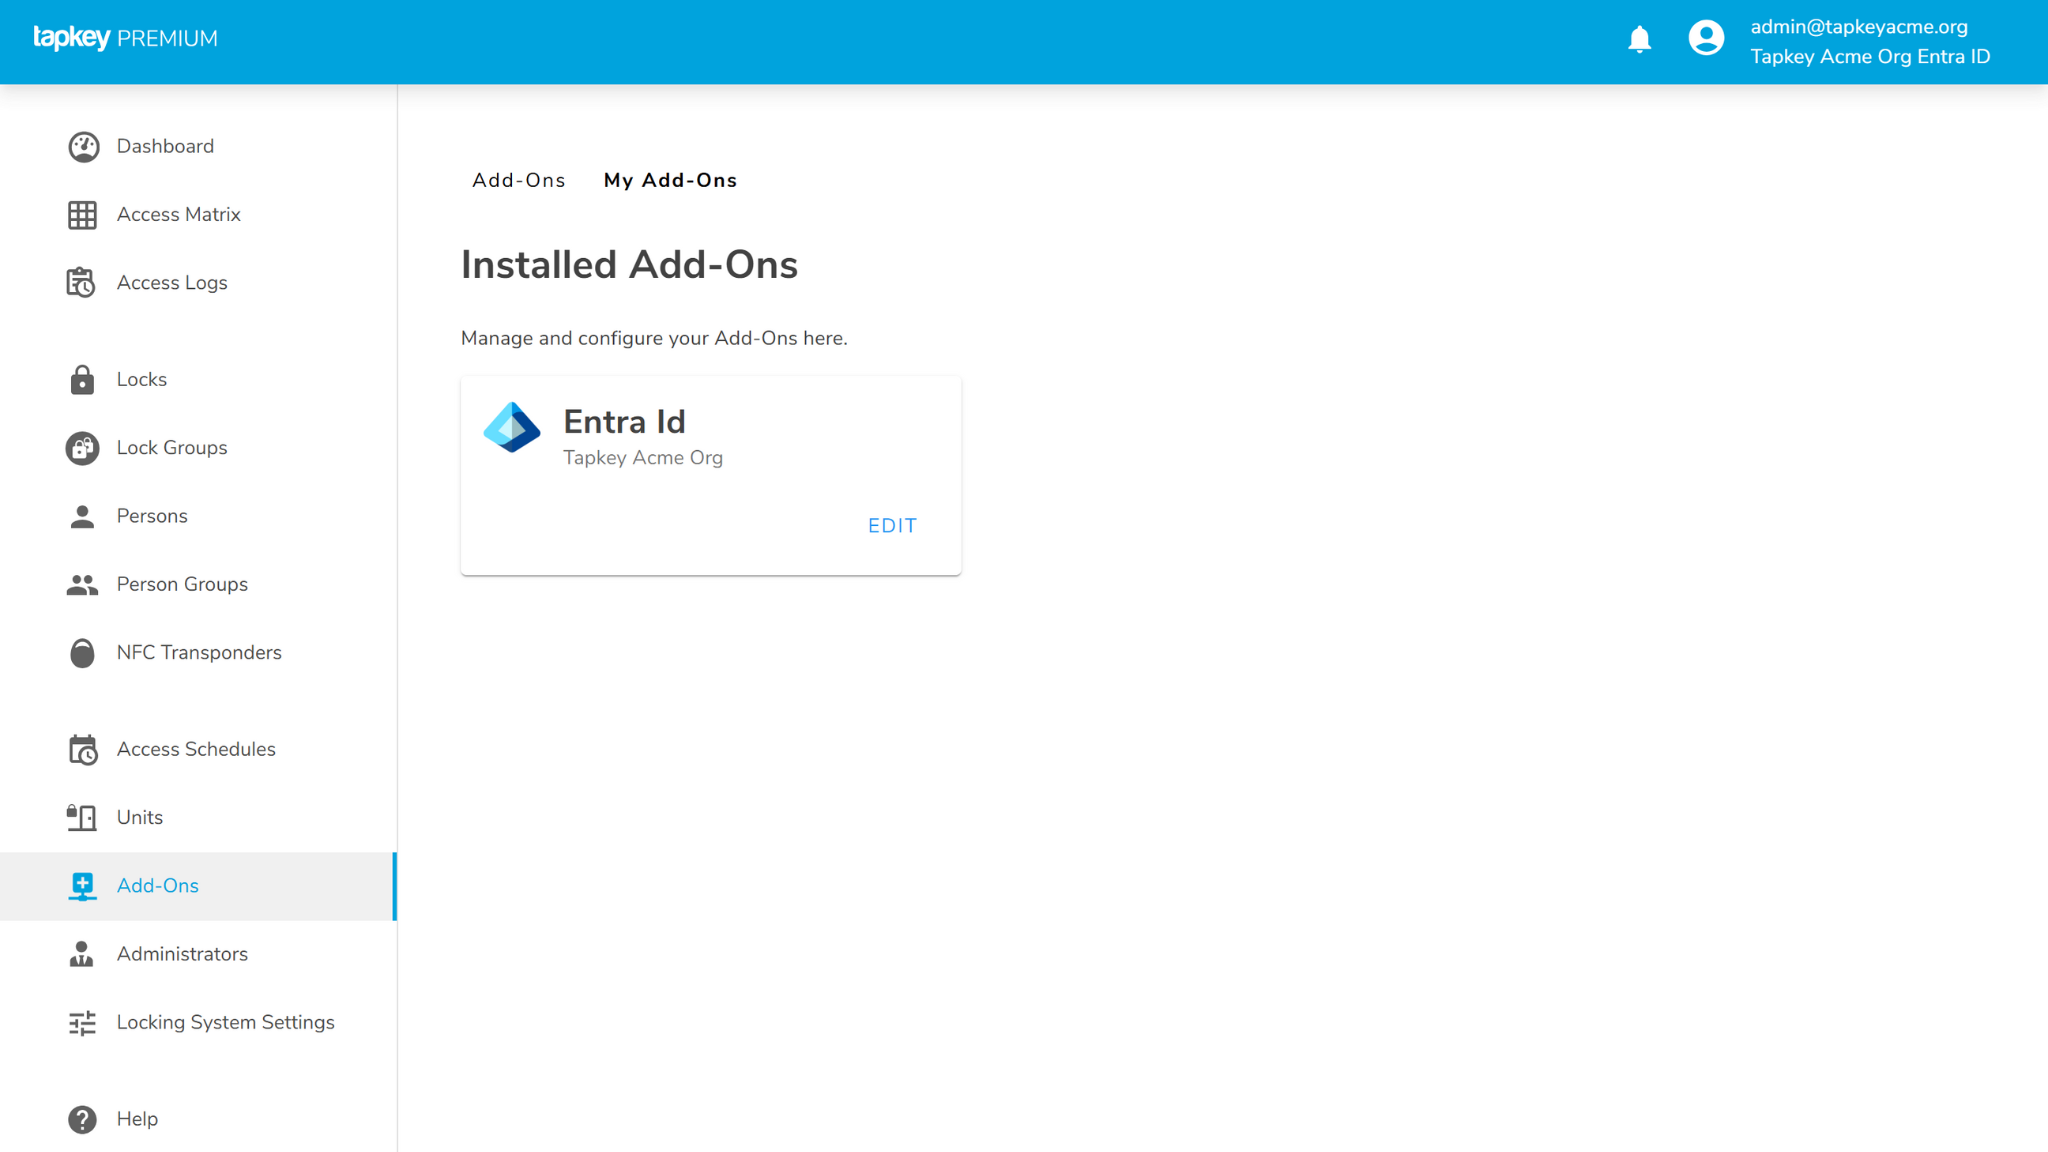
Click “Edit” in the Entra ID Add-On settings to continue.
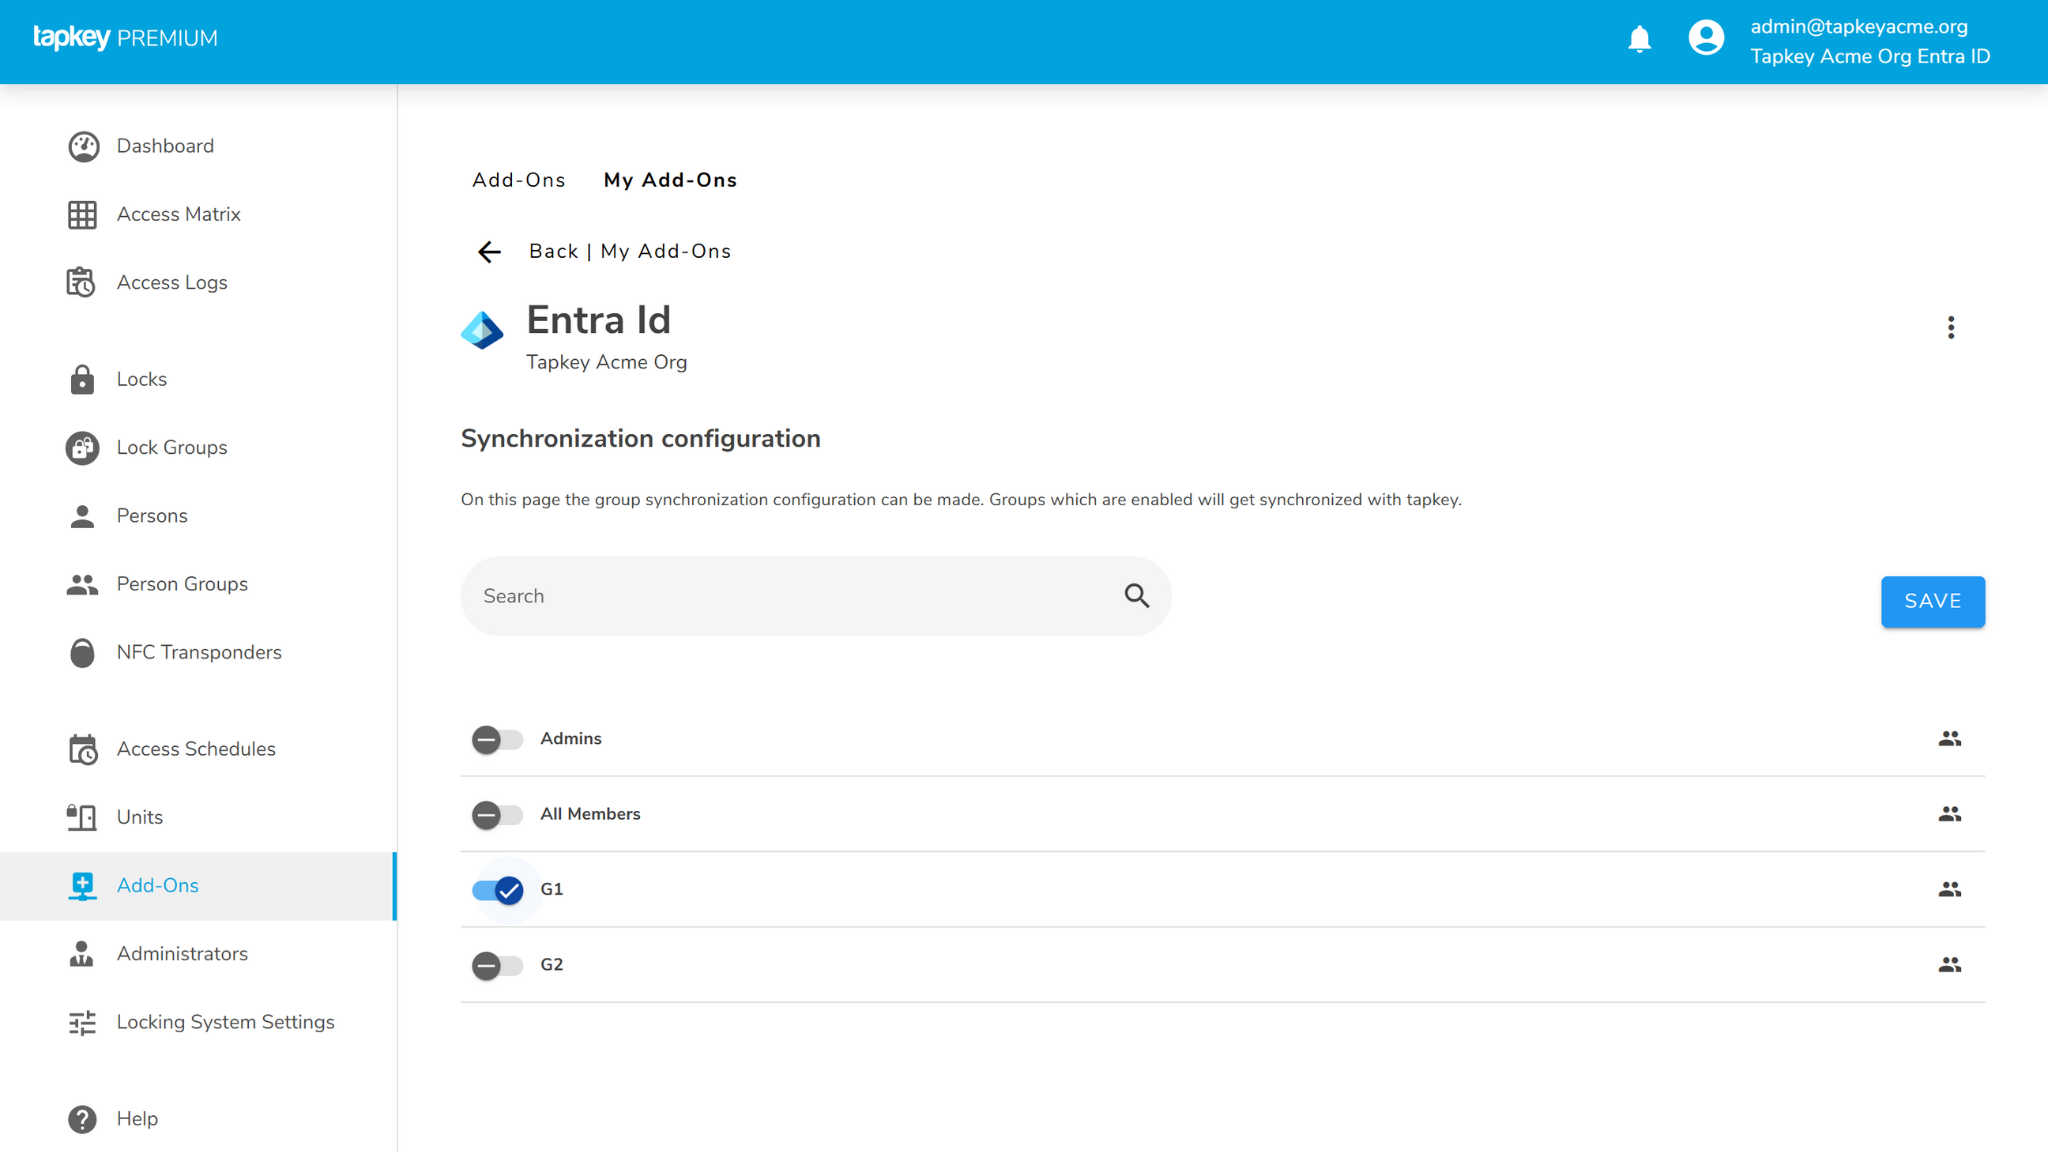
You will see the list of all groups available in your Entra ID tenant. Select the group(s) you want to synchronise—e.g. G1—and then click Save.
After saving, you can navigate to Person Groups in Tapkey and see the corresponding automatically created group. At this point, you can already start assigning access rights using your synchronised group. More information.
G1 has some data pre-created in the Tapkey Acme Org’s Entra ID, as soon as you click save you can navigate to the “Person Groups” and see the details of the group created.
Note: At this point the Tapkey person group can be used to create grants for any user assigned directly or transitively to this group, more information.
5. Optional: Real-Time Changes

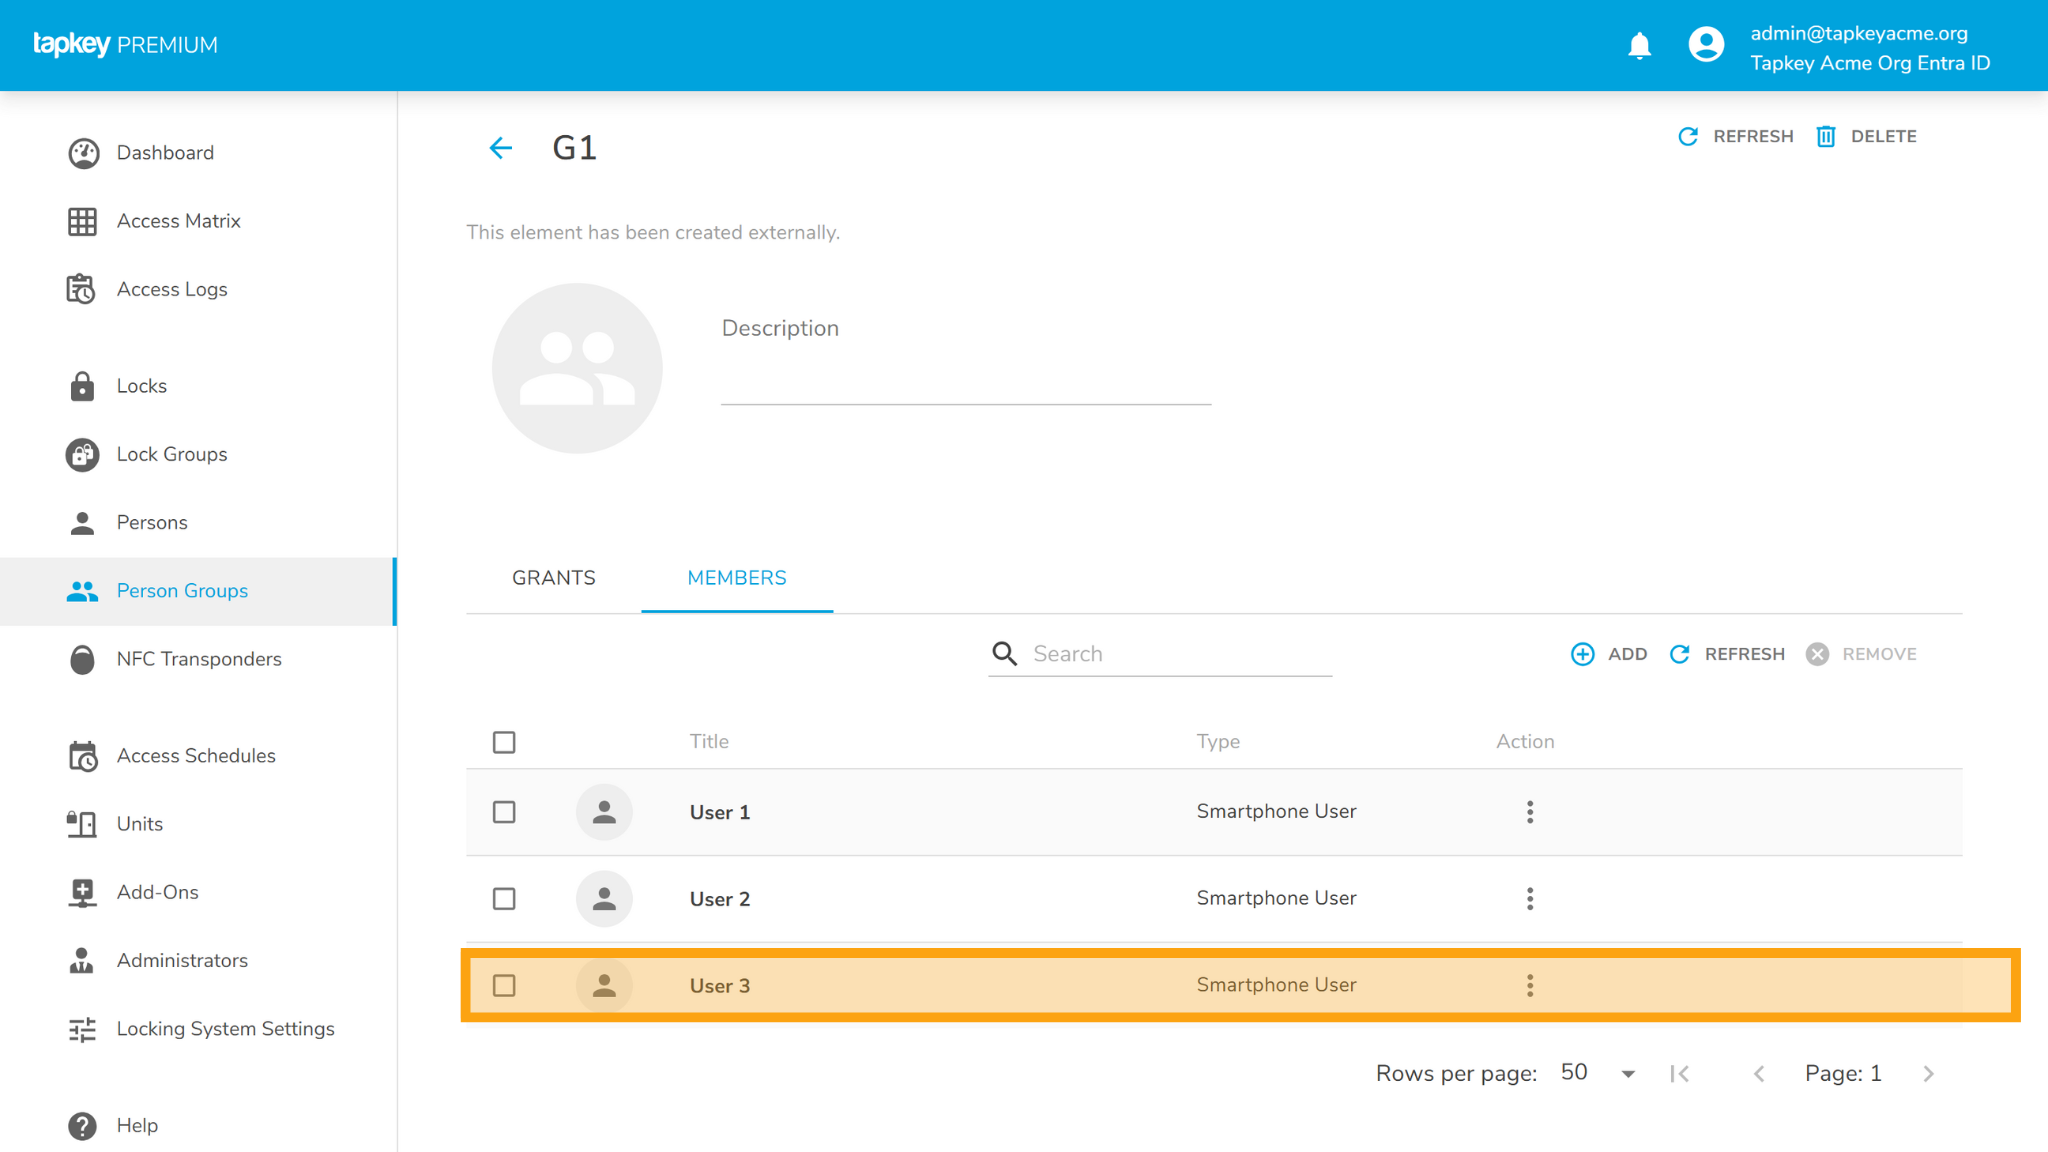
To elaborate more about how the Add-On behaves in different scenarios, examples are going to assume G2 and G1 have synchronisation enabled.
Add user to G1
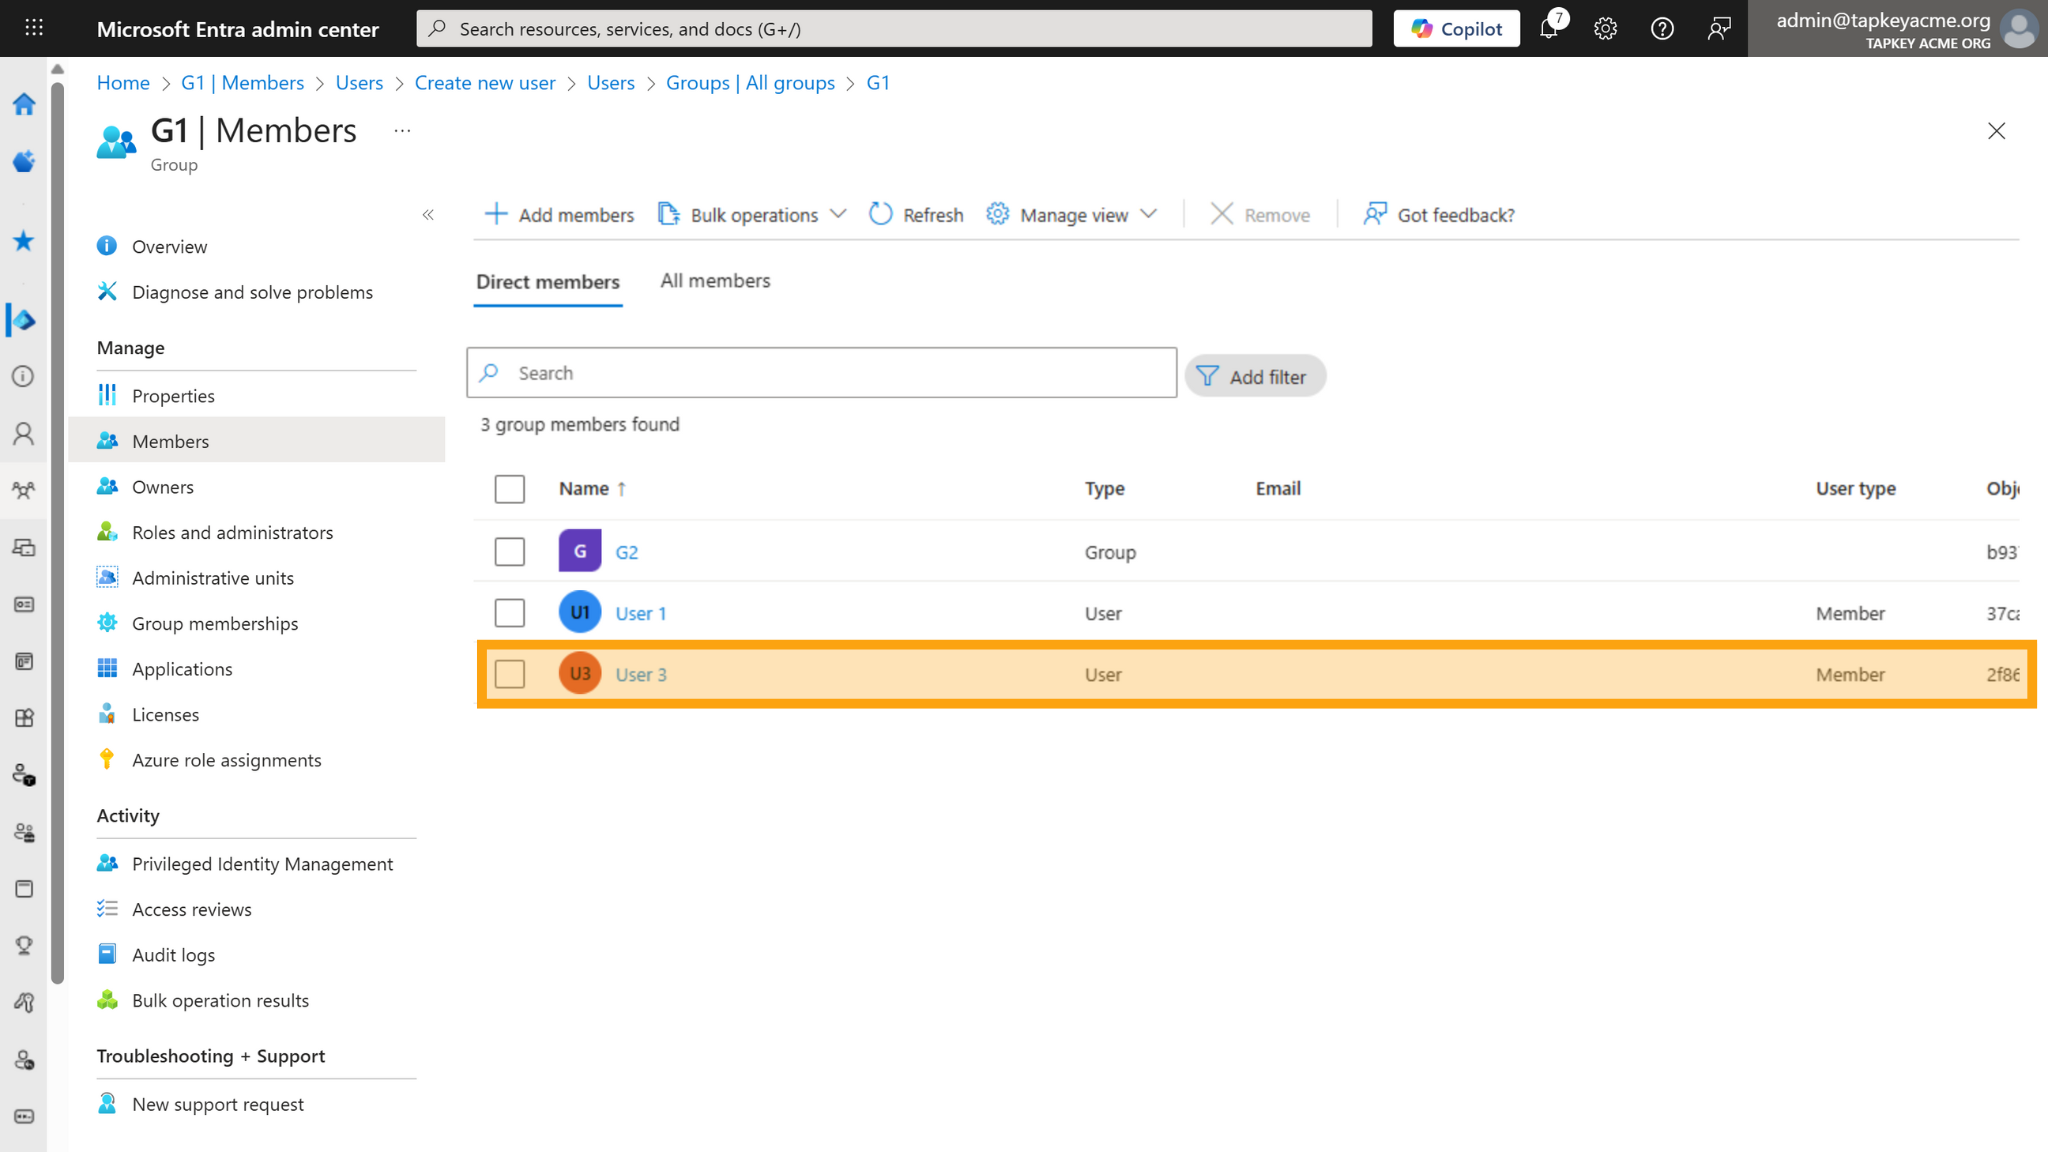
Adding User 3 into G1 will create the same user in G1 automatically:
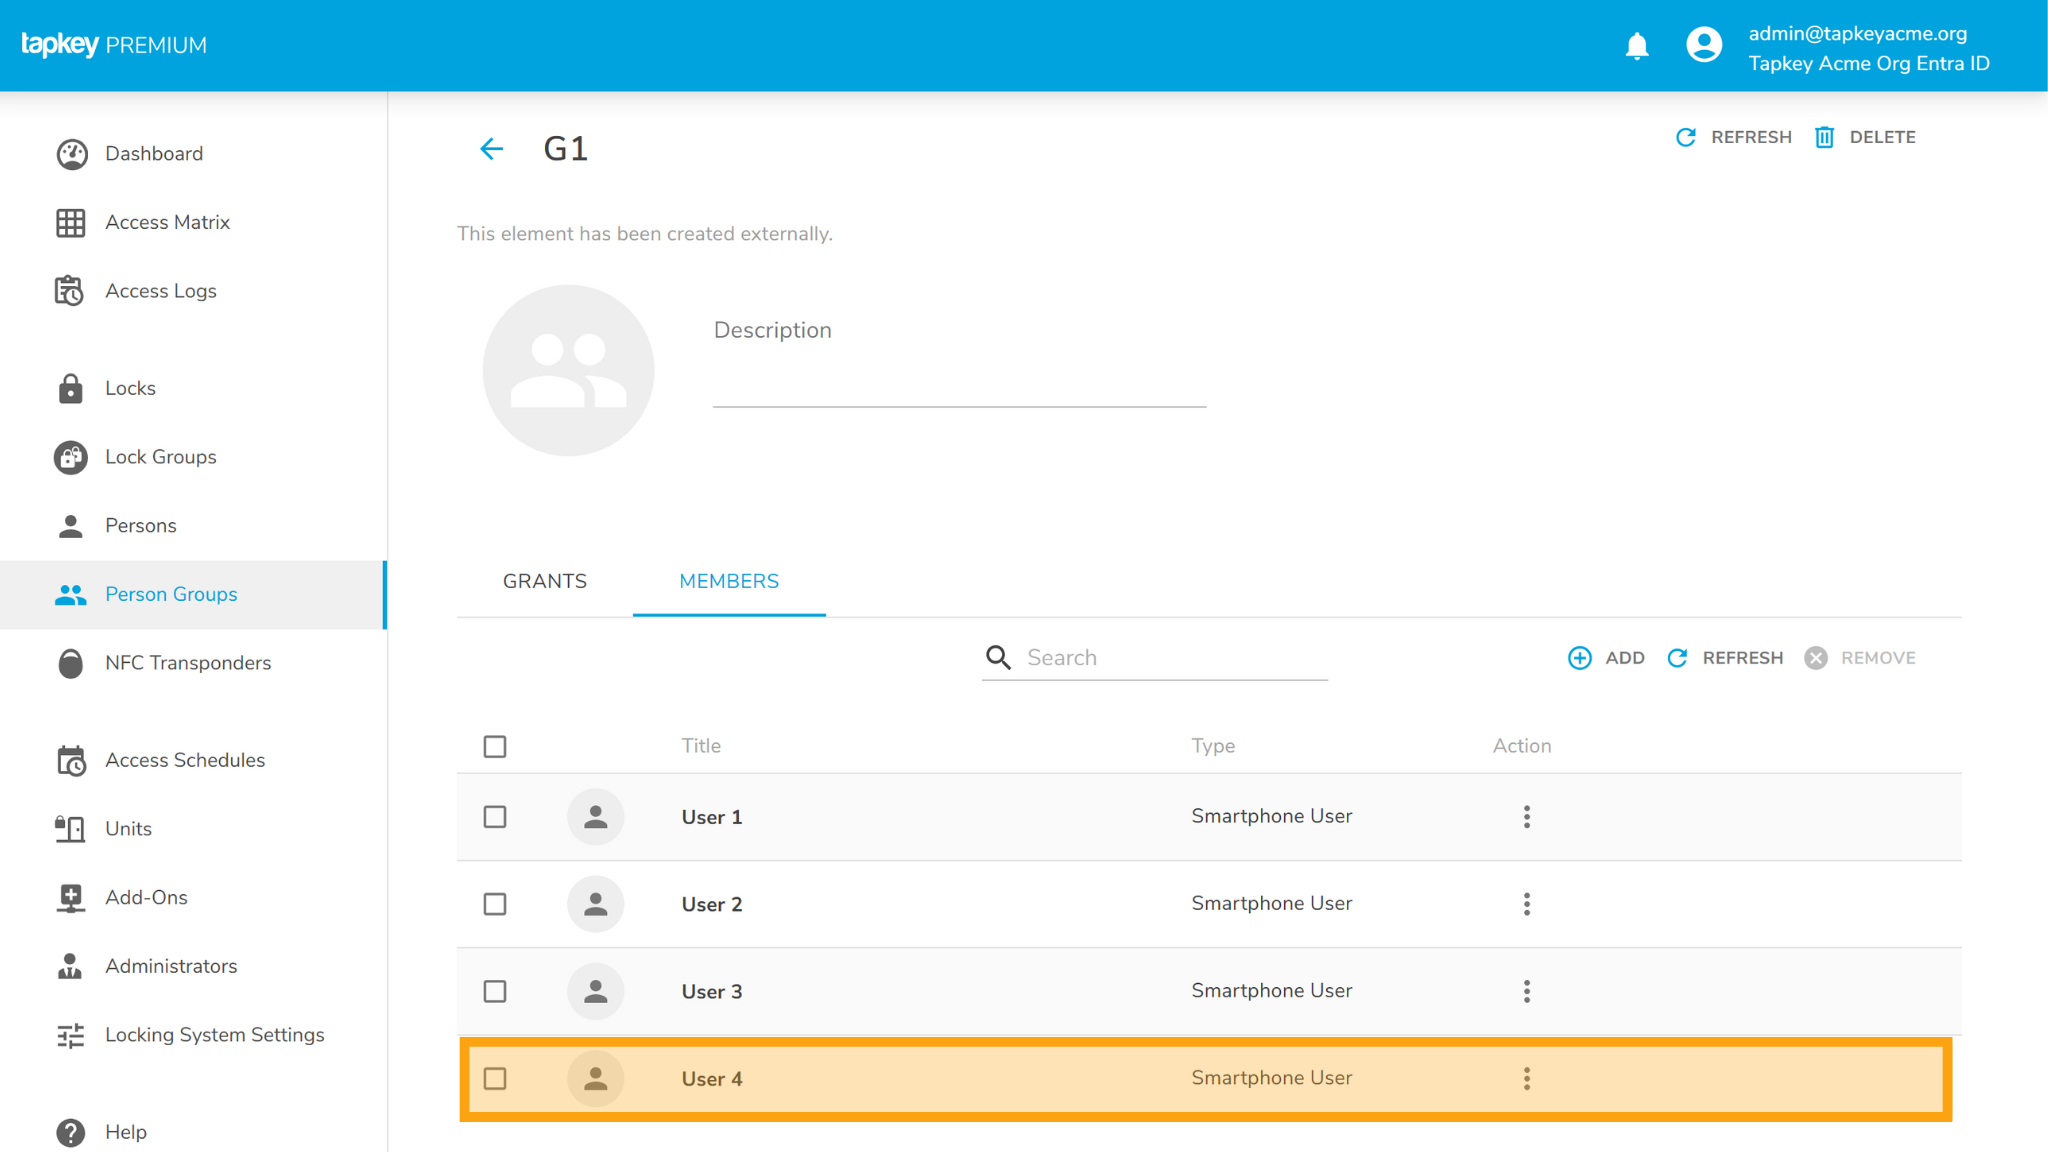
In the following example, we are going to add User 4 into G2, in this case the user is going to be created in the Tapkey Person Group G2 and in addition, the user will be created as member of G1 given that G2 group is member of G1 in Entra ID.
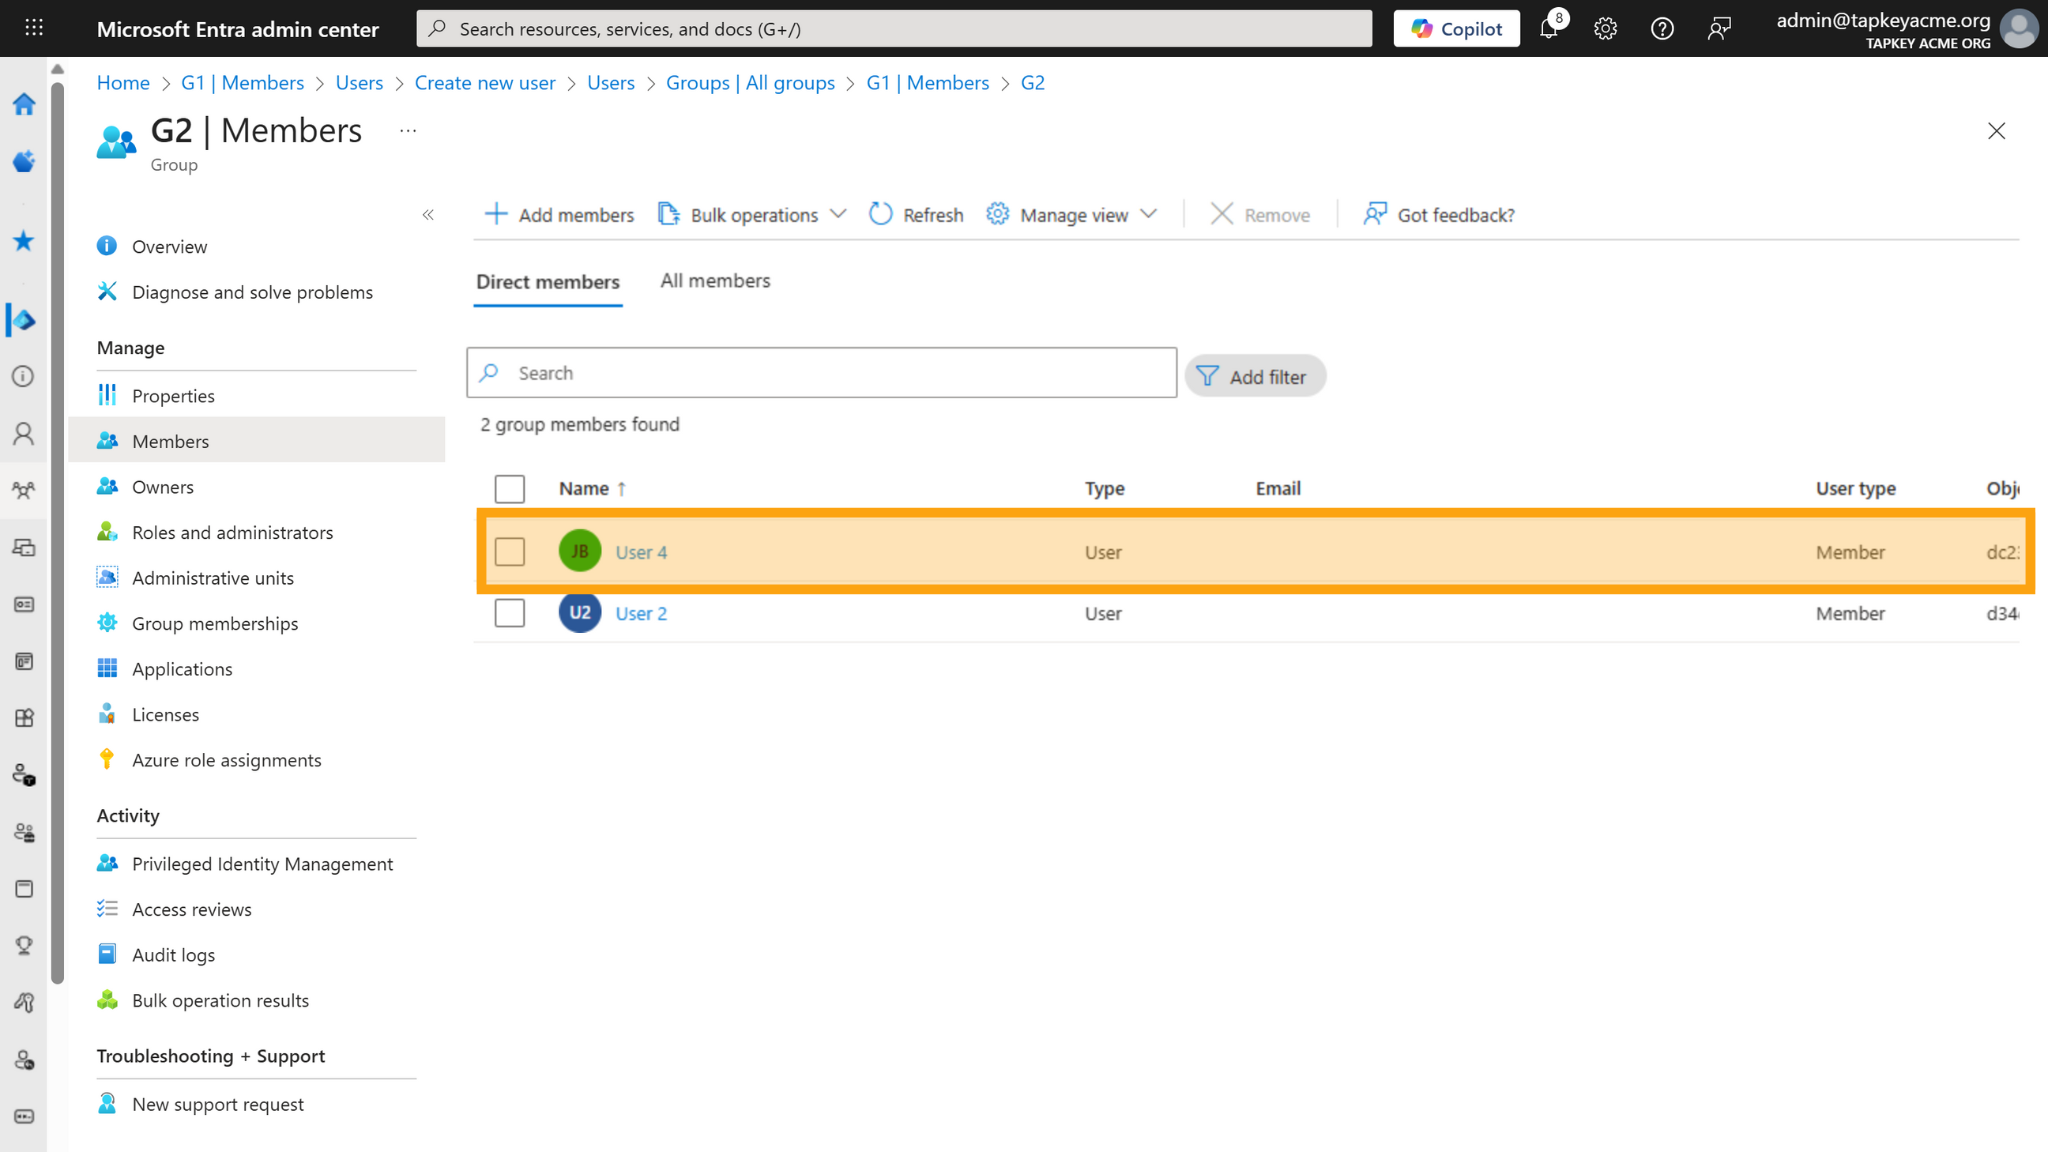
Changes in G2 Person Group in Tapkey
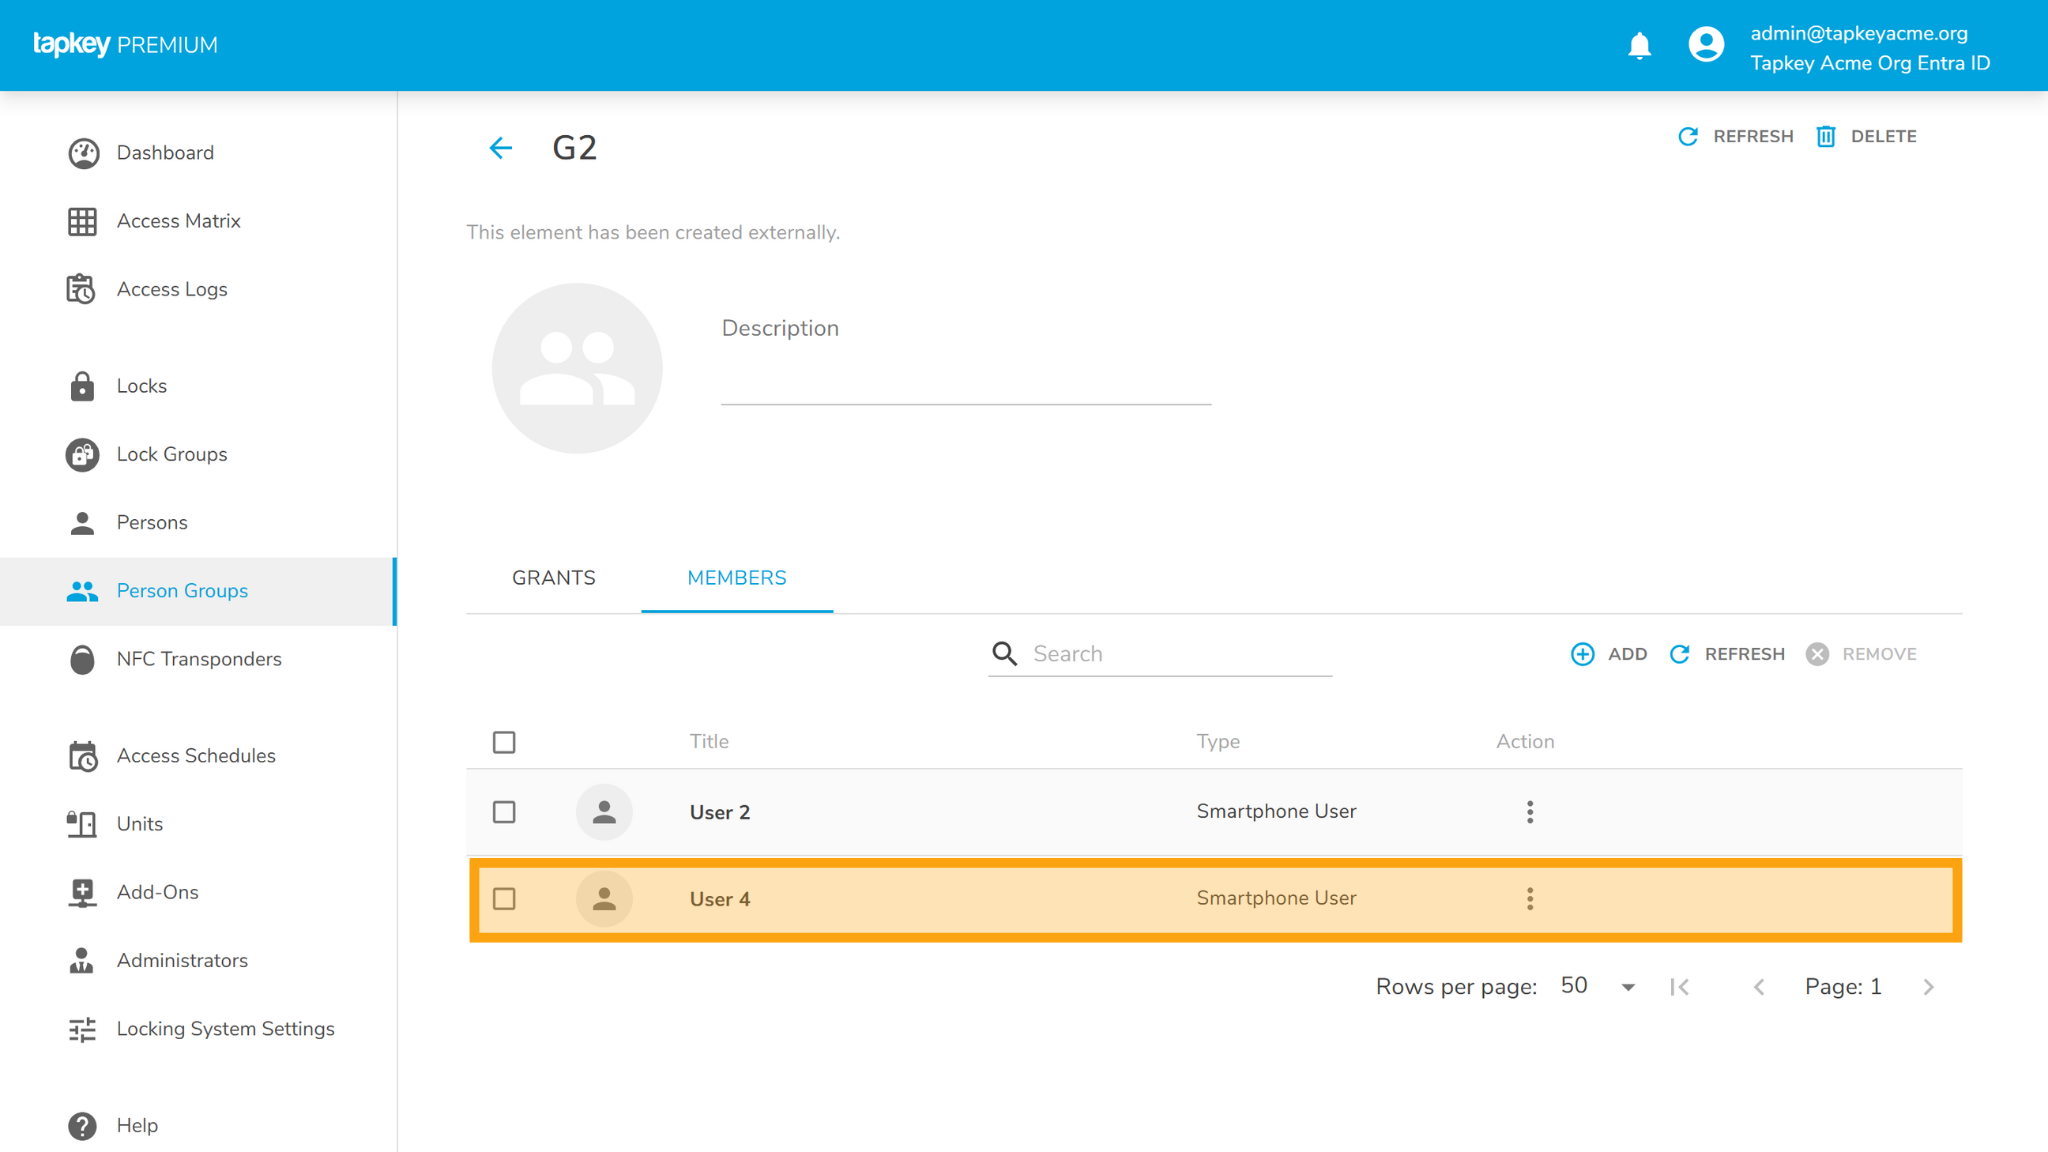
Changes in G1 Person Group in Tapkey:
6. Logging In
6.a. As Entra ID User:
To log in using a work or school Microsoft account, all user access must be created through the Entra ID Add-On.
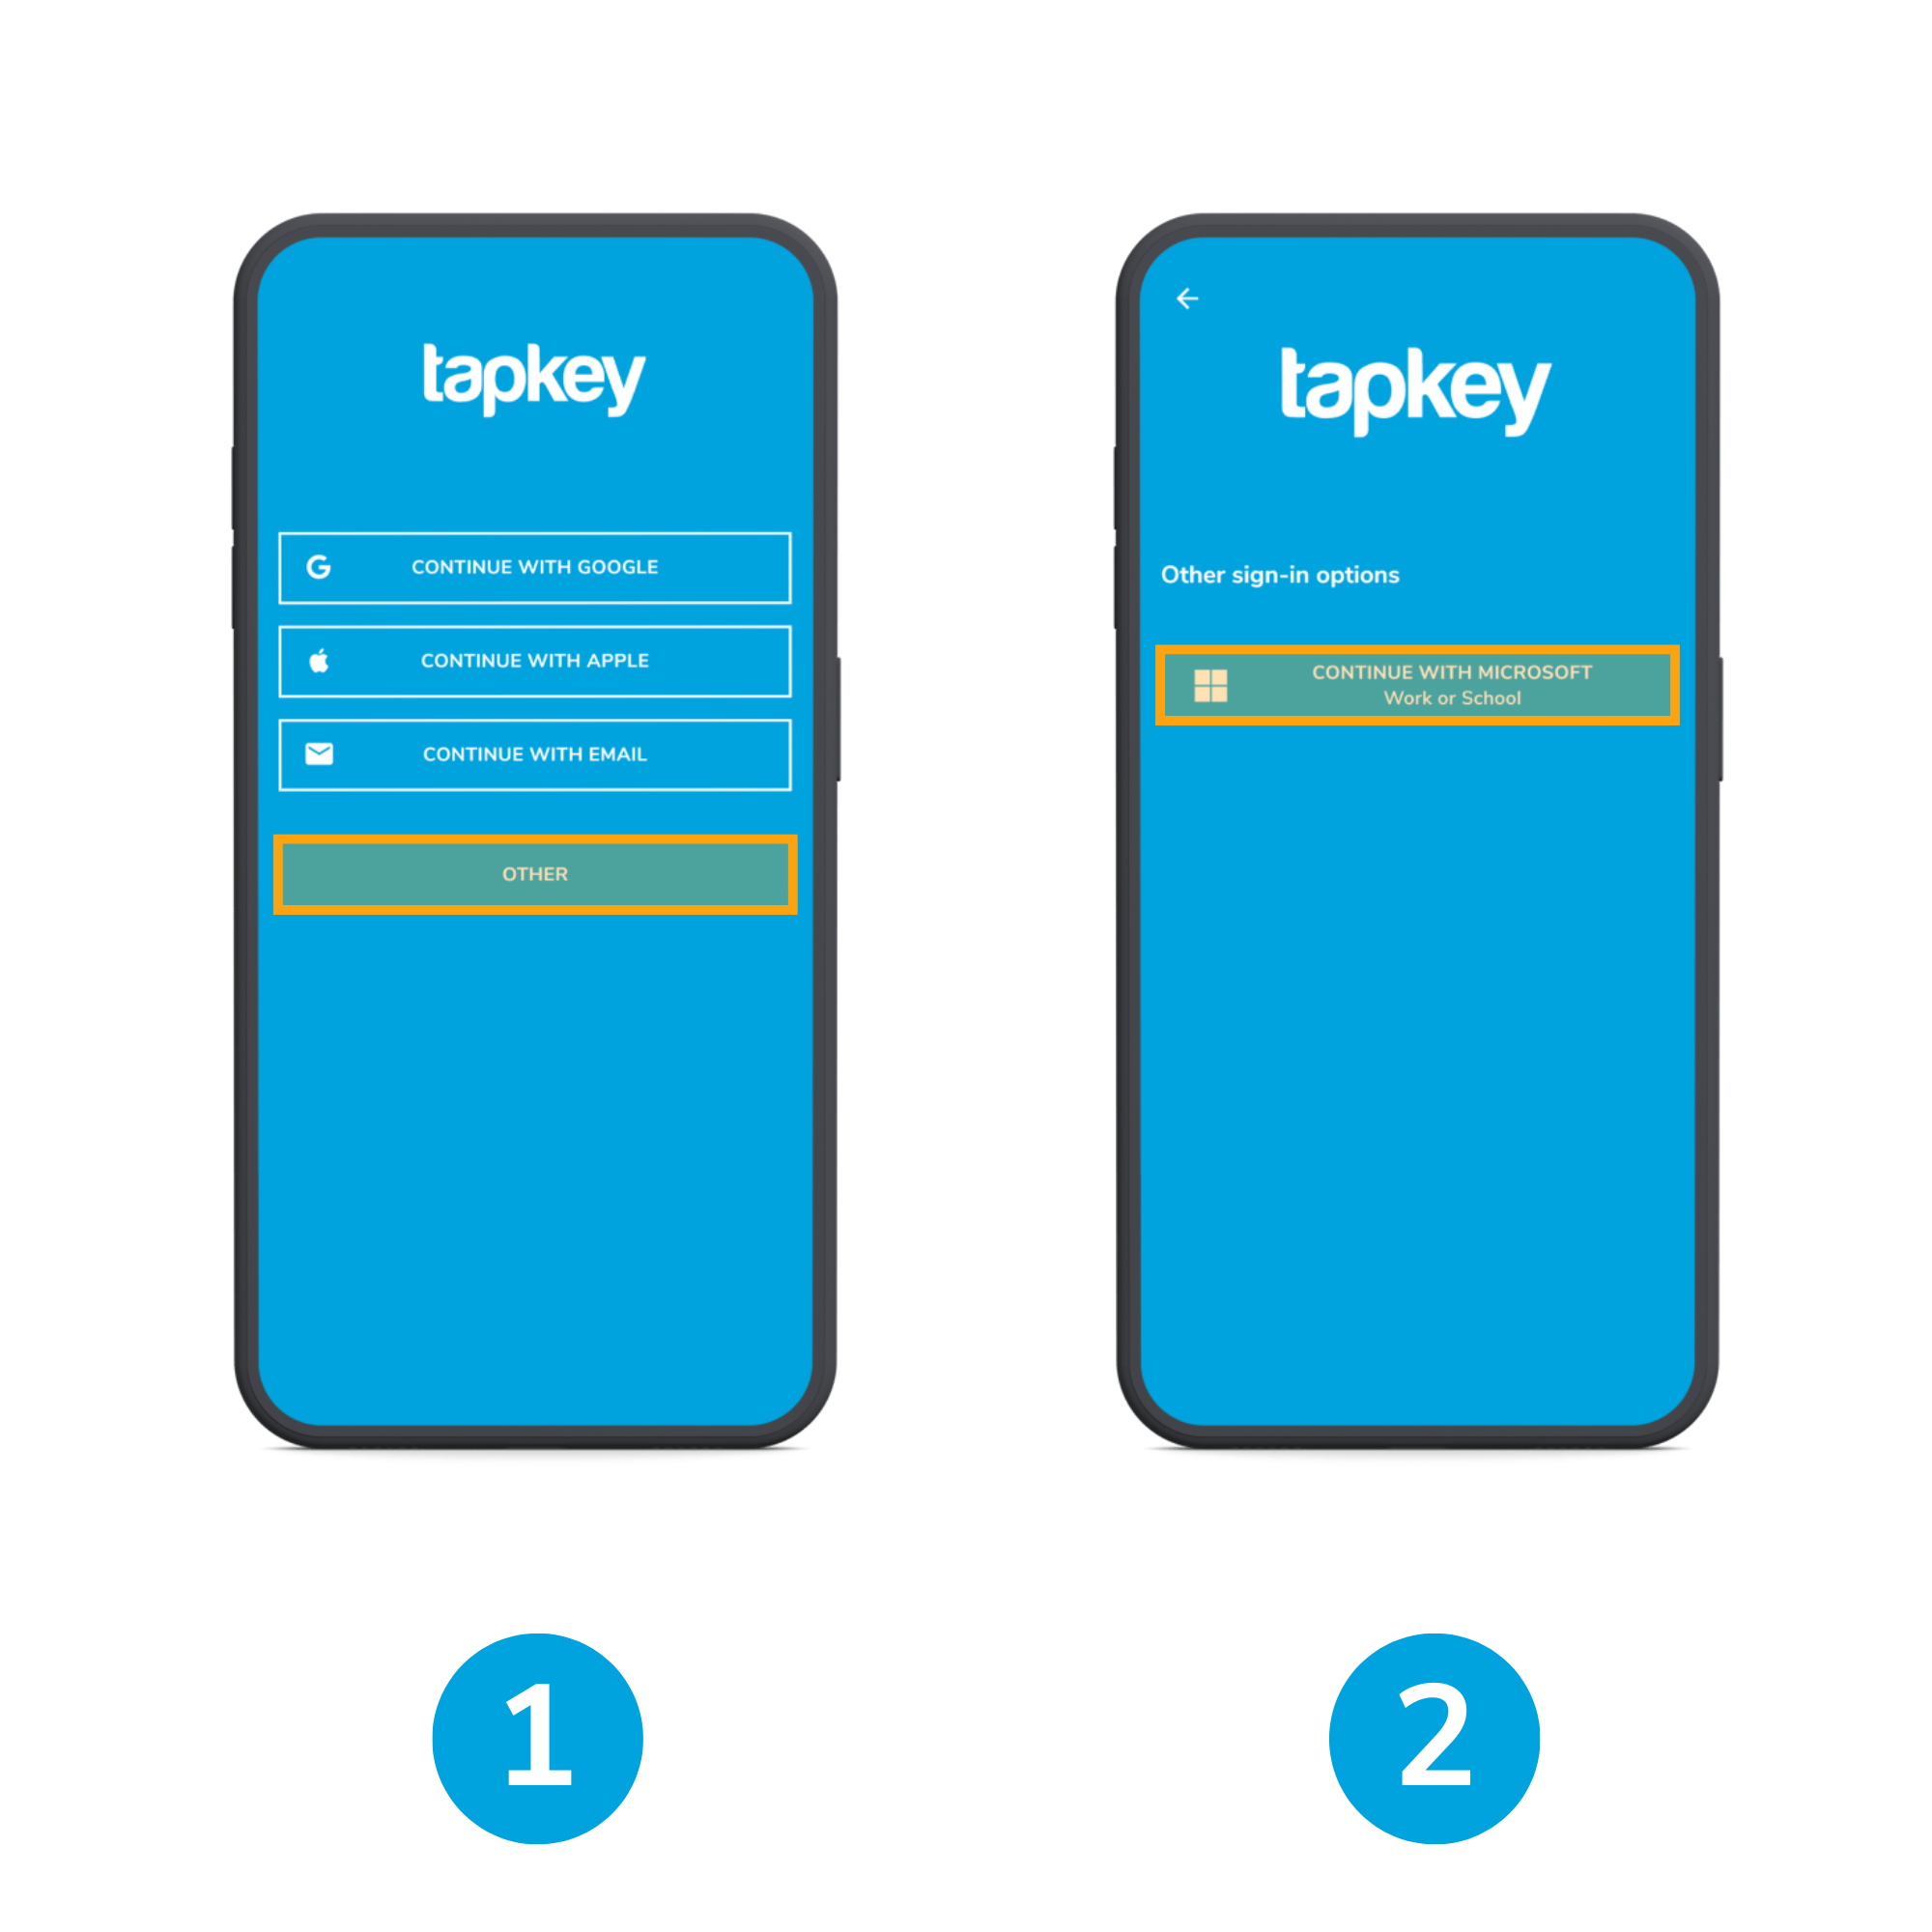
1) To login, open the Tapkey App and tap “Other”.
2) Tap on “Continue with Microsoft”, after this you will continue with the usual Microsoft account login.
From this point on, you, as a user, will be able to use Tapkey just like any other user.
6.b. As a Guest:
Entra ID offers B2B collaboration, allowing to integrate users that originally belong to a different domain inside of your Entra ID. More information. In this case, as user you need to login specifically to the target Entra ID organisation domain to use the keys created in your locking system.
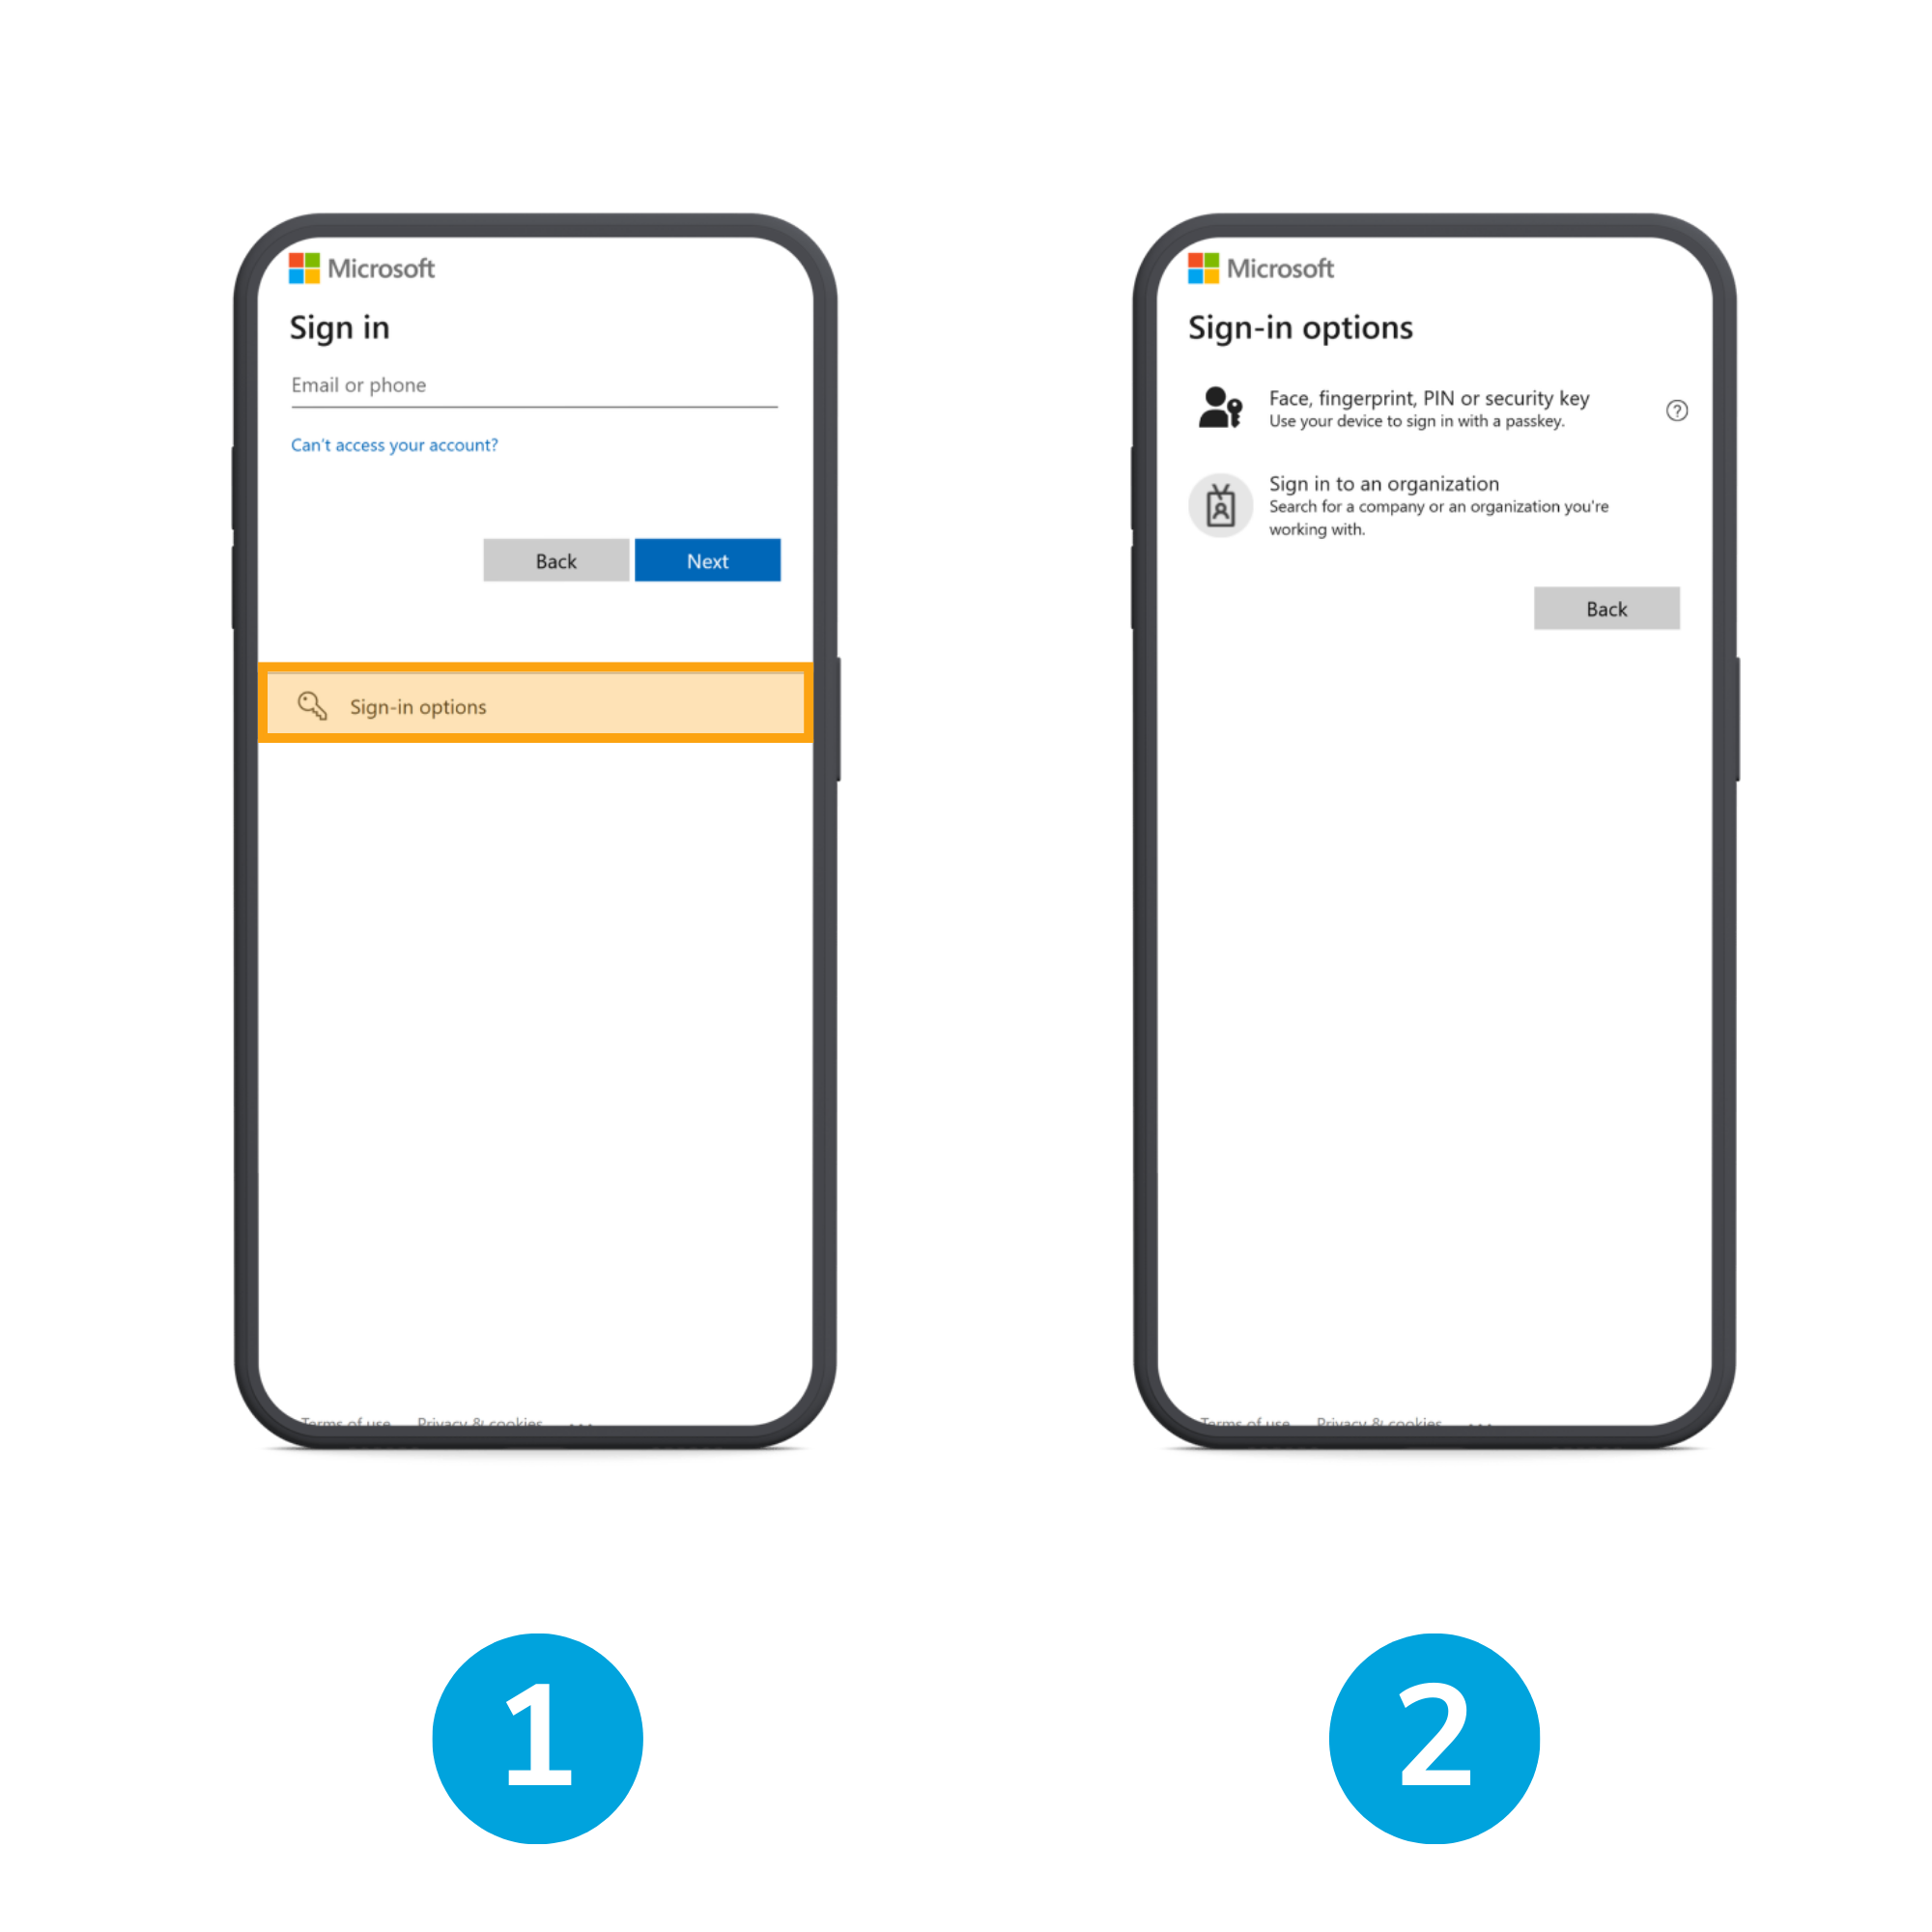
In the login screen tap on Sign-in options
Tap on Sign in to an organization
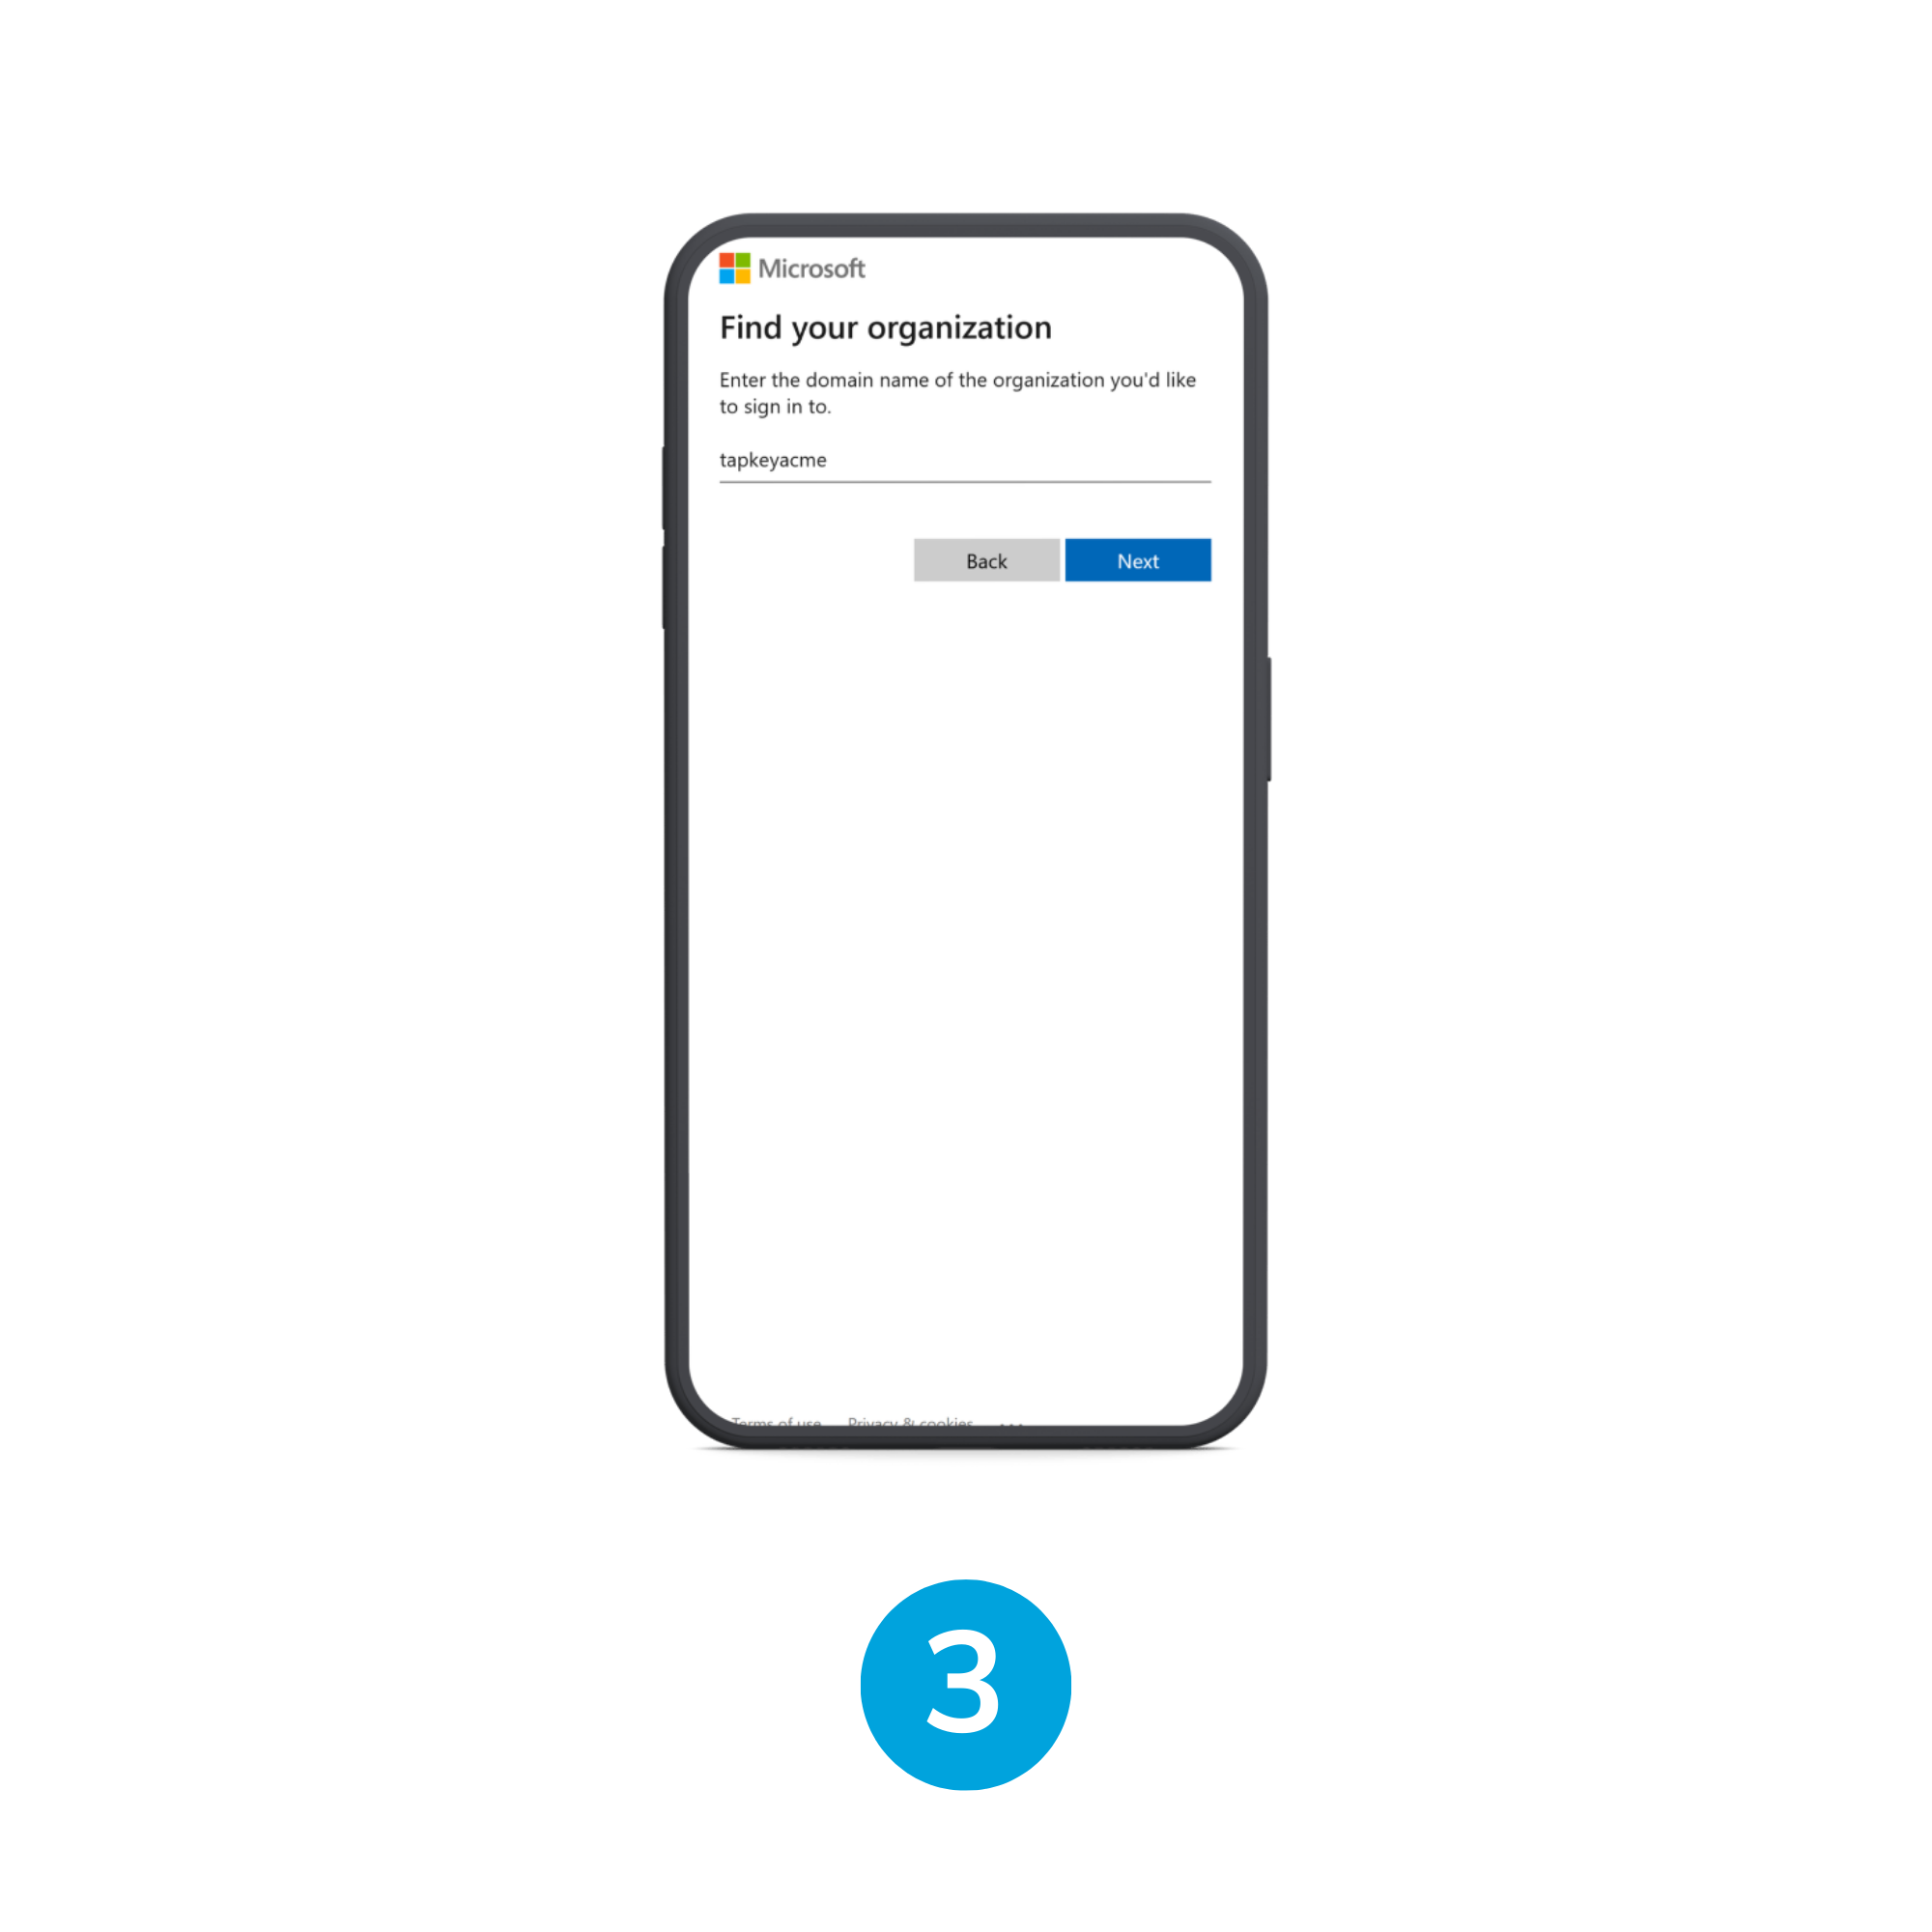
In the Find your organization type the target organization domain and tap “Next”
Continue with the standard Microsoft login steps.
7. Additional actions
The Entra ID Add-On continually keeps your Tapkey setup aligned with your directory. When users or groups change, Tapkey updates Person groups and members automatically. This section explains how the system behaves in typical scenarios:
Remove user from group: In this case the Entra ID Add-On will automatically remove the Smartphone user created from the Target group and any transitive parent group.
Delete user: In this case, the user will be removed from all the Groups.
Disable group sync in Tapkey or by deleting the group in Entra ID: All the grants, person group members created in Tapkey will be removed automatically, no Smartphone Users are deleted, only their membership to the person groups created by the Entra ID Add-On.
8. Best Practice
Avoid creating access directly to the Smartphone Users, your system will be more secure if accesses are created directly from the Person Groups created given that synchronisation will keep the access linked to organisational structures and automatically synced up based on centralised actions.
Was this article helpful?
That’s Great!
Thank you for your feedback
Sorry! We couldn't be helpful
Thank you for your feedback
Feedback sent
We appreciate your effort and will try to fix the article