Google Calendar: How to set up Shared Calendar Resources and connect them with Tapkey
In this help center article, we are going to showcase the use of a Google Calendar Add-On based on Shared Calendars, this is applicable in cases where trust in a certain community and ownership is first priority. The example we are going to follow is based on the usage of a fitness room within a residential building, which can be reserved by anyone living within the complex.
Before starting with this tutorial, it is required:
- Google account already created for administrators and tenants.
- Tapkey smart locks are already installed in the facilities. This article shows you how to register a lock.
- If you want to edit the margin time, find a detailed description here.
The scenario
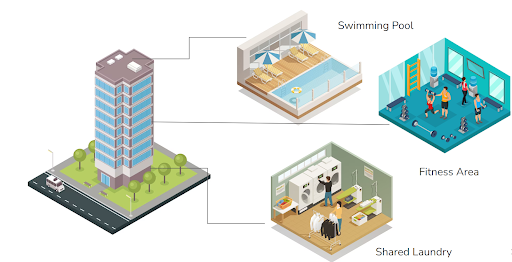
For this scenario, we will use a residential building with multiple resources that can be used by members of the building, such as a swimming pool, fitness area, and shared laundry.
By assumption, we are going to consider that every tenant already has access to the entrance door and the only resource required to be secured by booking is the “Fitness Area” which is going to be the area where the example is going to be focused on:
As a result of the guide, every tenant of the residential building can reserve the Fitness Area using a Shared Google Calendar, when reserving, Tapkey access for the Fitness Area smart lock will be created automatically.
Video guide
Step-by-step guide
Step 1: Create shared calendar resource
In this section, we are going to cover the creation of a calendar and sharing the given calendar with tenants of the building's Google help center article.
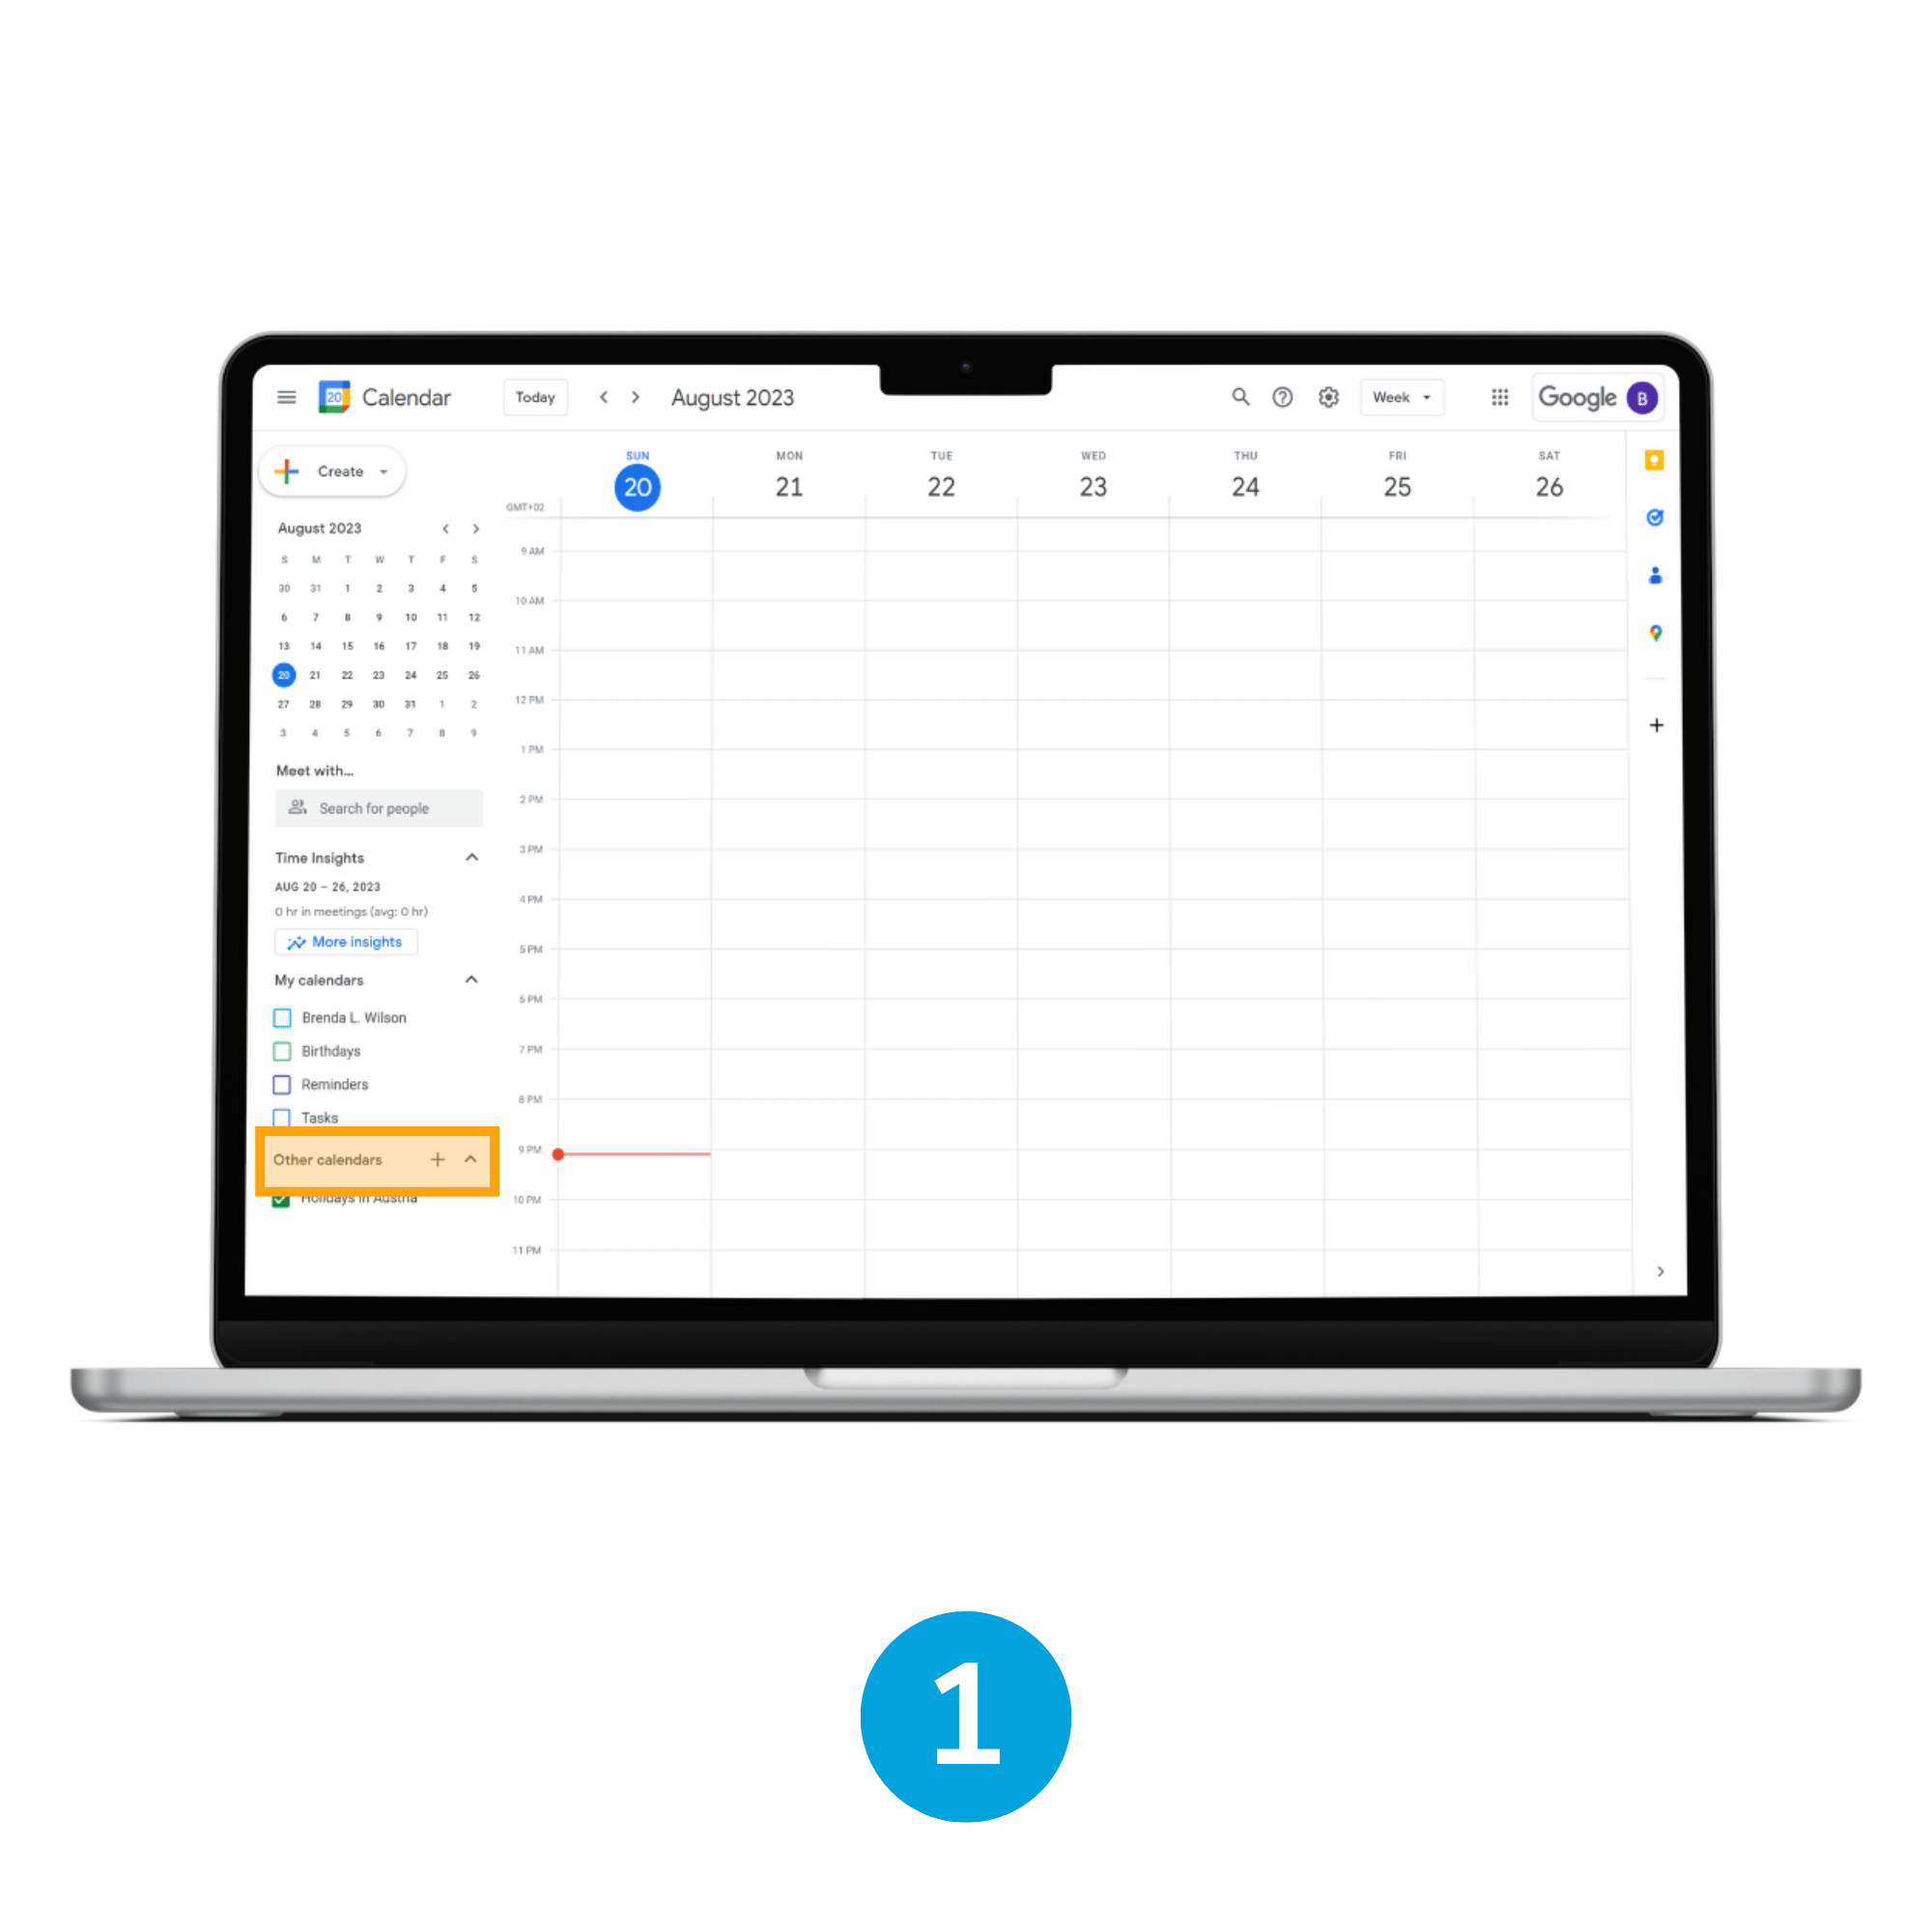
1. Open menu Other calendars
As administrator of the residential unit, navigate to the Google Calendar application, once there locate the Other Calendars section, and tap on the "+" button.
2. Create new calendar
When the contextual menu is expanded, select the Create Calendar option.
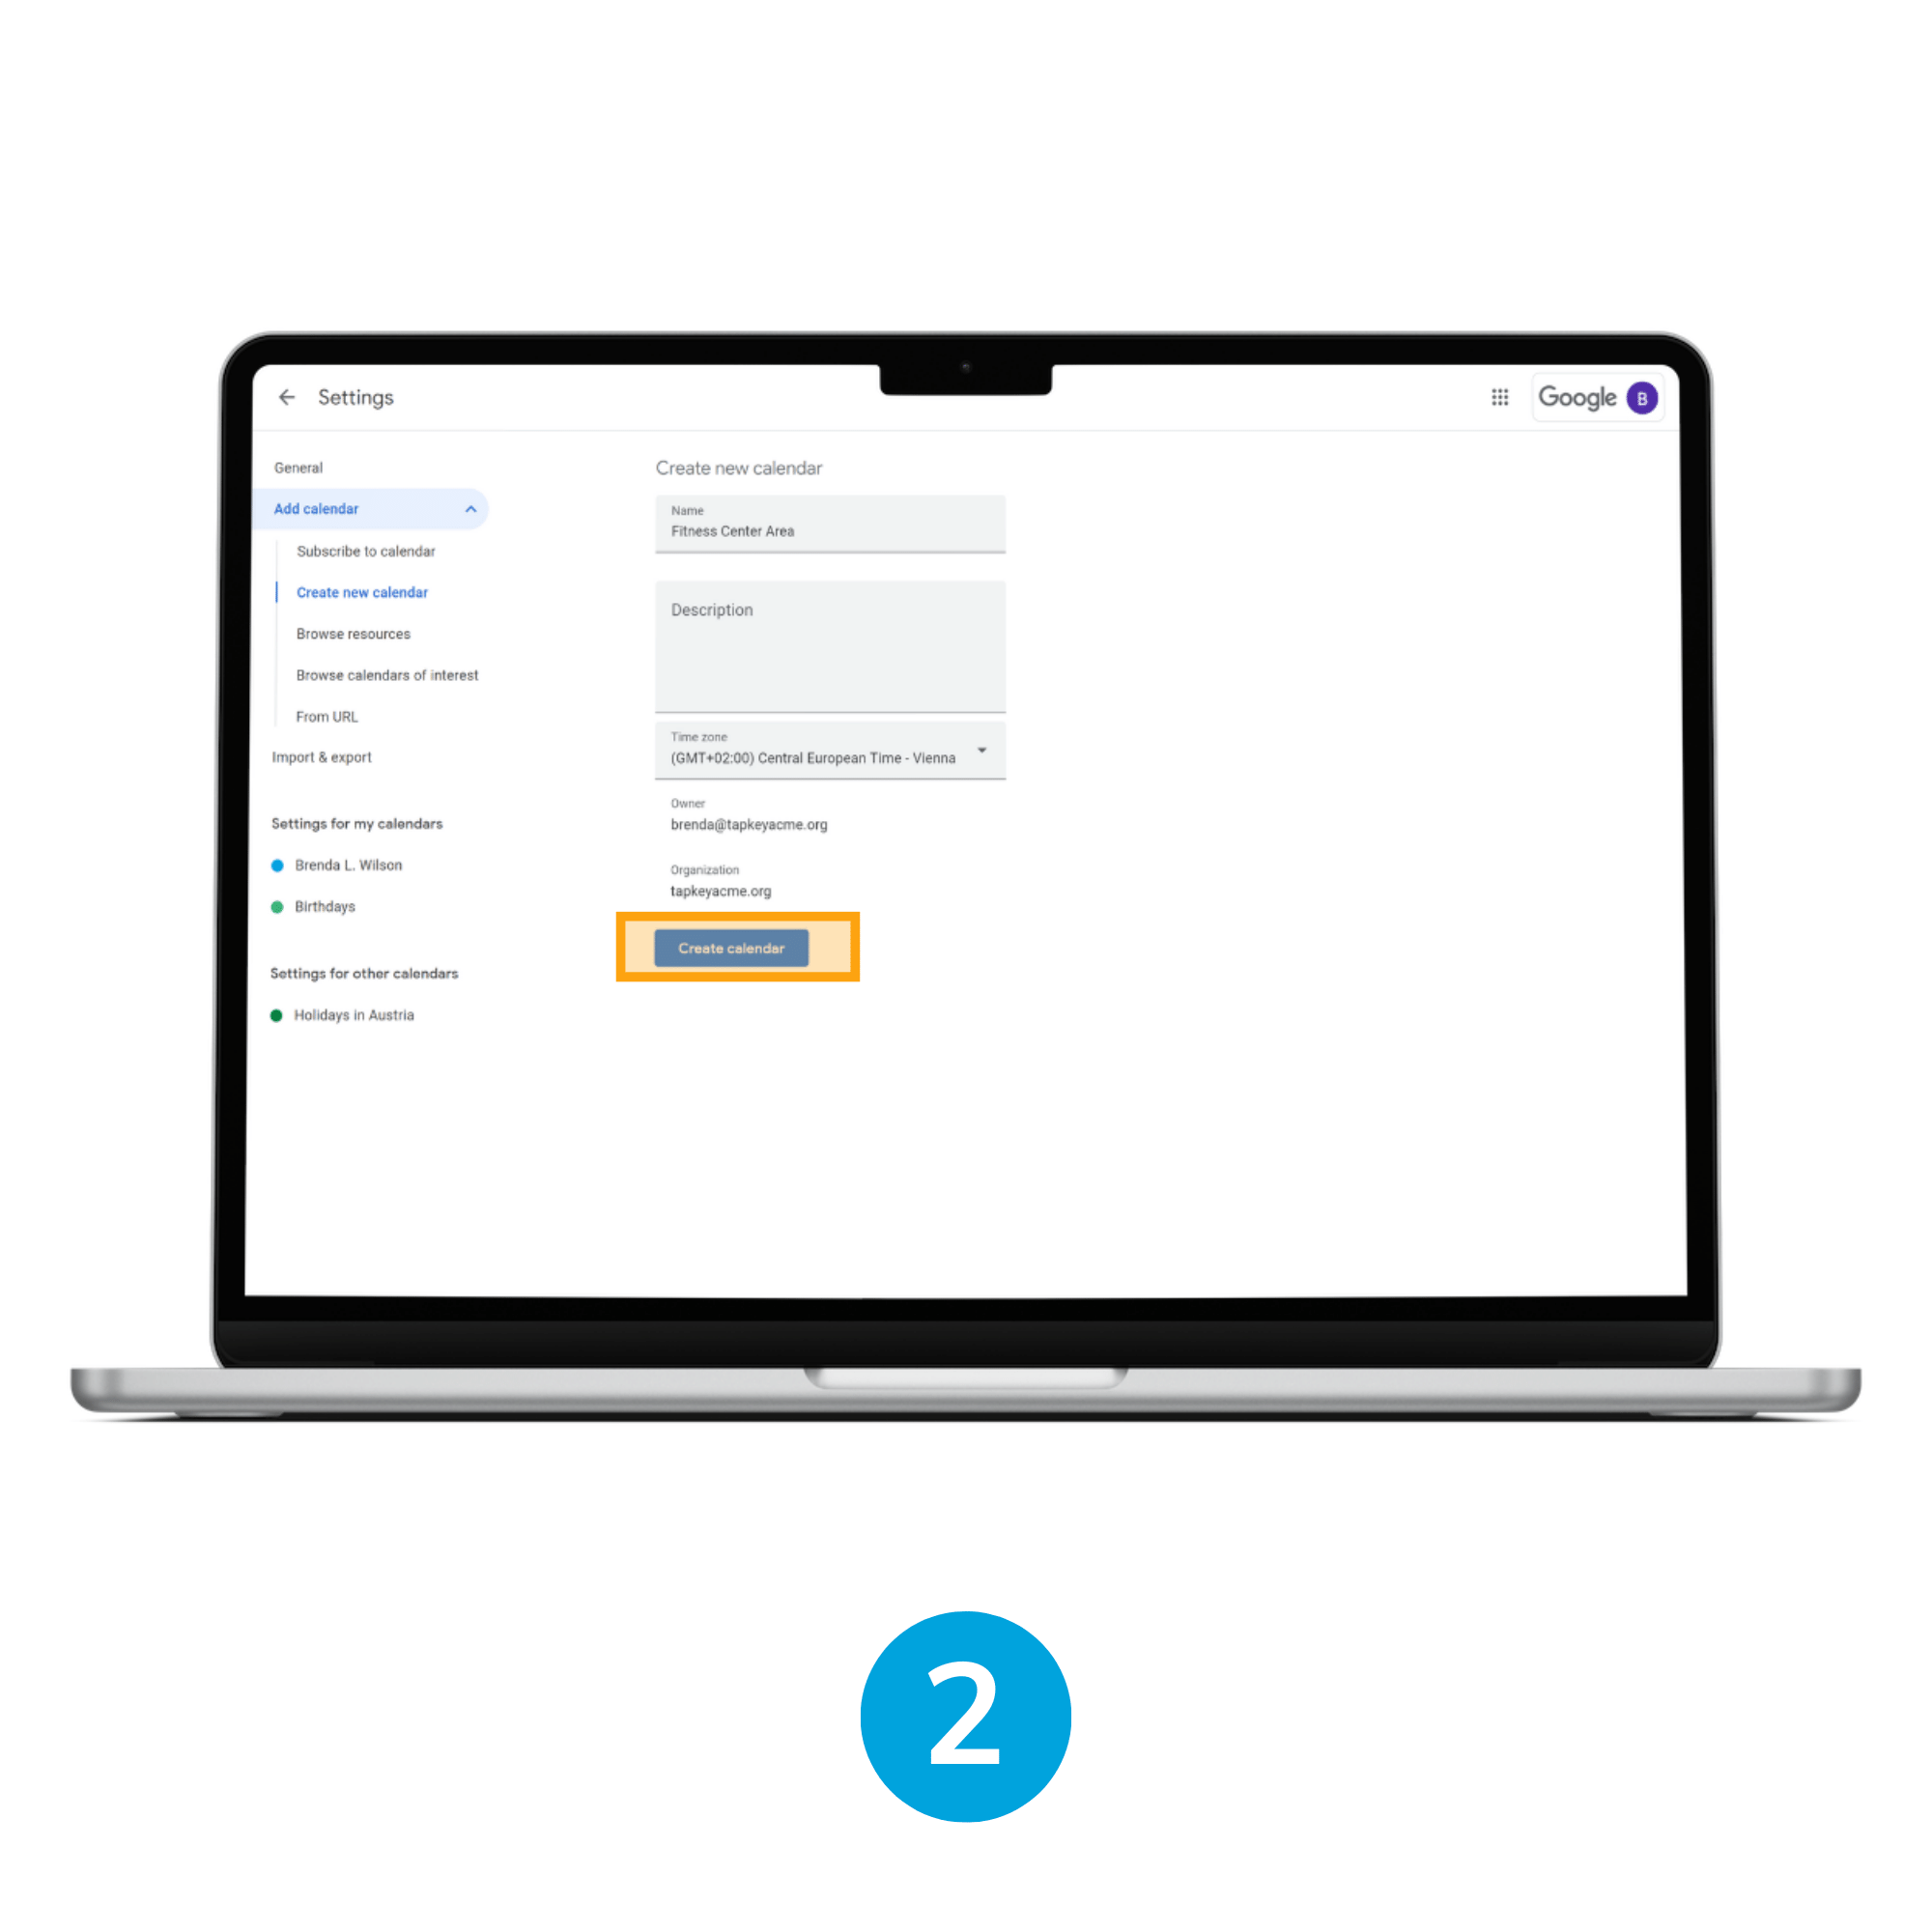
3. Name the calendar
Define the name of the calendar of your choosing, and verify the Time Zone, tap the Create Calendar button. In our scenario, it will be called “Fitness Center Area”.
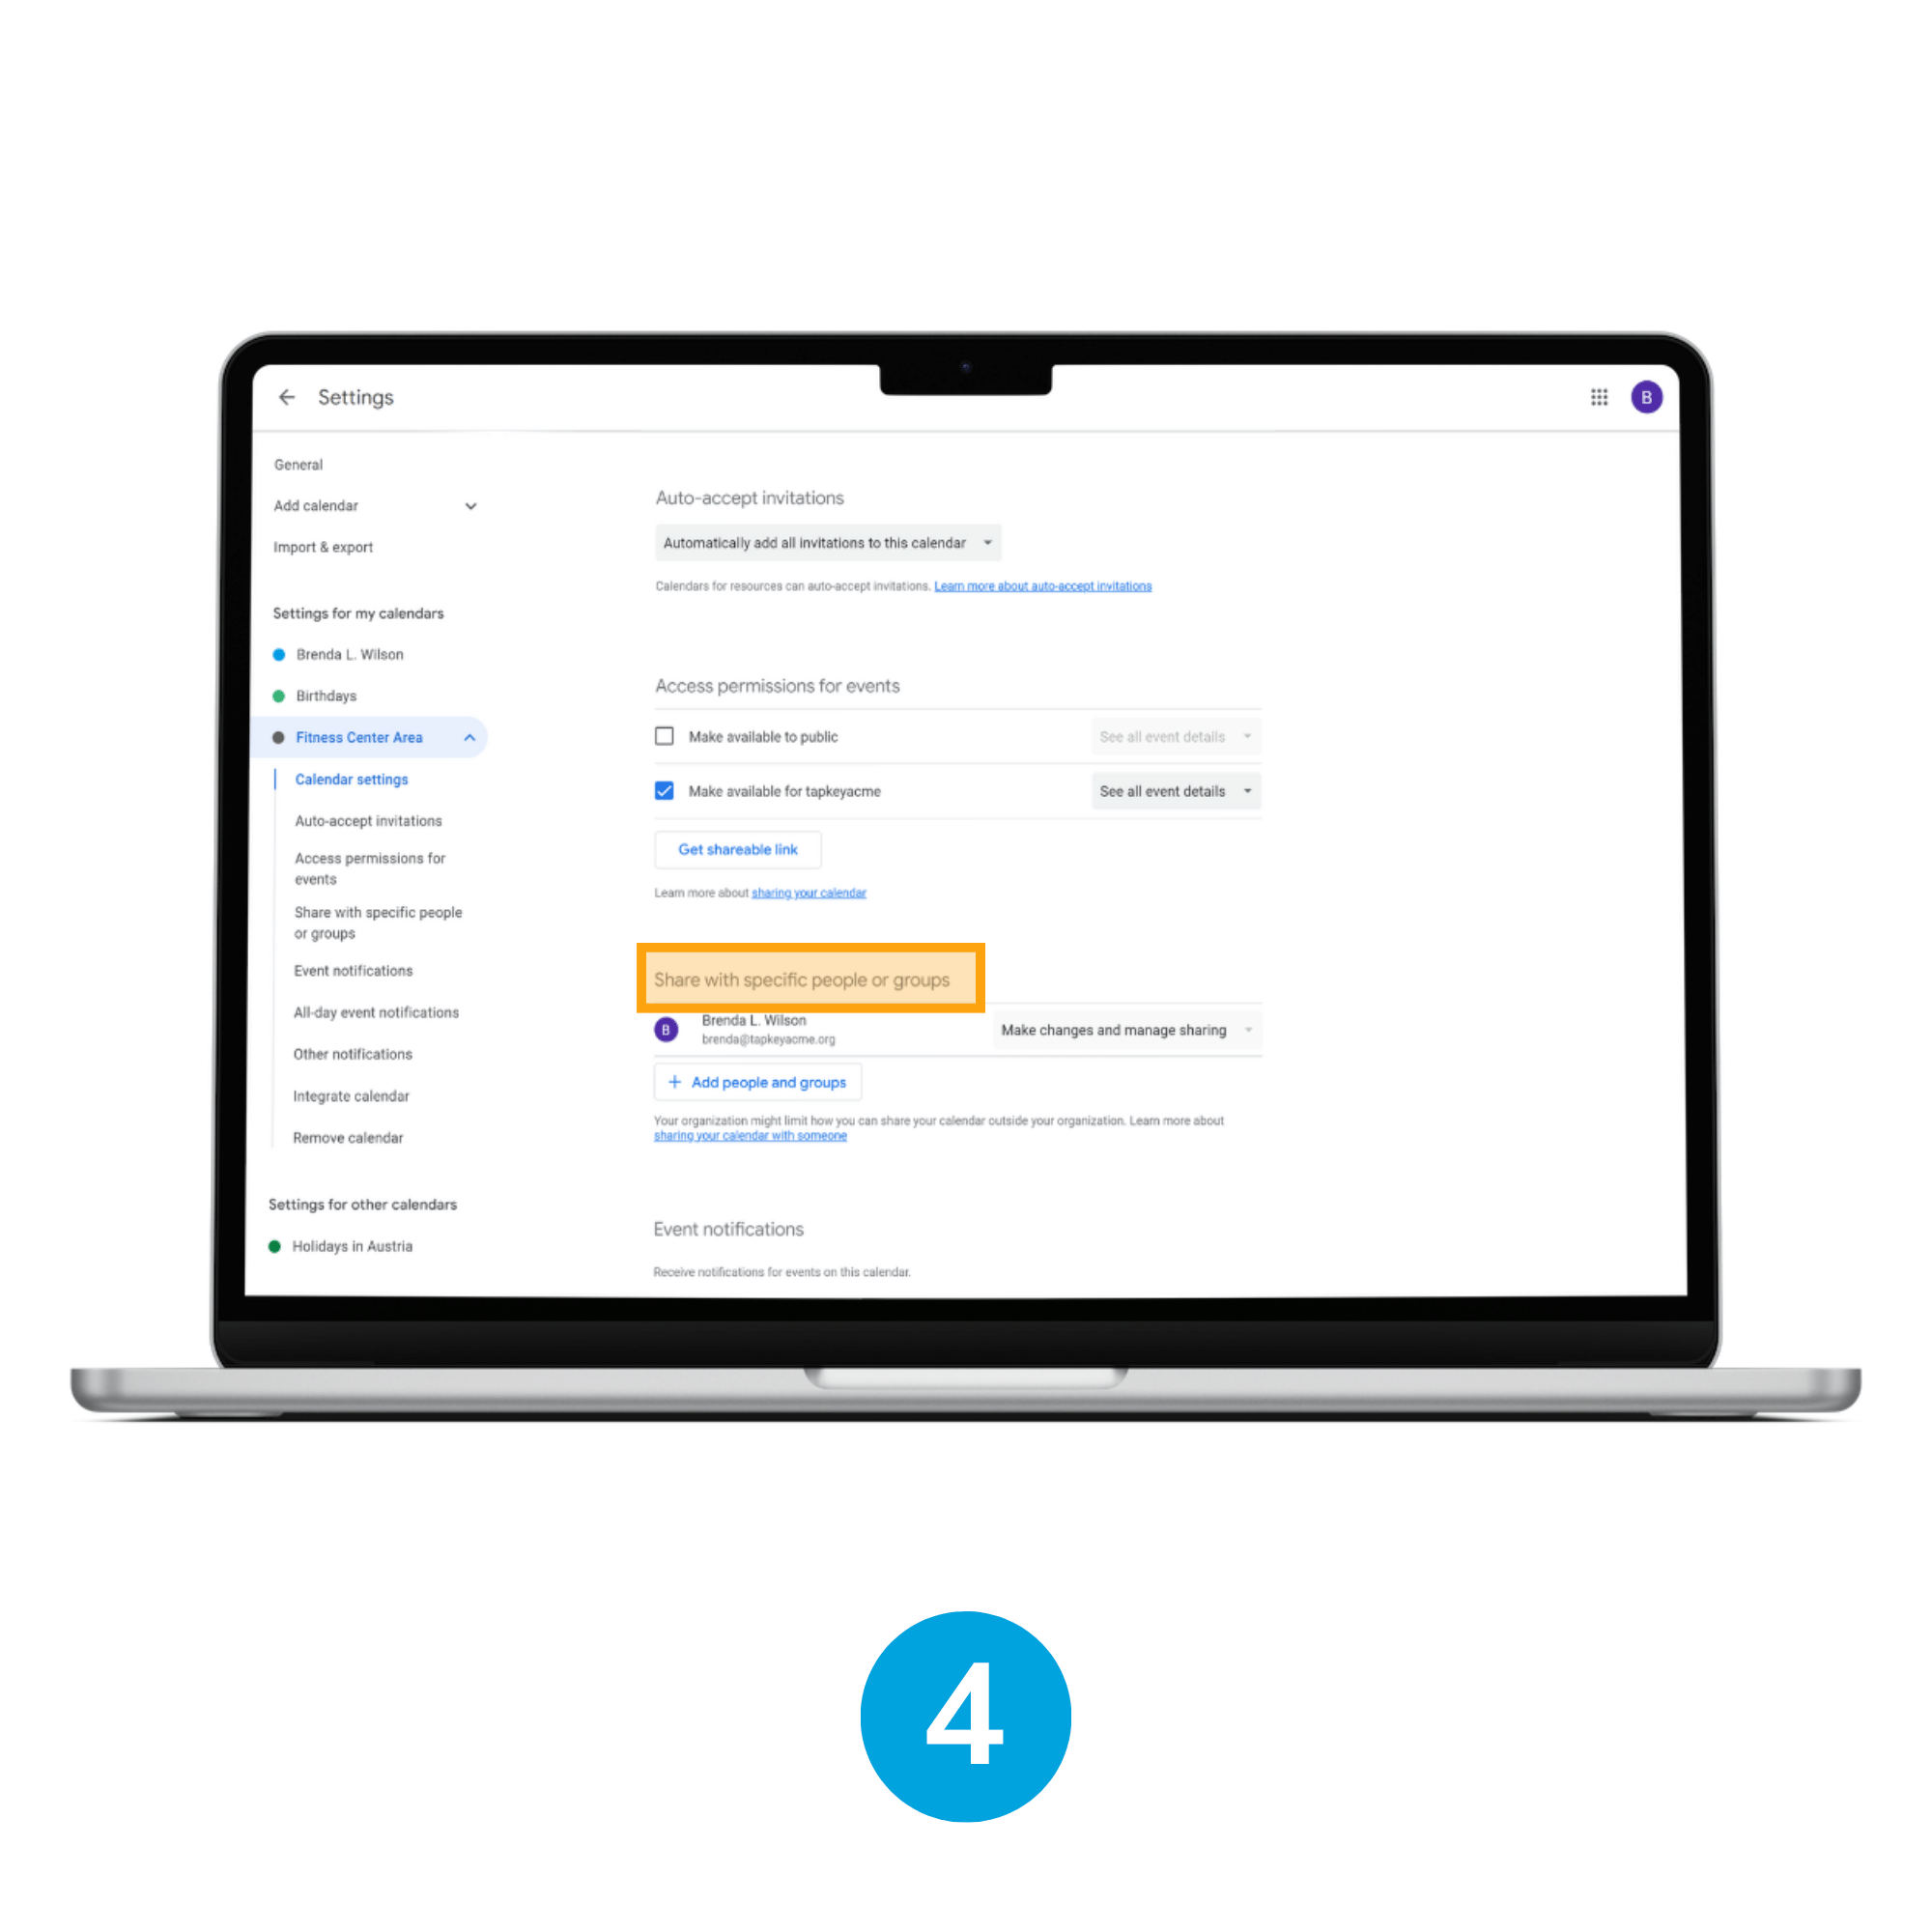
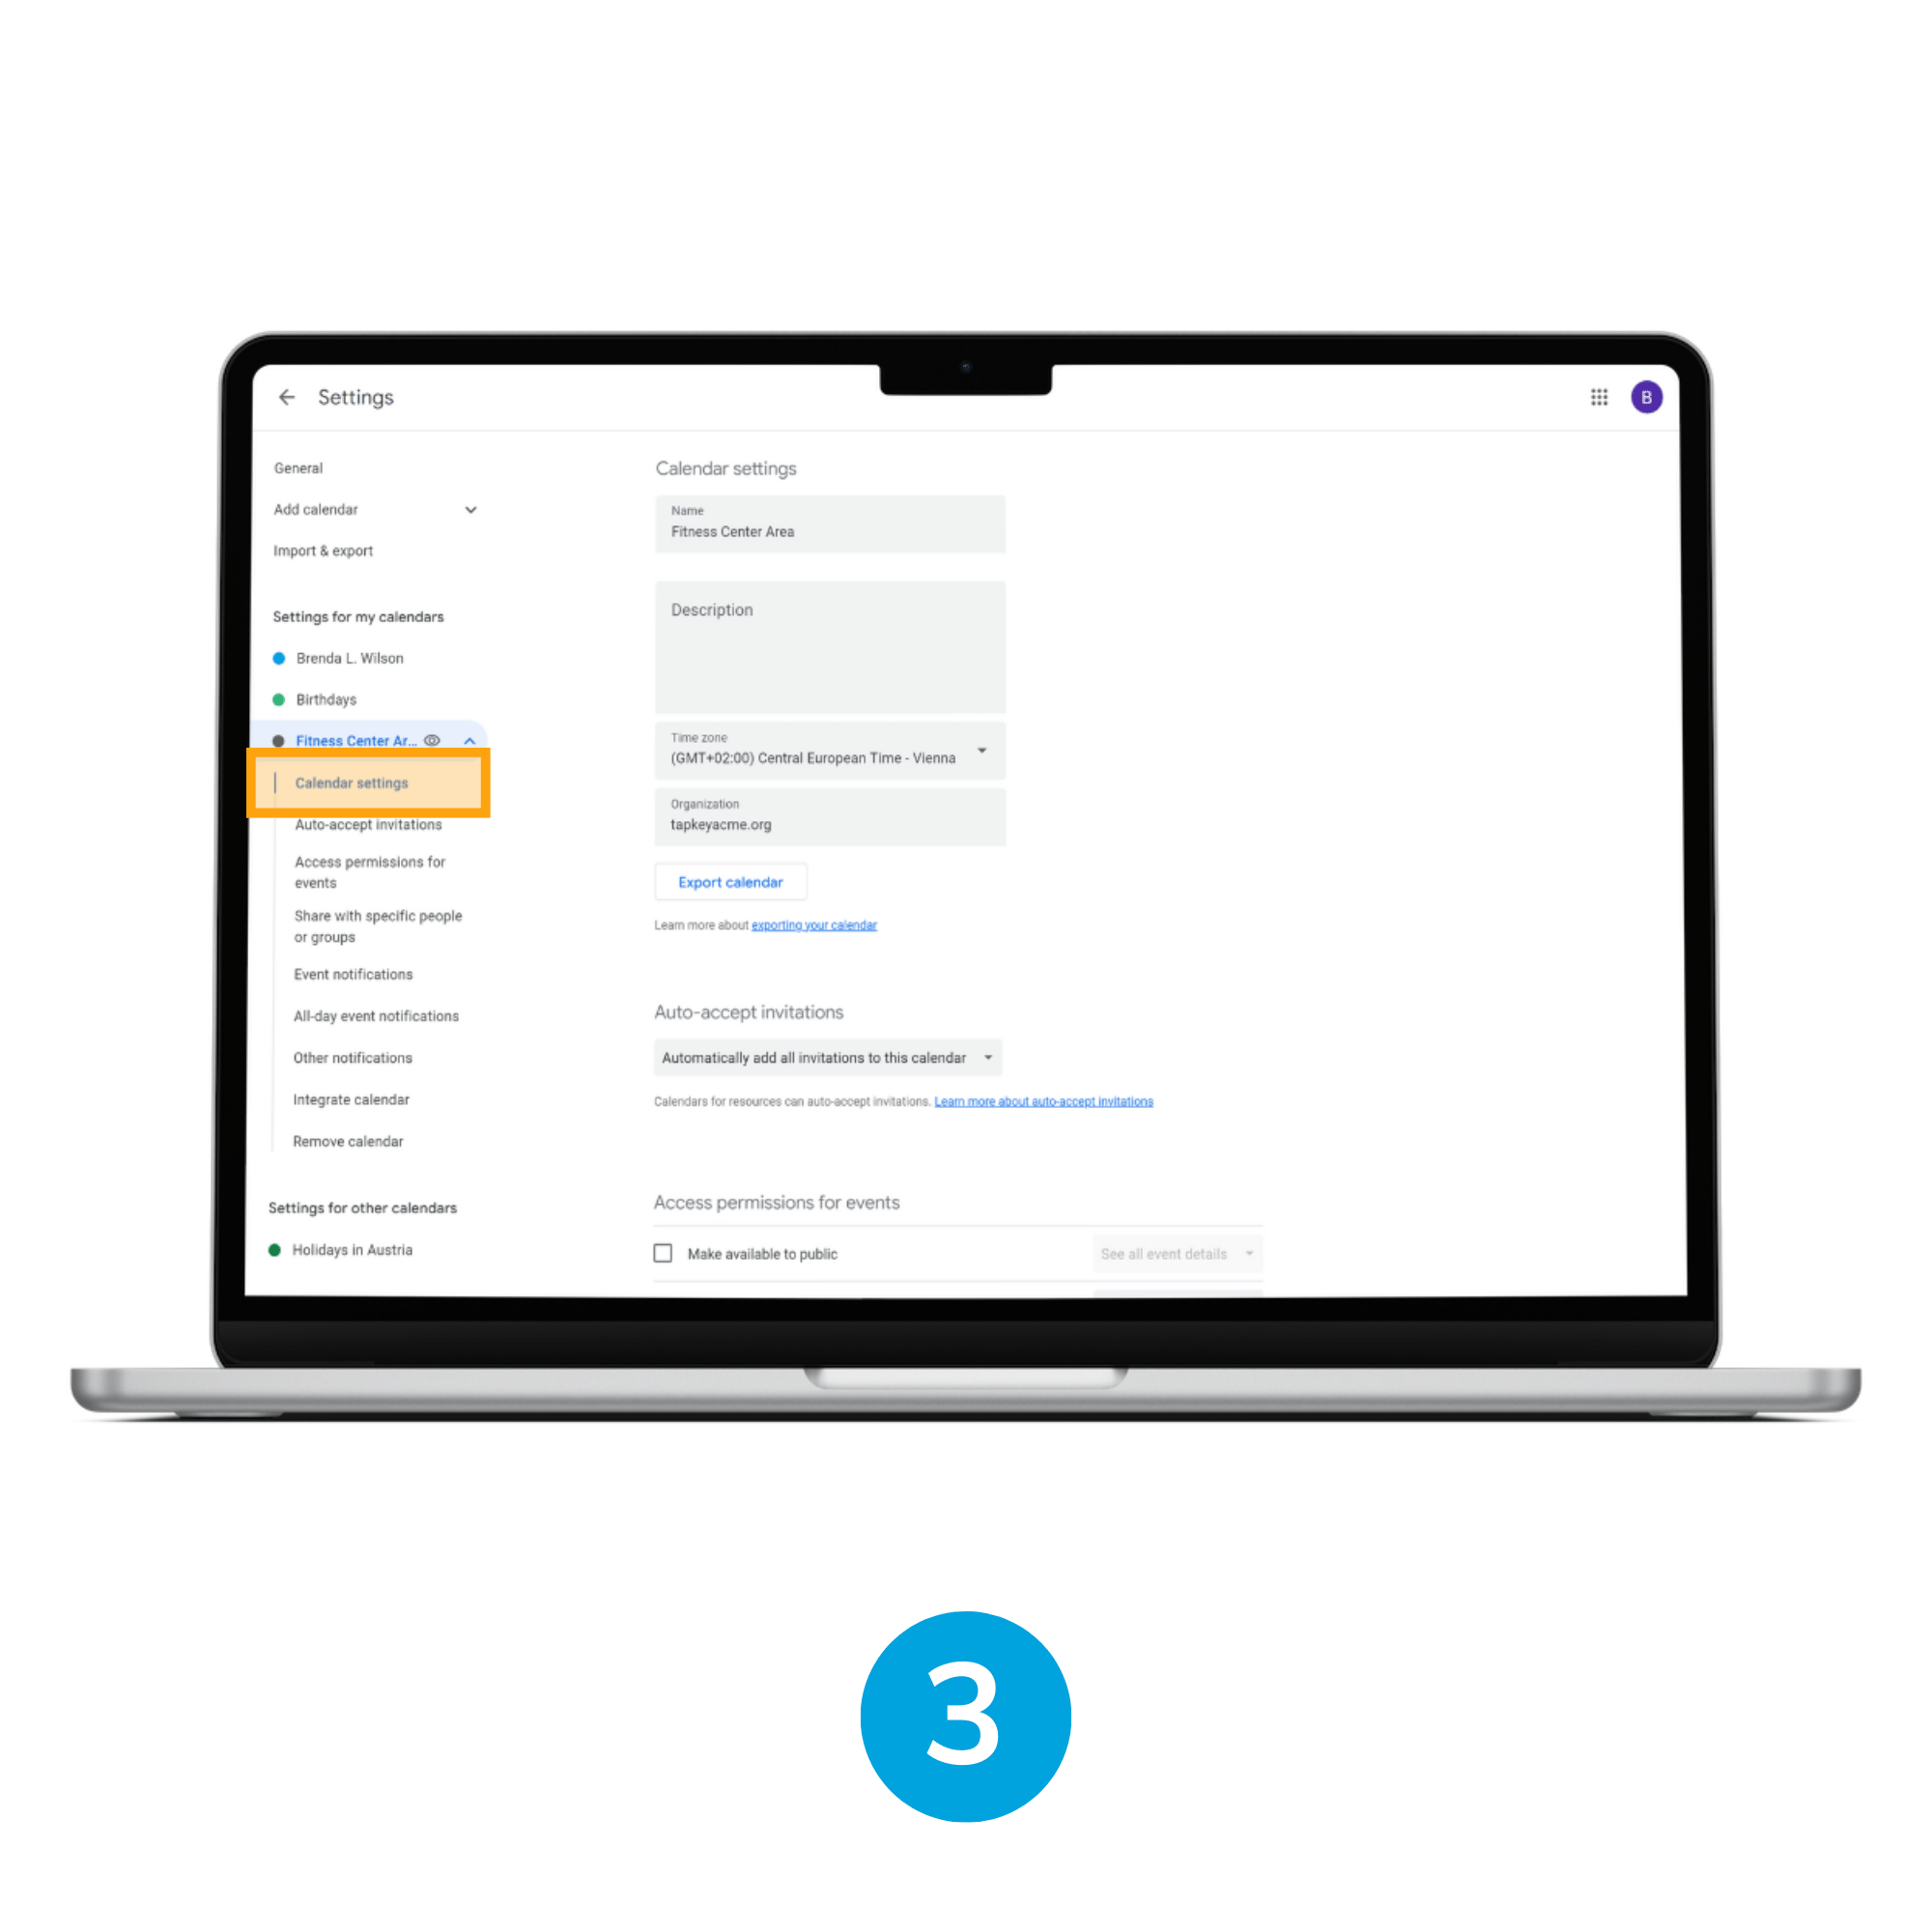
4. Edit calendar settings
As soon as the calendar is created, navigate to the calendar settings. Scroll down to the section Share with specific people or groups.
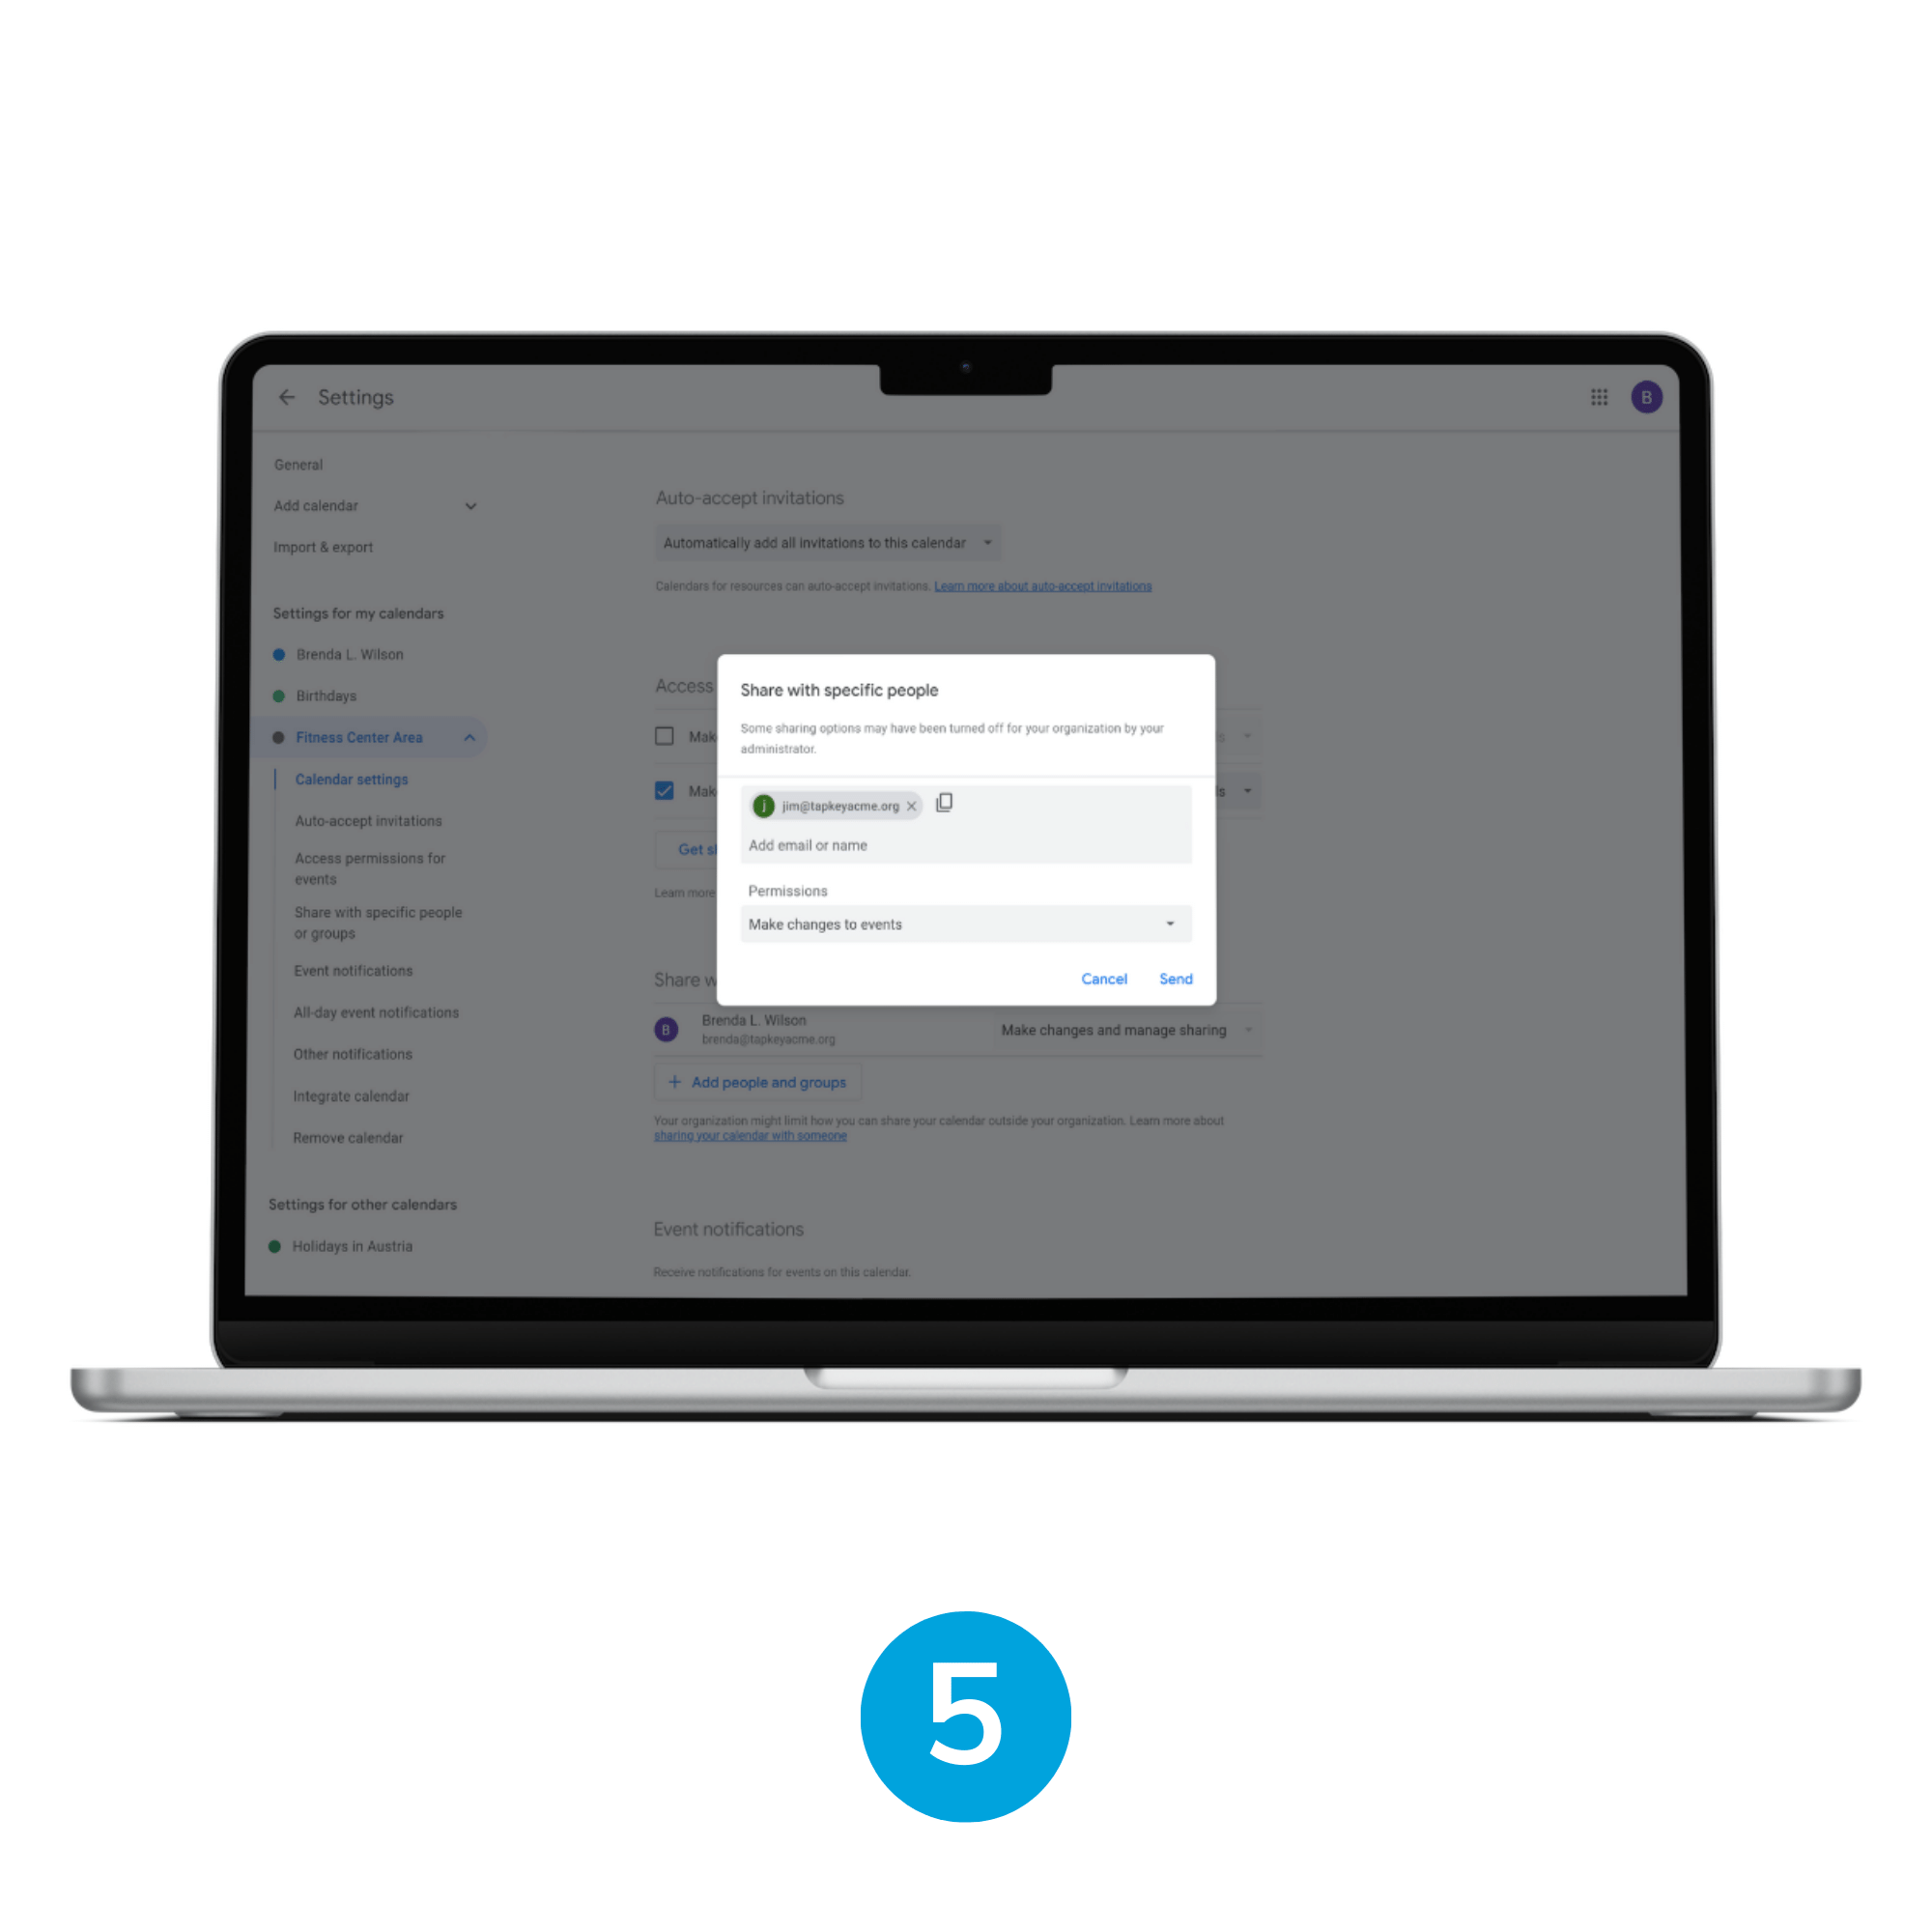
5. Add other users
Now you grant access to whoever needs it. In this scenario, we are going to consider Jim as a resident of the building.
Important: It is required to select “Make changes to events” in the Permissions field, this allows the tenant to create events but does not allow the tenant to re-share the calendar.
Step 2: Install Add-On from Tapkey web portal
The next step is to install Google Calendar Add-On within Tapkey web portal, this Add-On is going to allow Tapkey to gather information from Google Calendar and create access in the respective locks linked to shared rooms within your company facilities, to achieve this, login to Tapkey as Locking System Owner, then navigate to the Add-Ons section.
Find a detailed description of the Add-On installation here from step 5 forward.
Follow the instructions provided by Google to allow Tapkey to access Google Calendar resources, make sure that the Google account entered is the same Google account you have configured in previous steps with admin permissions and calendar resources already created for “Fitness Center Area”. After finishing, the Tapkey application is going to display the list of calendars obtained from the residential building admin account, containing the “Fitness Center Area” calendar.
Step 3: Setup Calendar Sync with Tapkey Smart Locks
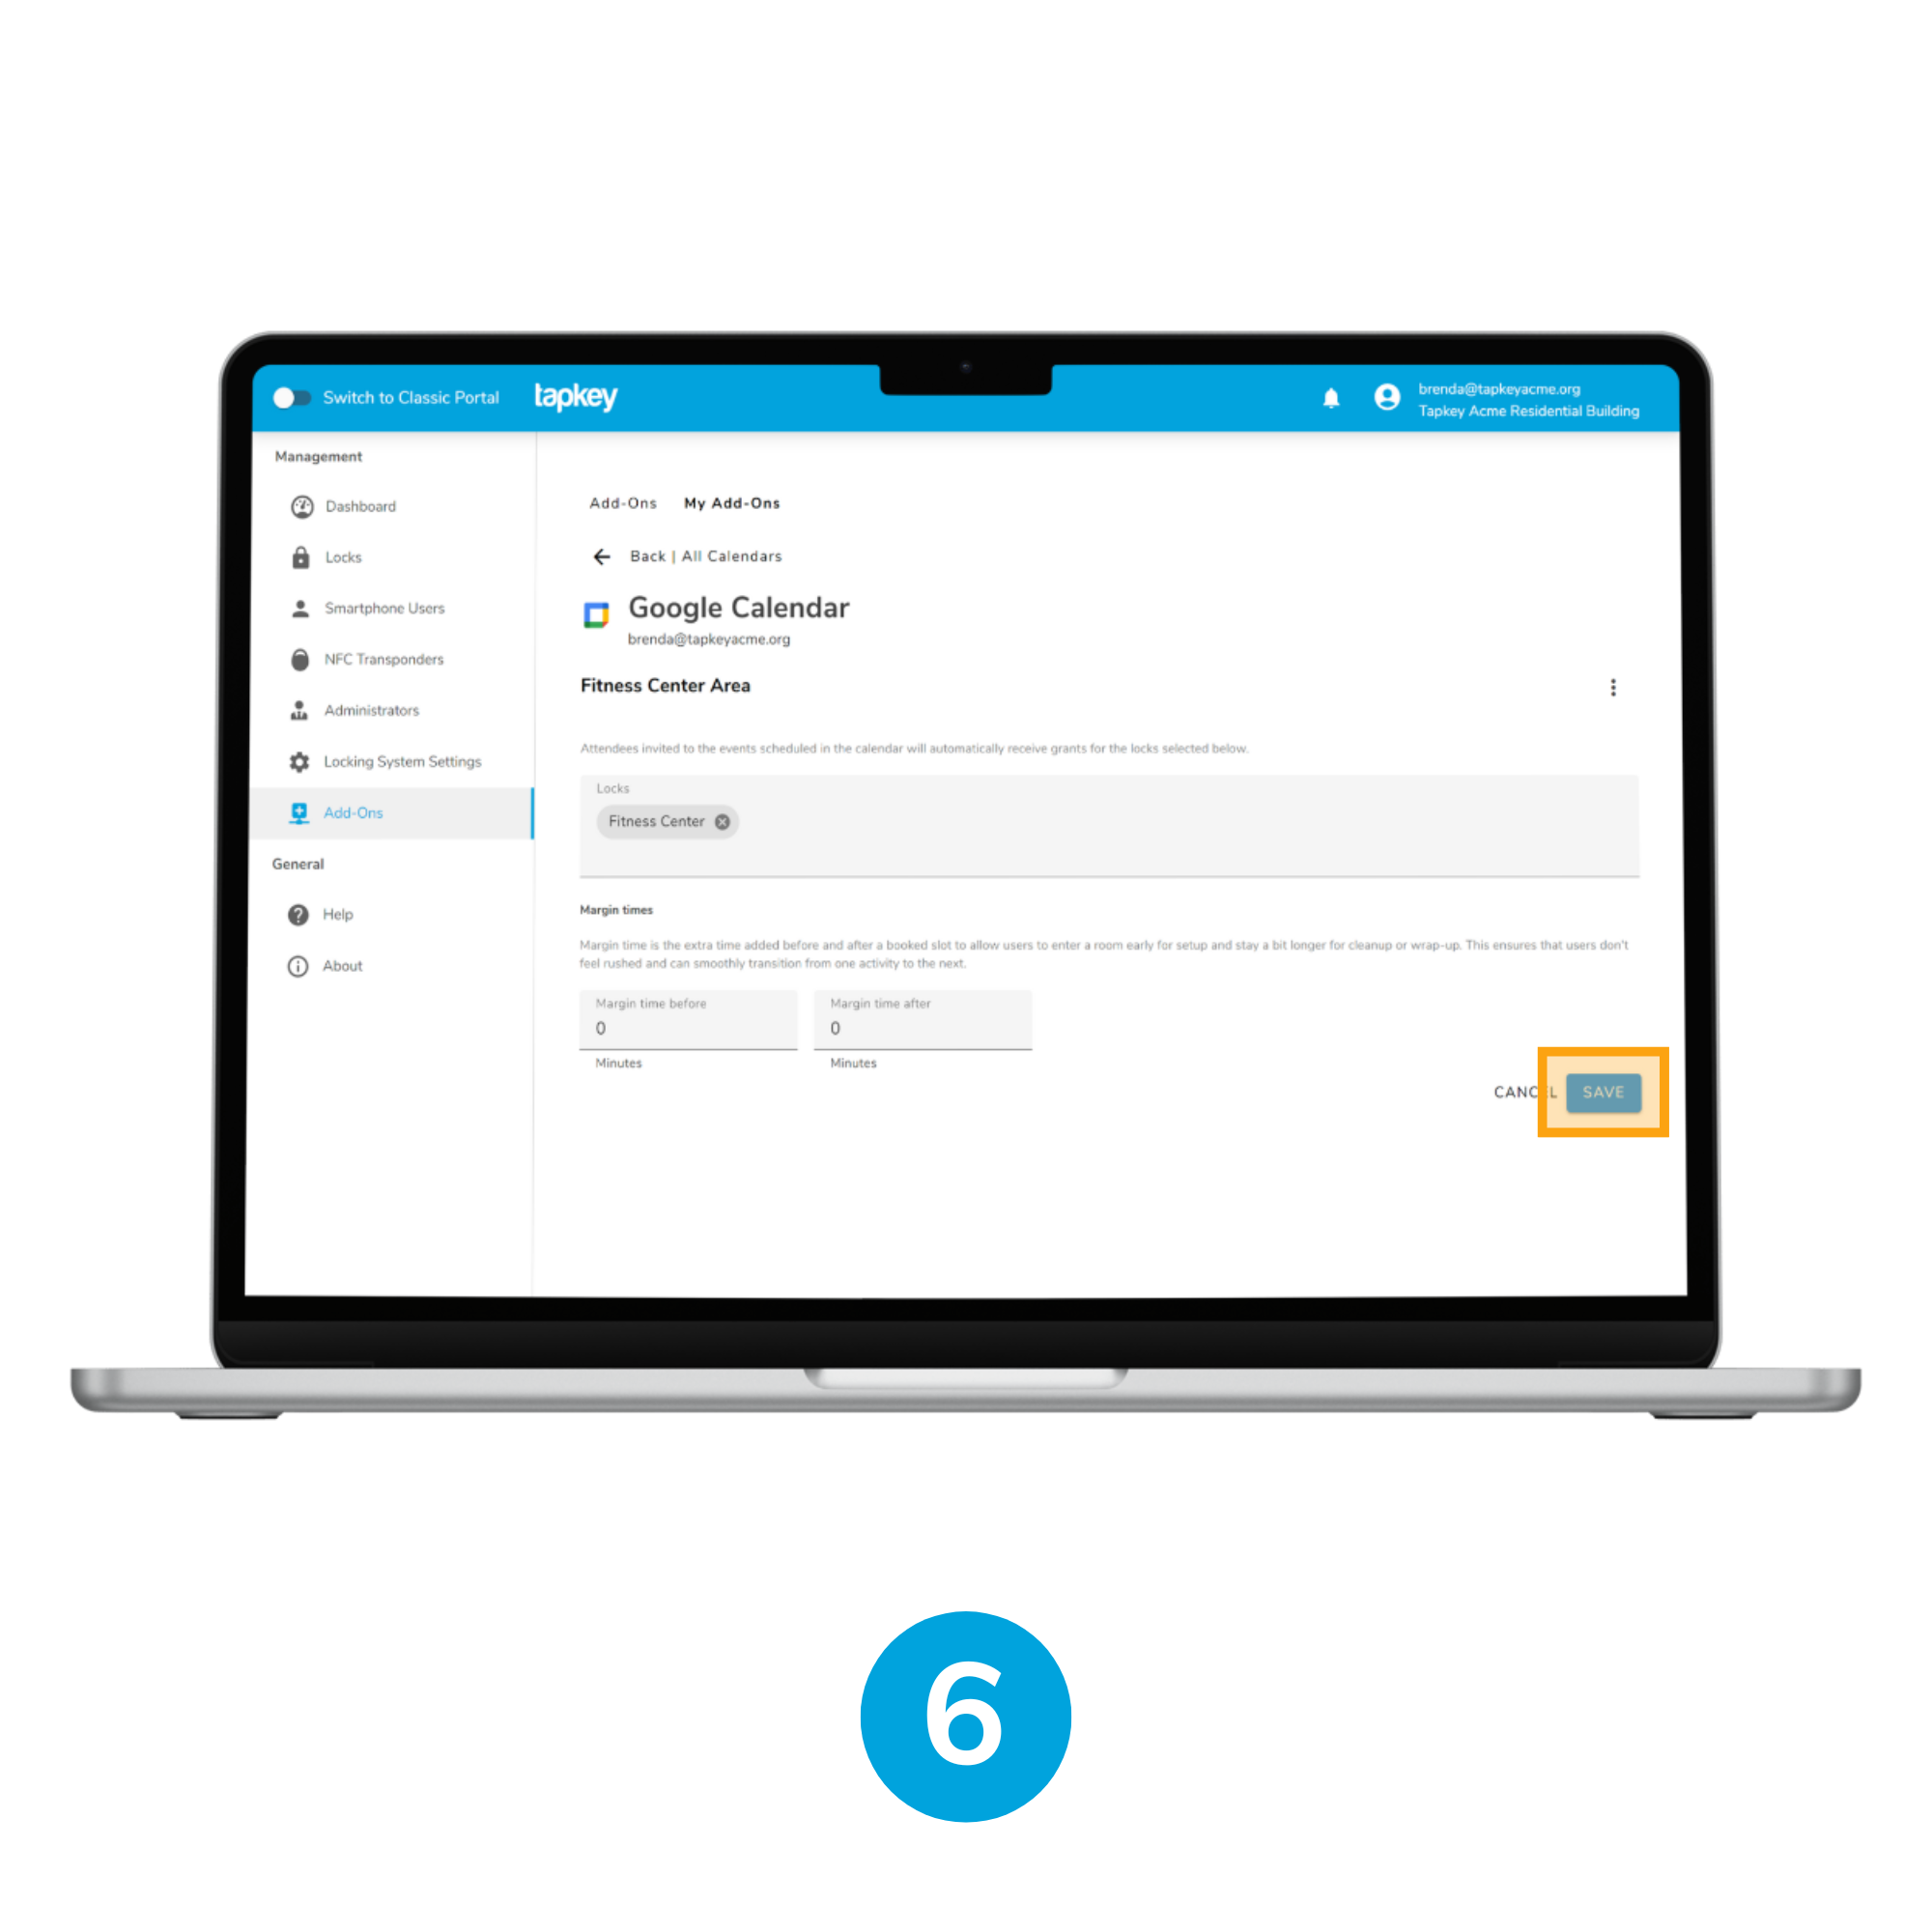
6. Sync calendar
Select the Calendar “Fitness Center Area” in the calendar list and associate the locks intended to be in sync with the reservation of the room, in this scenario, we are going to link the Calendar resource with “Fitness Center” lock to allow users to access from the entrance door towards the shared resource. Once finished with the changes, click Save.
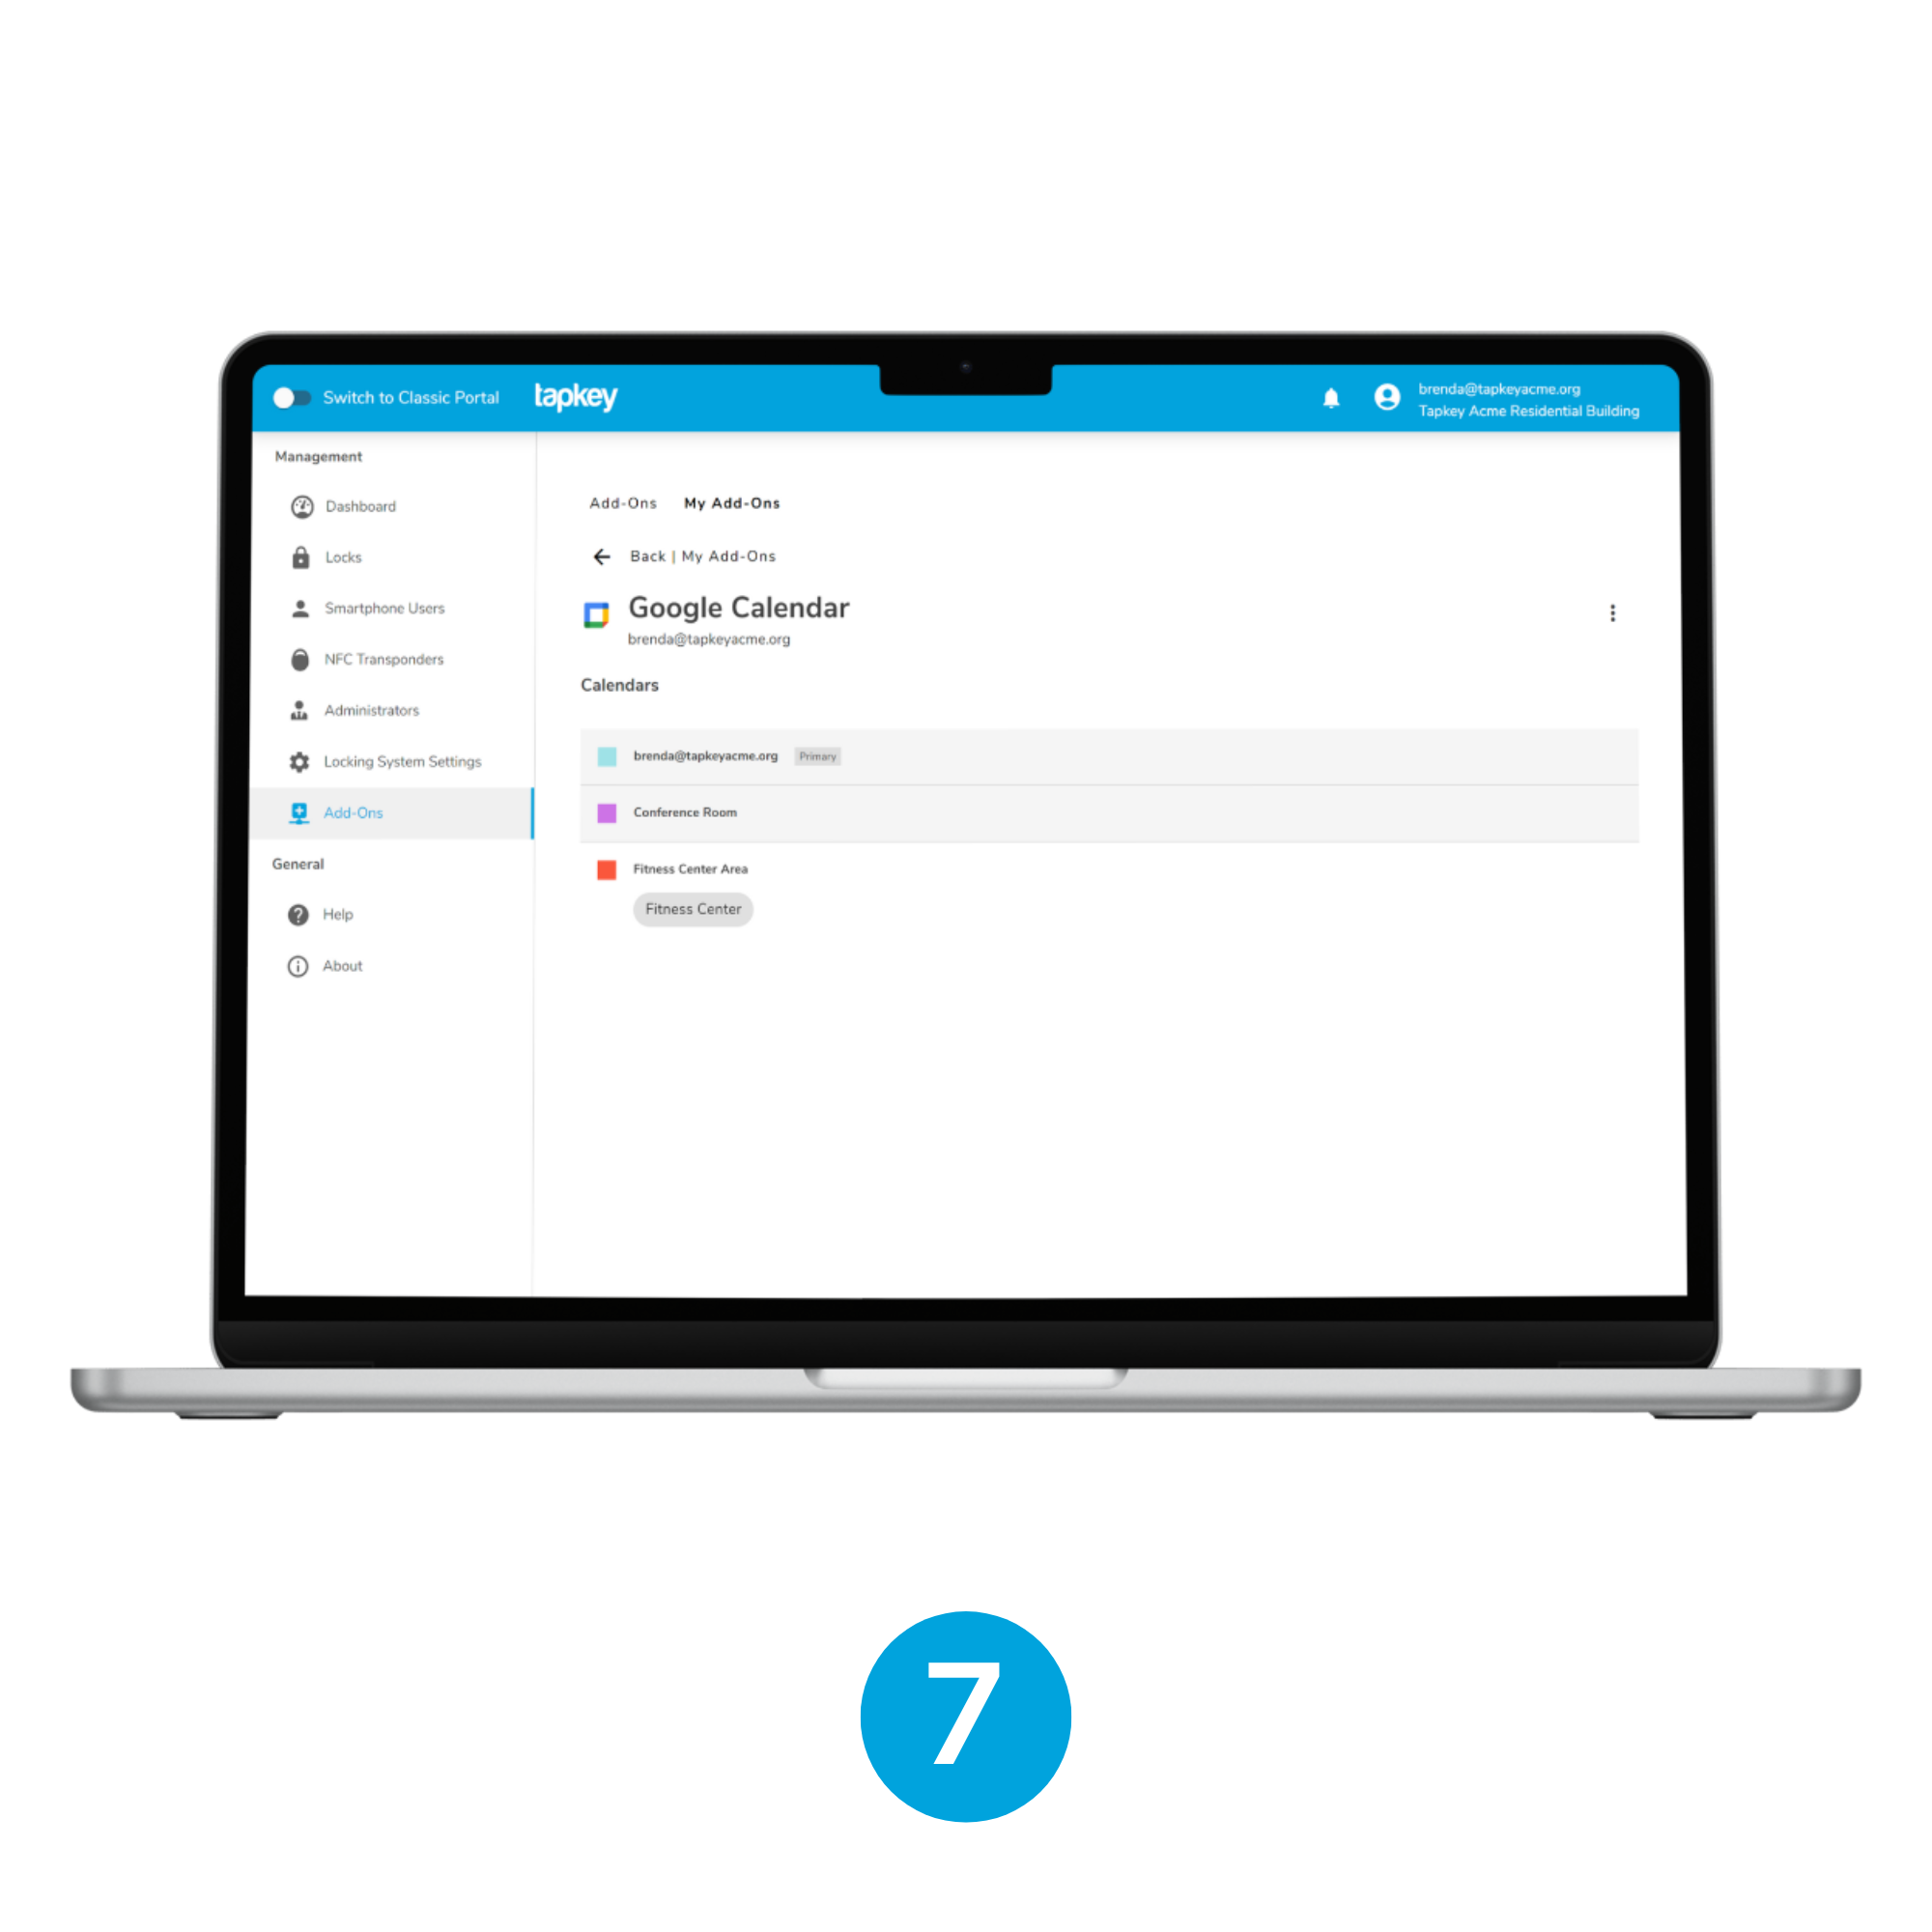
7. Sync is enabled, good job!
Step 4: Accept Calendar shared as tenant
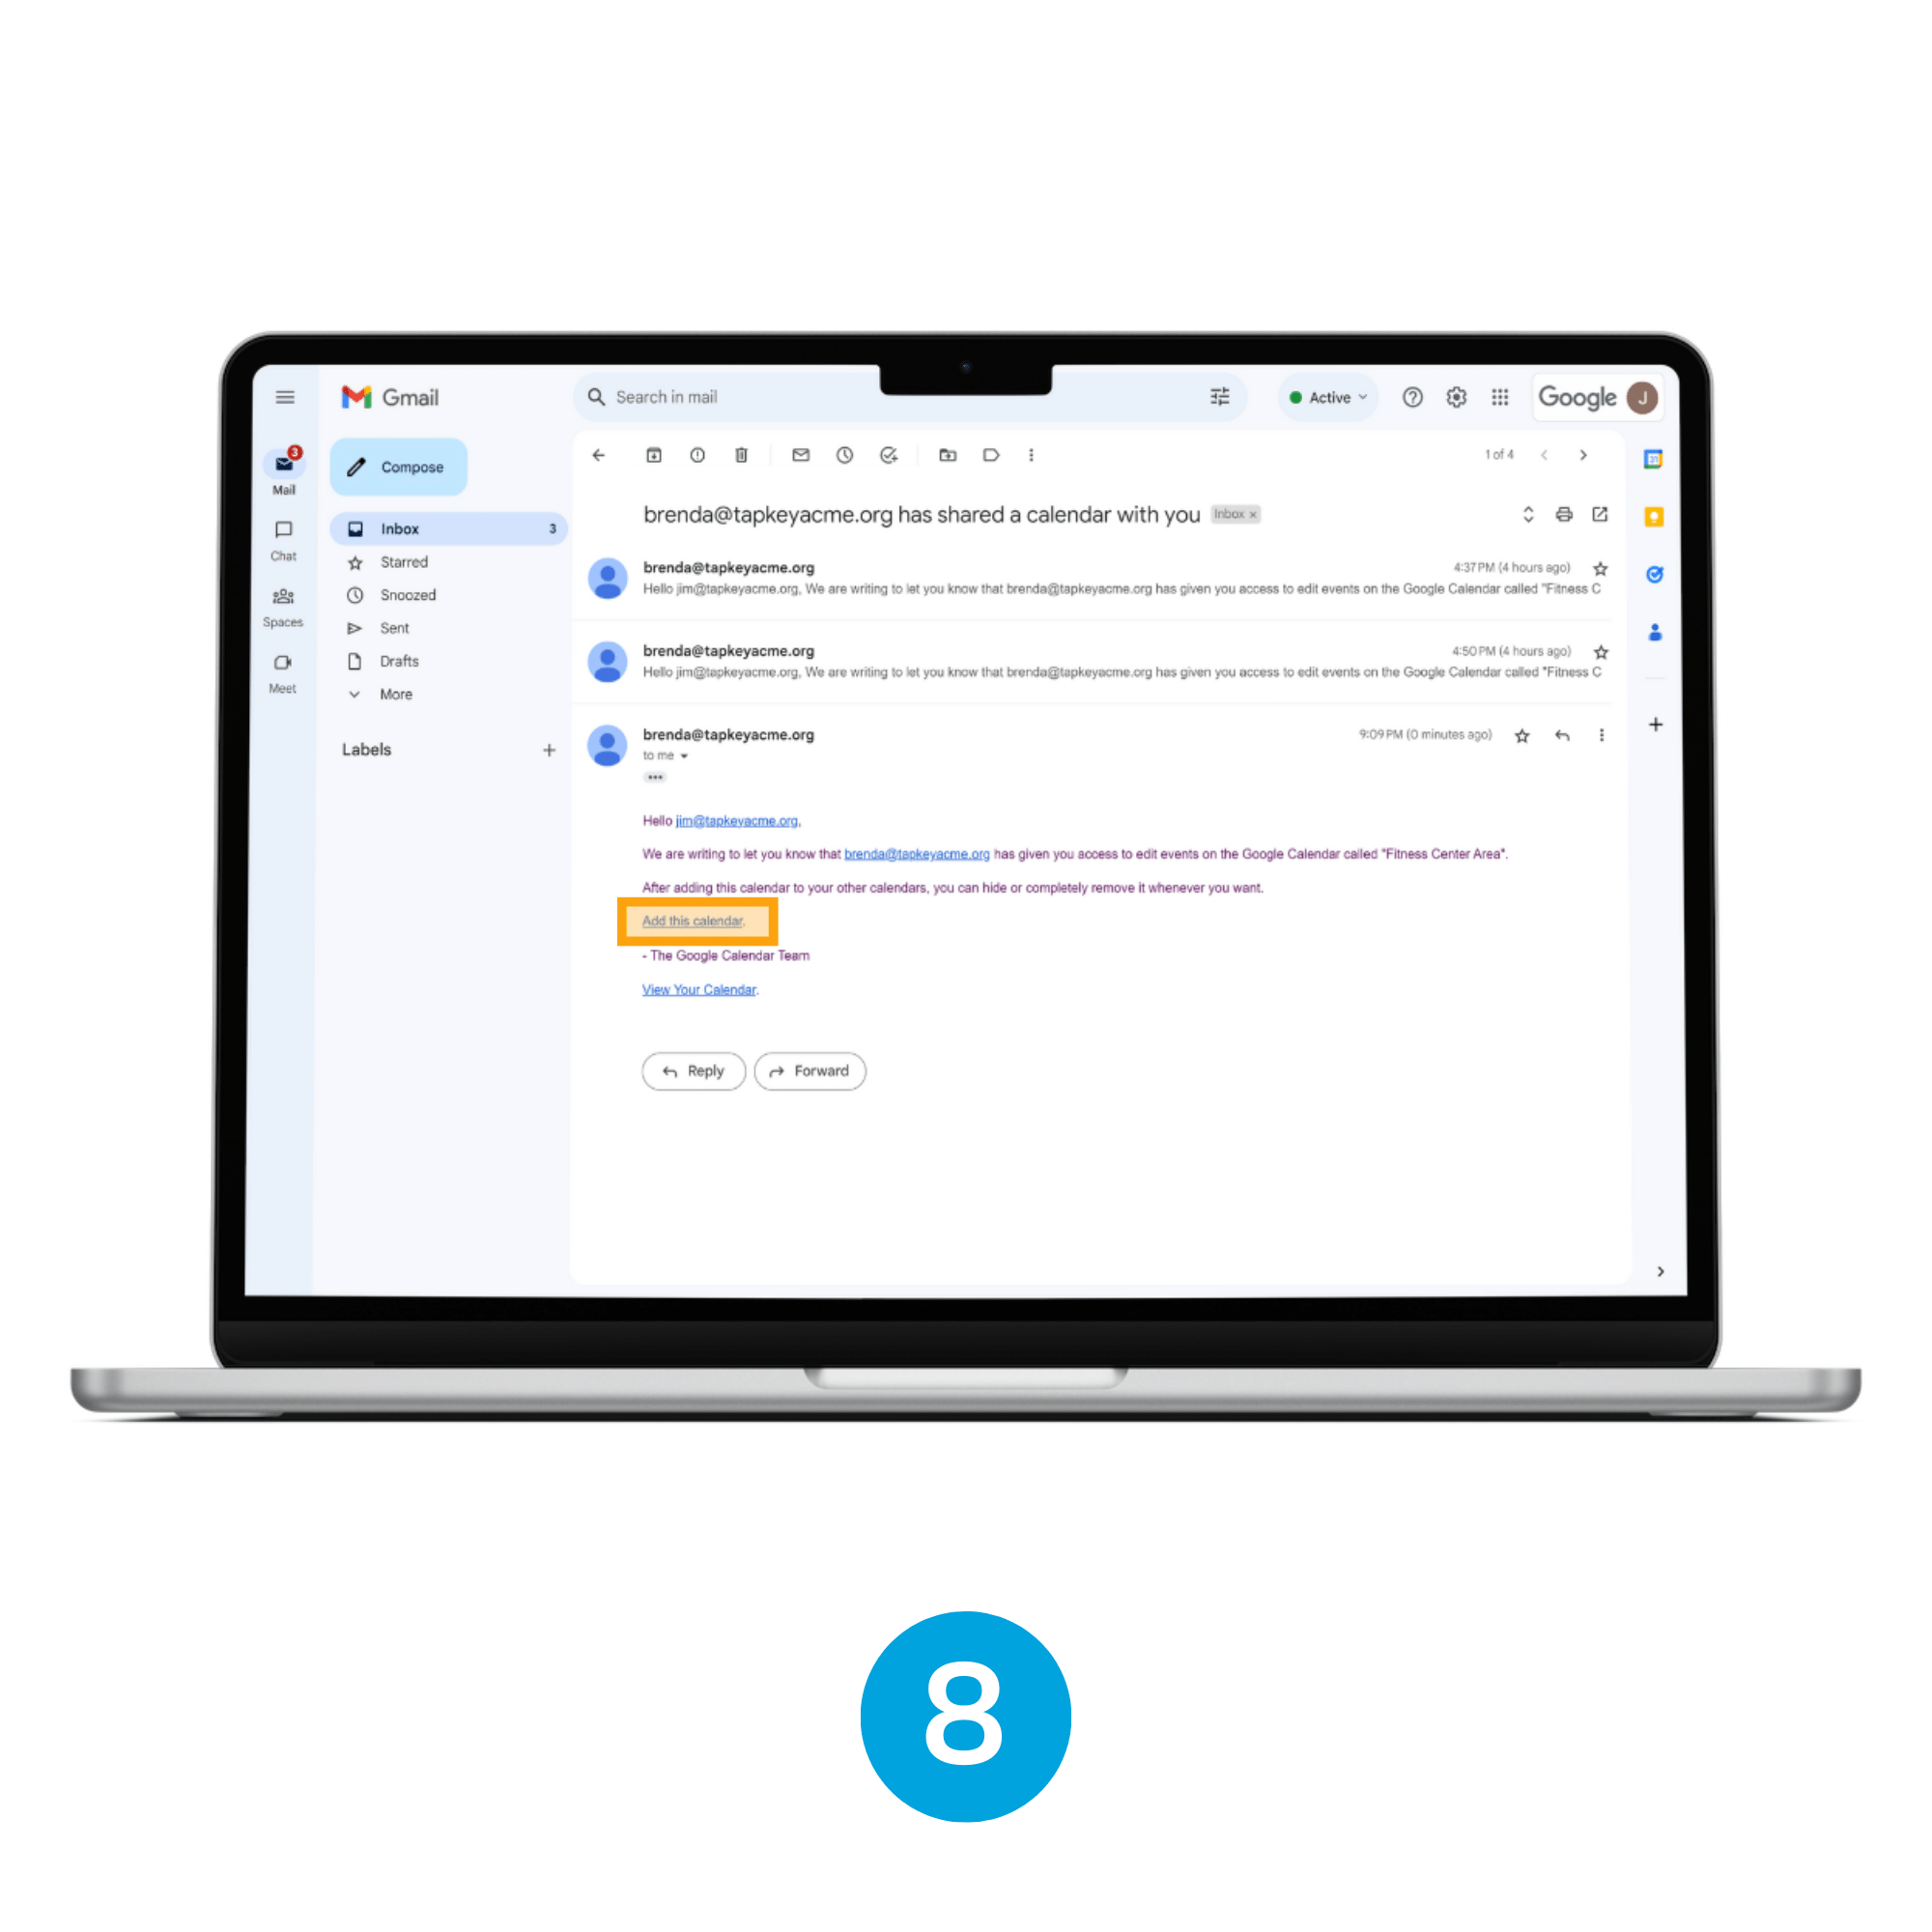
8. Check the invite in Gmail
Login to Google Gmail as a tenant, in this scenario jim@tapkeyacme.org, and check the invite sent by the administrator in the previous steps. Once the shared calendar email is opened, tap in Add this calendar.
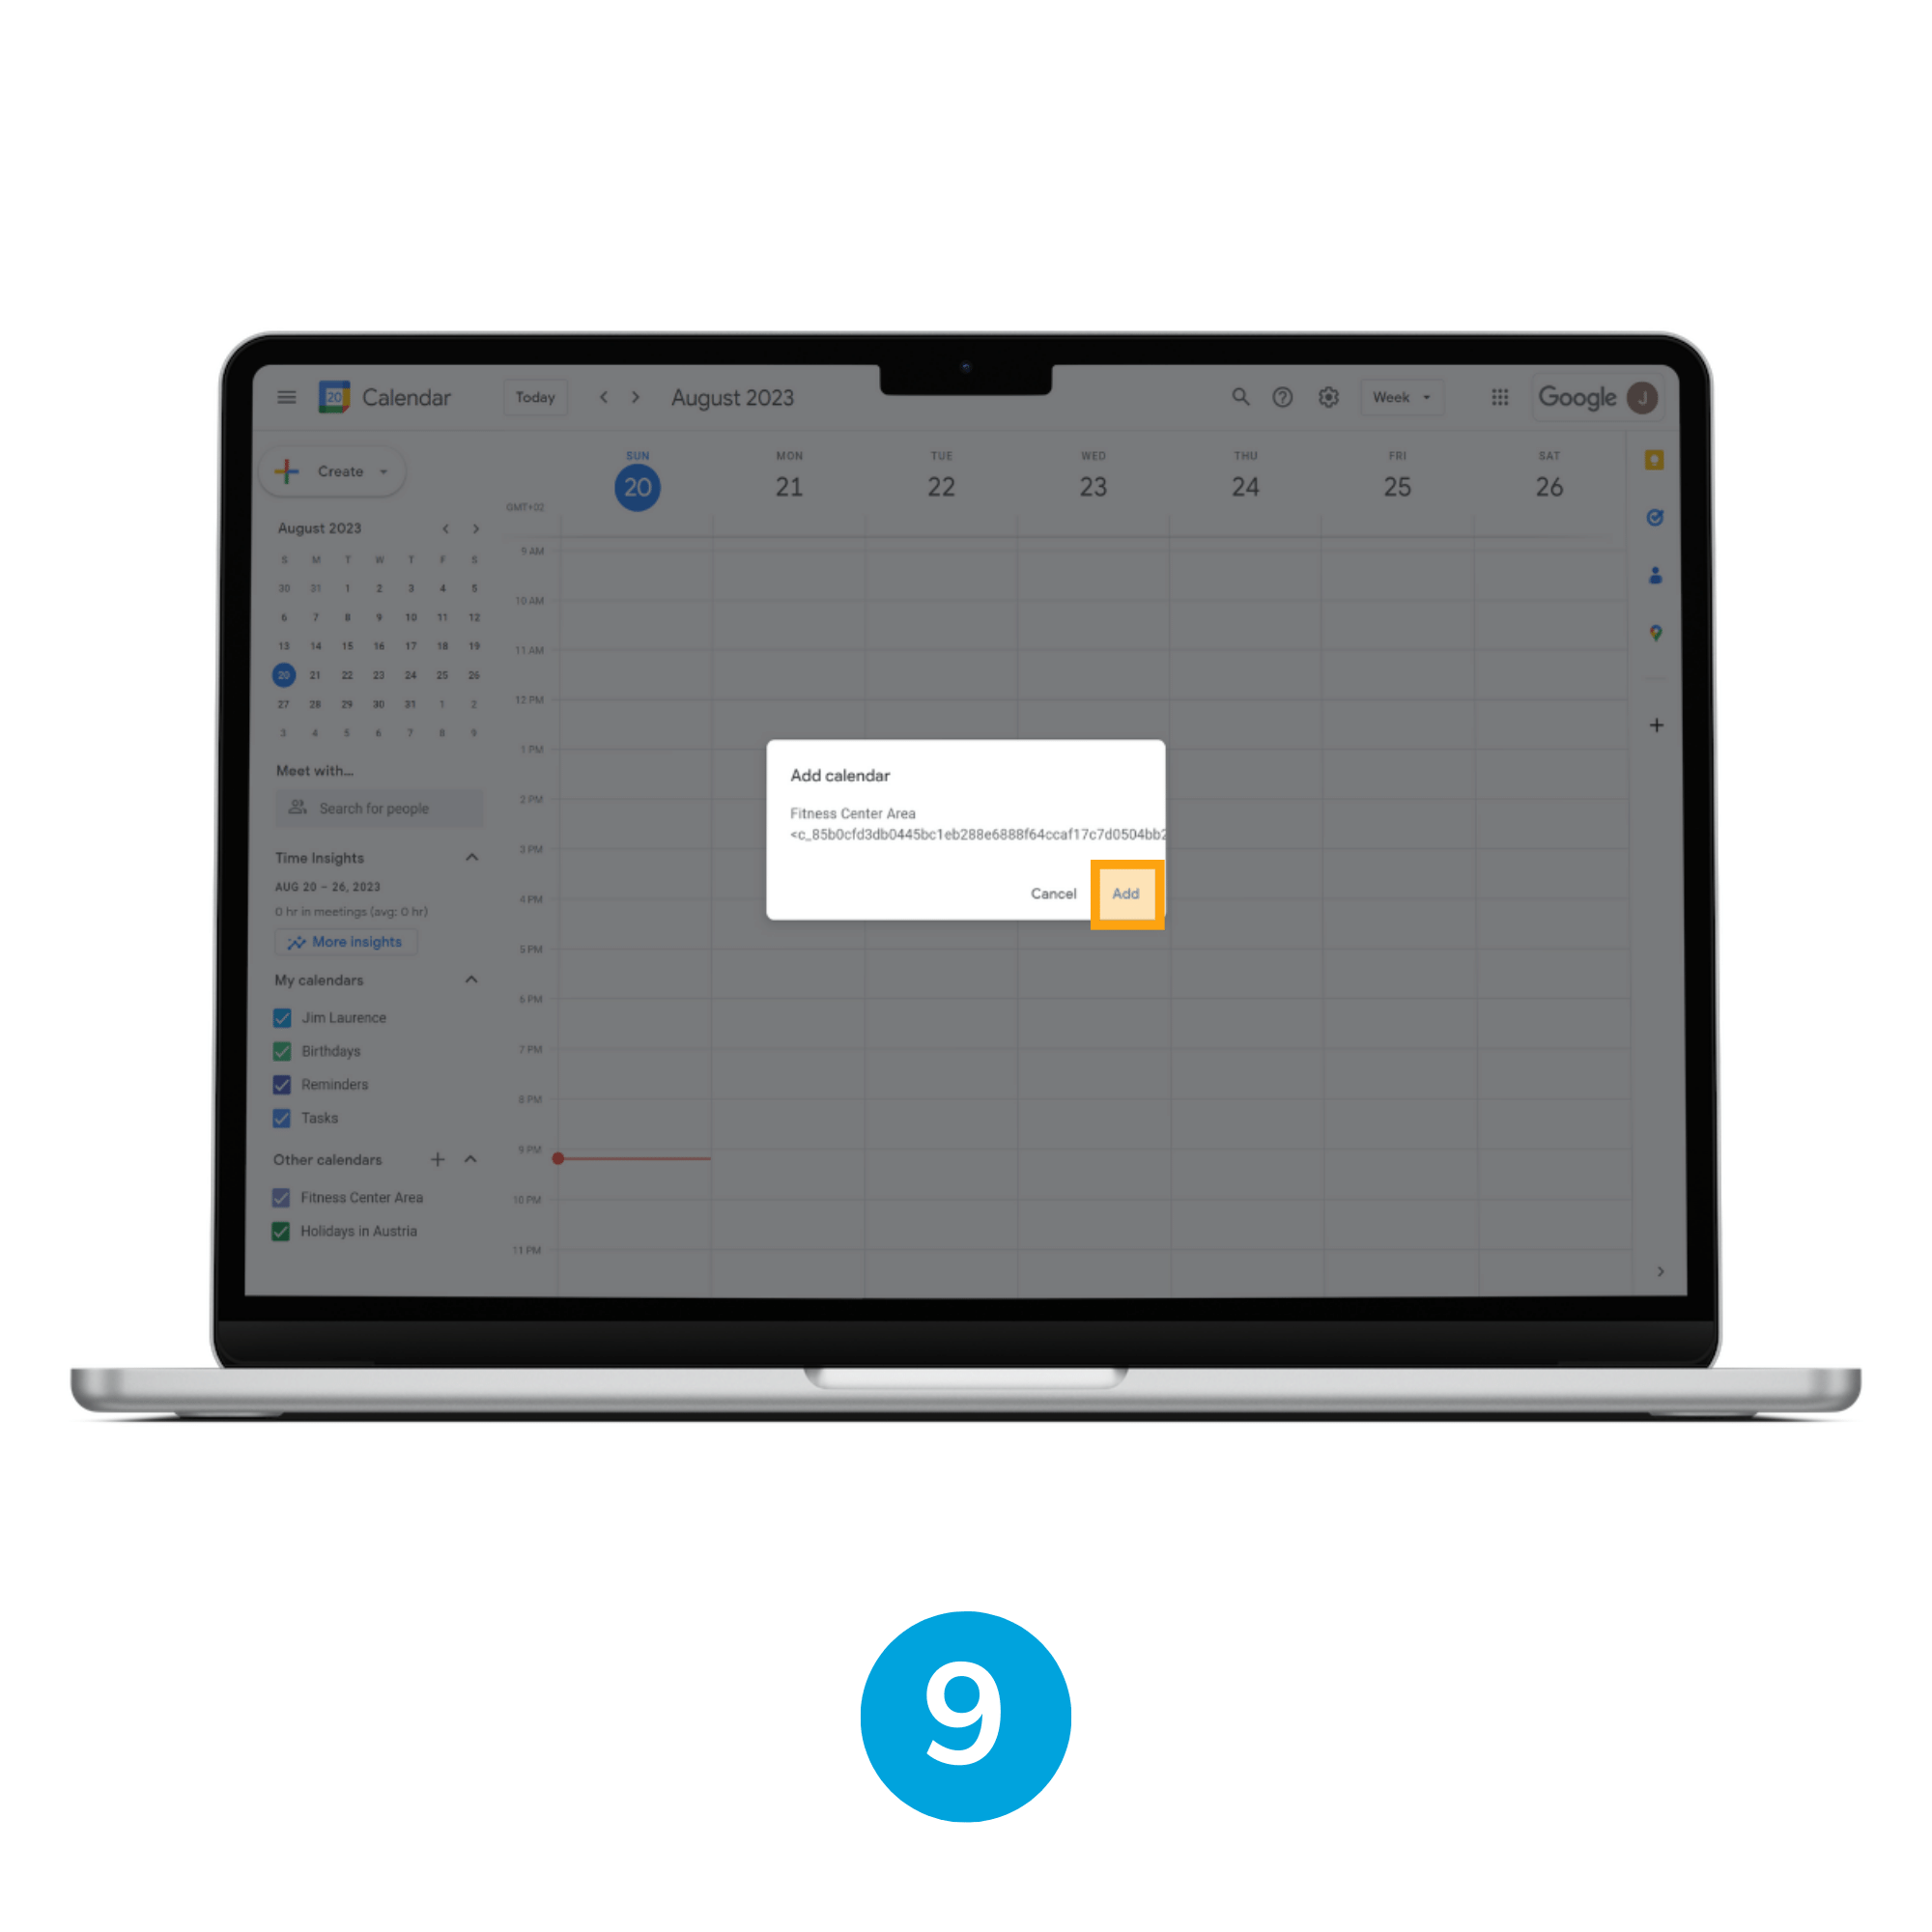
9. Add the calendar
Google Calendar application is going open, asking for confirmation to add a calendar shared to the list of calendars available, here it is required to tap “Add”.
Step 5: Test calendar reservation from the tenant account
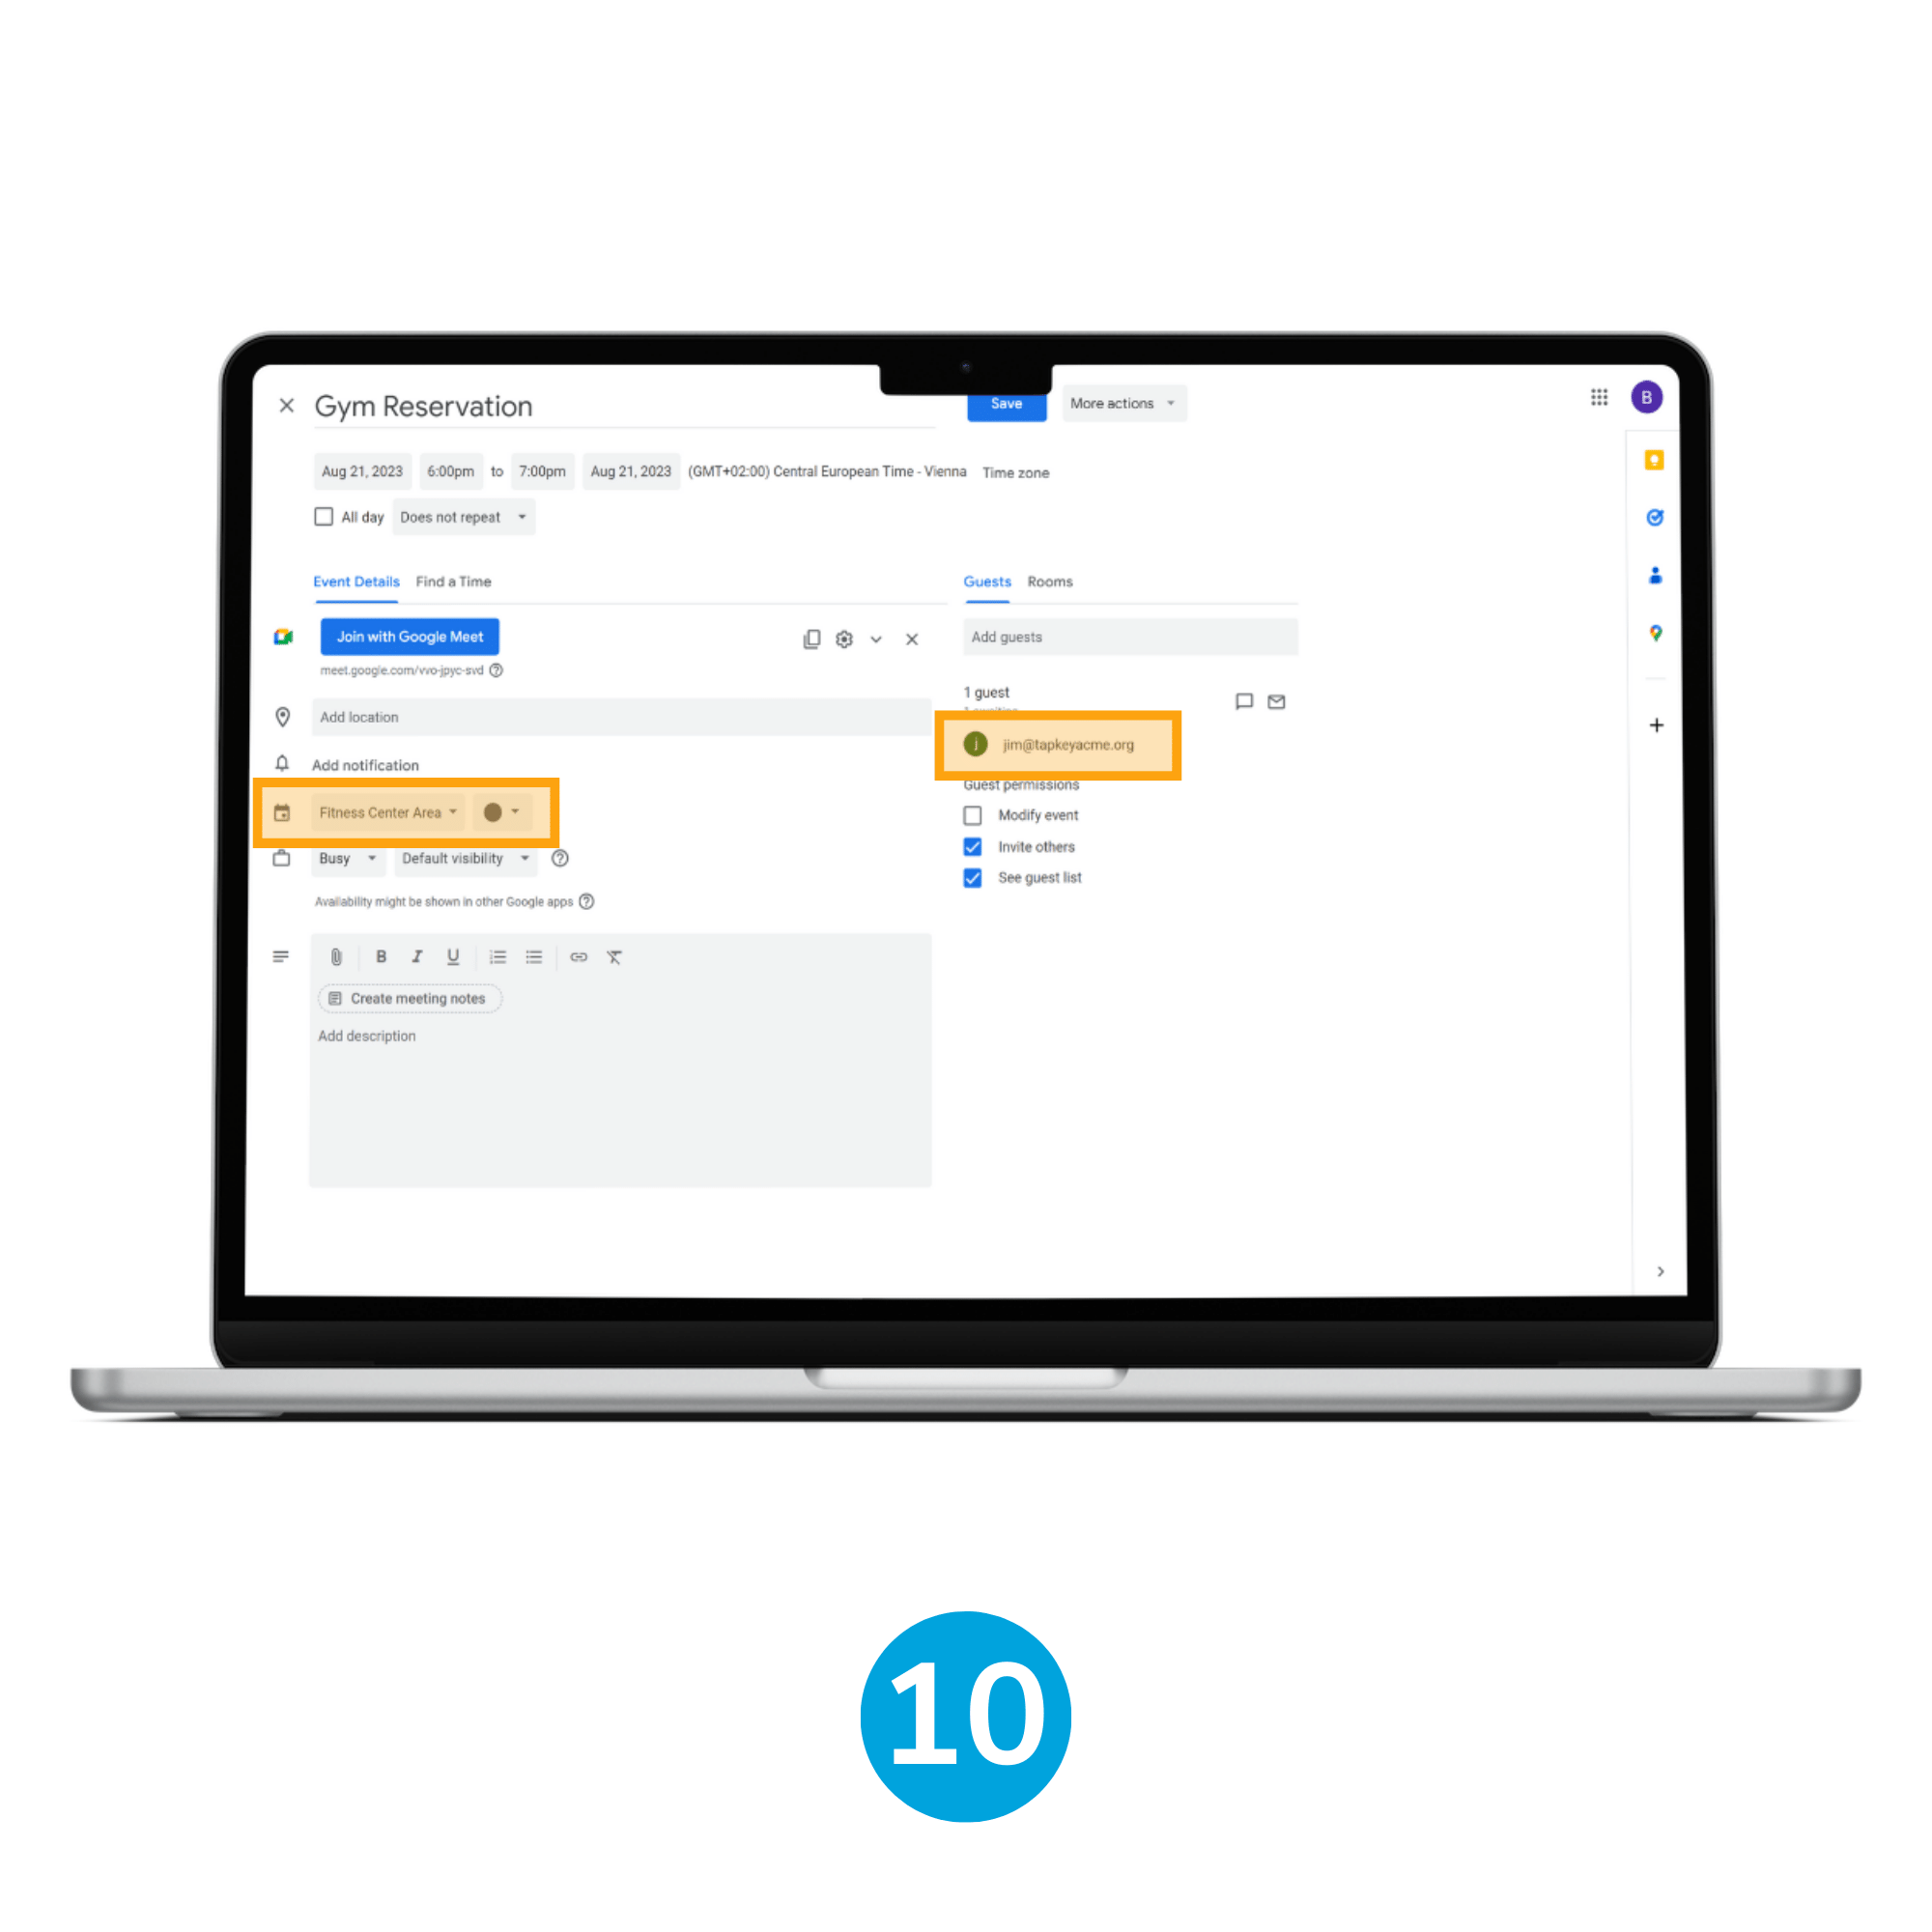
10. Create event
Create an event as a resident (jim@tapkeyacme.org), make sure the event has the guest jim@tapkeyacme.org, and select the “Fitness Center Area” calendar.
Important: After setting this up for the first time, we recommend verifying the access creation in the Tapkey web portal. Log in as the Locking System admin user and then navigate to the locks where we are expecting to have access, which should be granted to the resident jim@tapkeyacme.org within the same time period reserved in the previous step.
Was this article helpful?
That’s Great!
Thank you for your feedback
Sorry! We couldn't be helpful
Thank you for your feedback
Feedback sent
We appreciate your effort and will try to fix the article