How can I register a new lock?
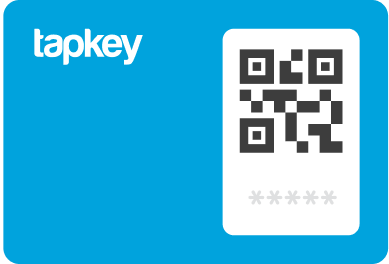
Tapkey locks offer three different binding methods, available at the time of purchase. All of our locks come with an Owner Card in charge of legitimate the ownership of the Locks, they can be either proximity Owner Cards (NFC) or Owner Cards with QR Code. To add a new lock in your locking system add proceed according to the type of card you received at the moment of purchase:
1. Register with Owner Card (NFC)
2. Register with Owner Card (QR Code)
3. Register with Registration Code
Note: It's crucial to keep the cards in a secure place, as they serve as proof of ownership for a specific lock.
1. Register with Owner Card (NFC)
The most widely used method is the Owner Card, included with the lock package. These cards are intended to be used in proximity to the lock.

Step-By-Step Guide
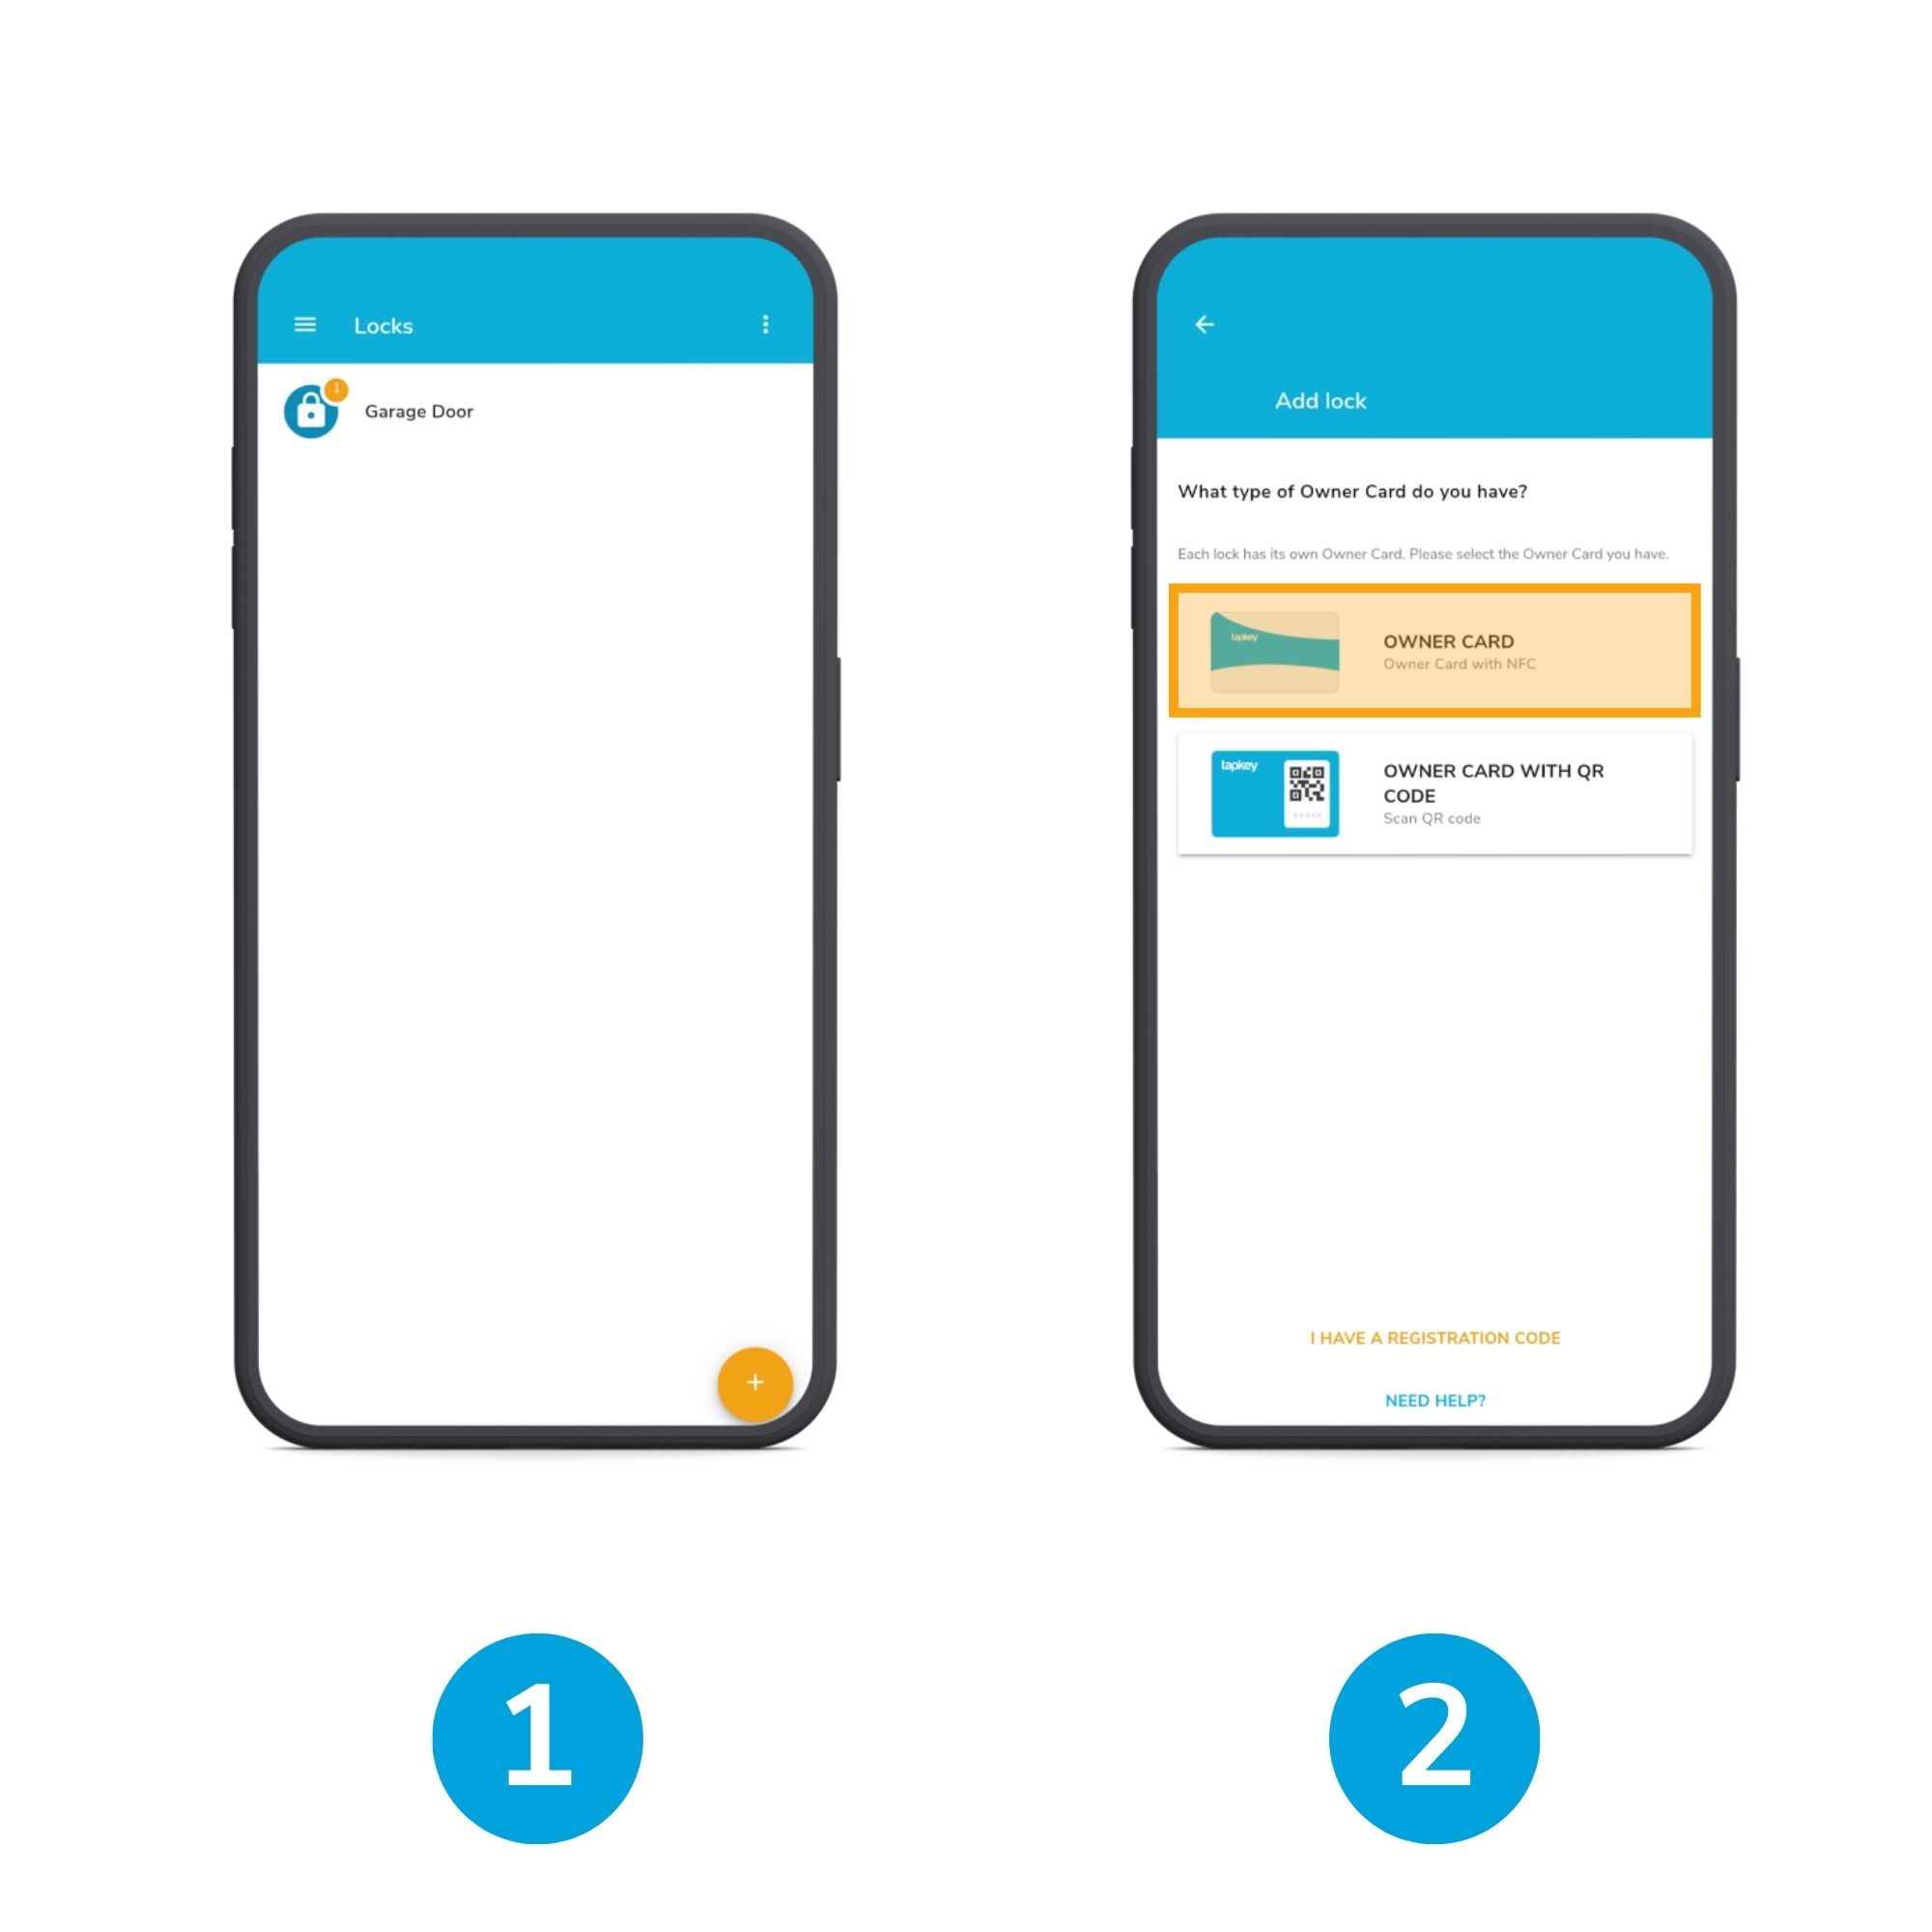
1. Tap Add (+) button to add a new lock
In the list of Locks
2. Choose Owner Card with NFC
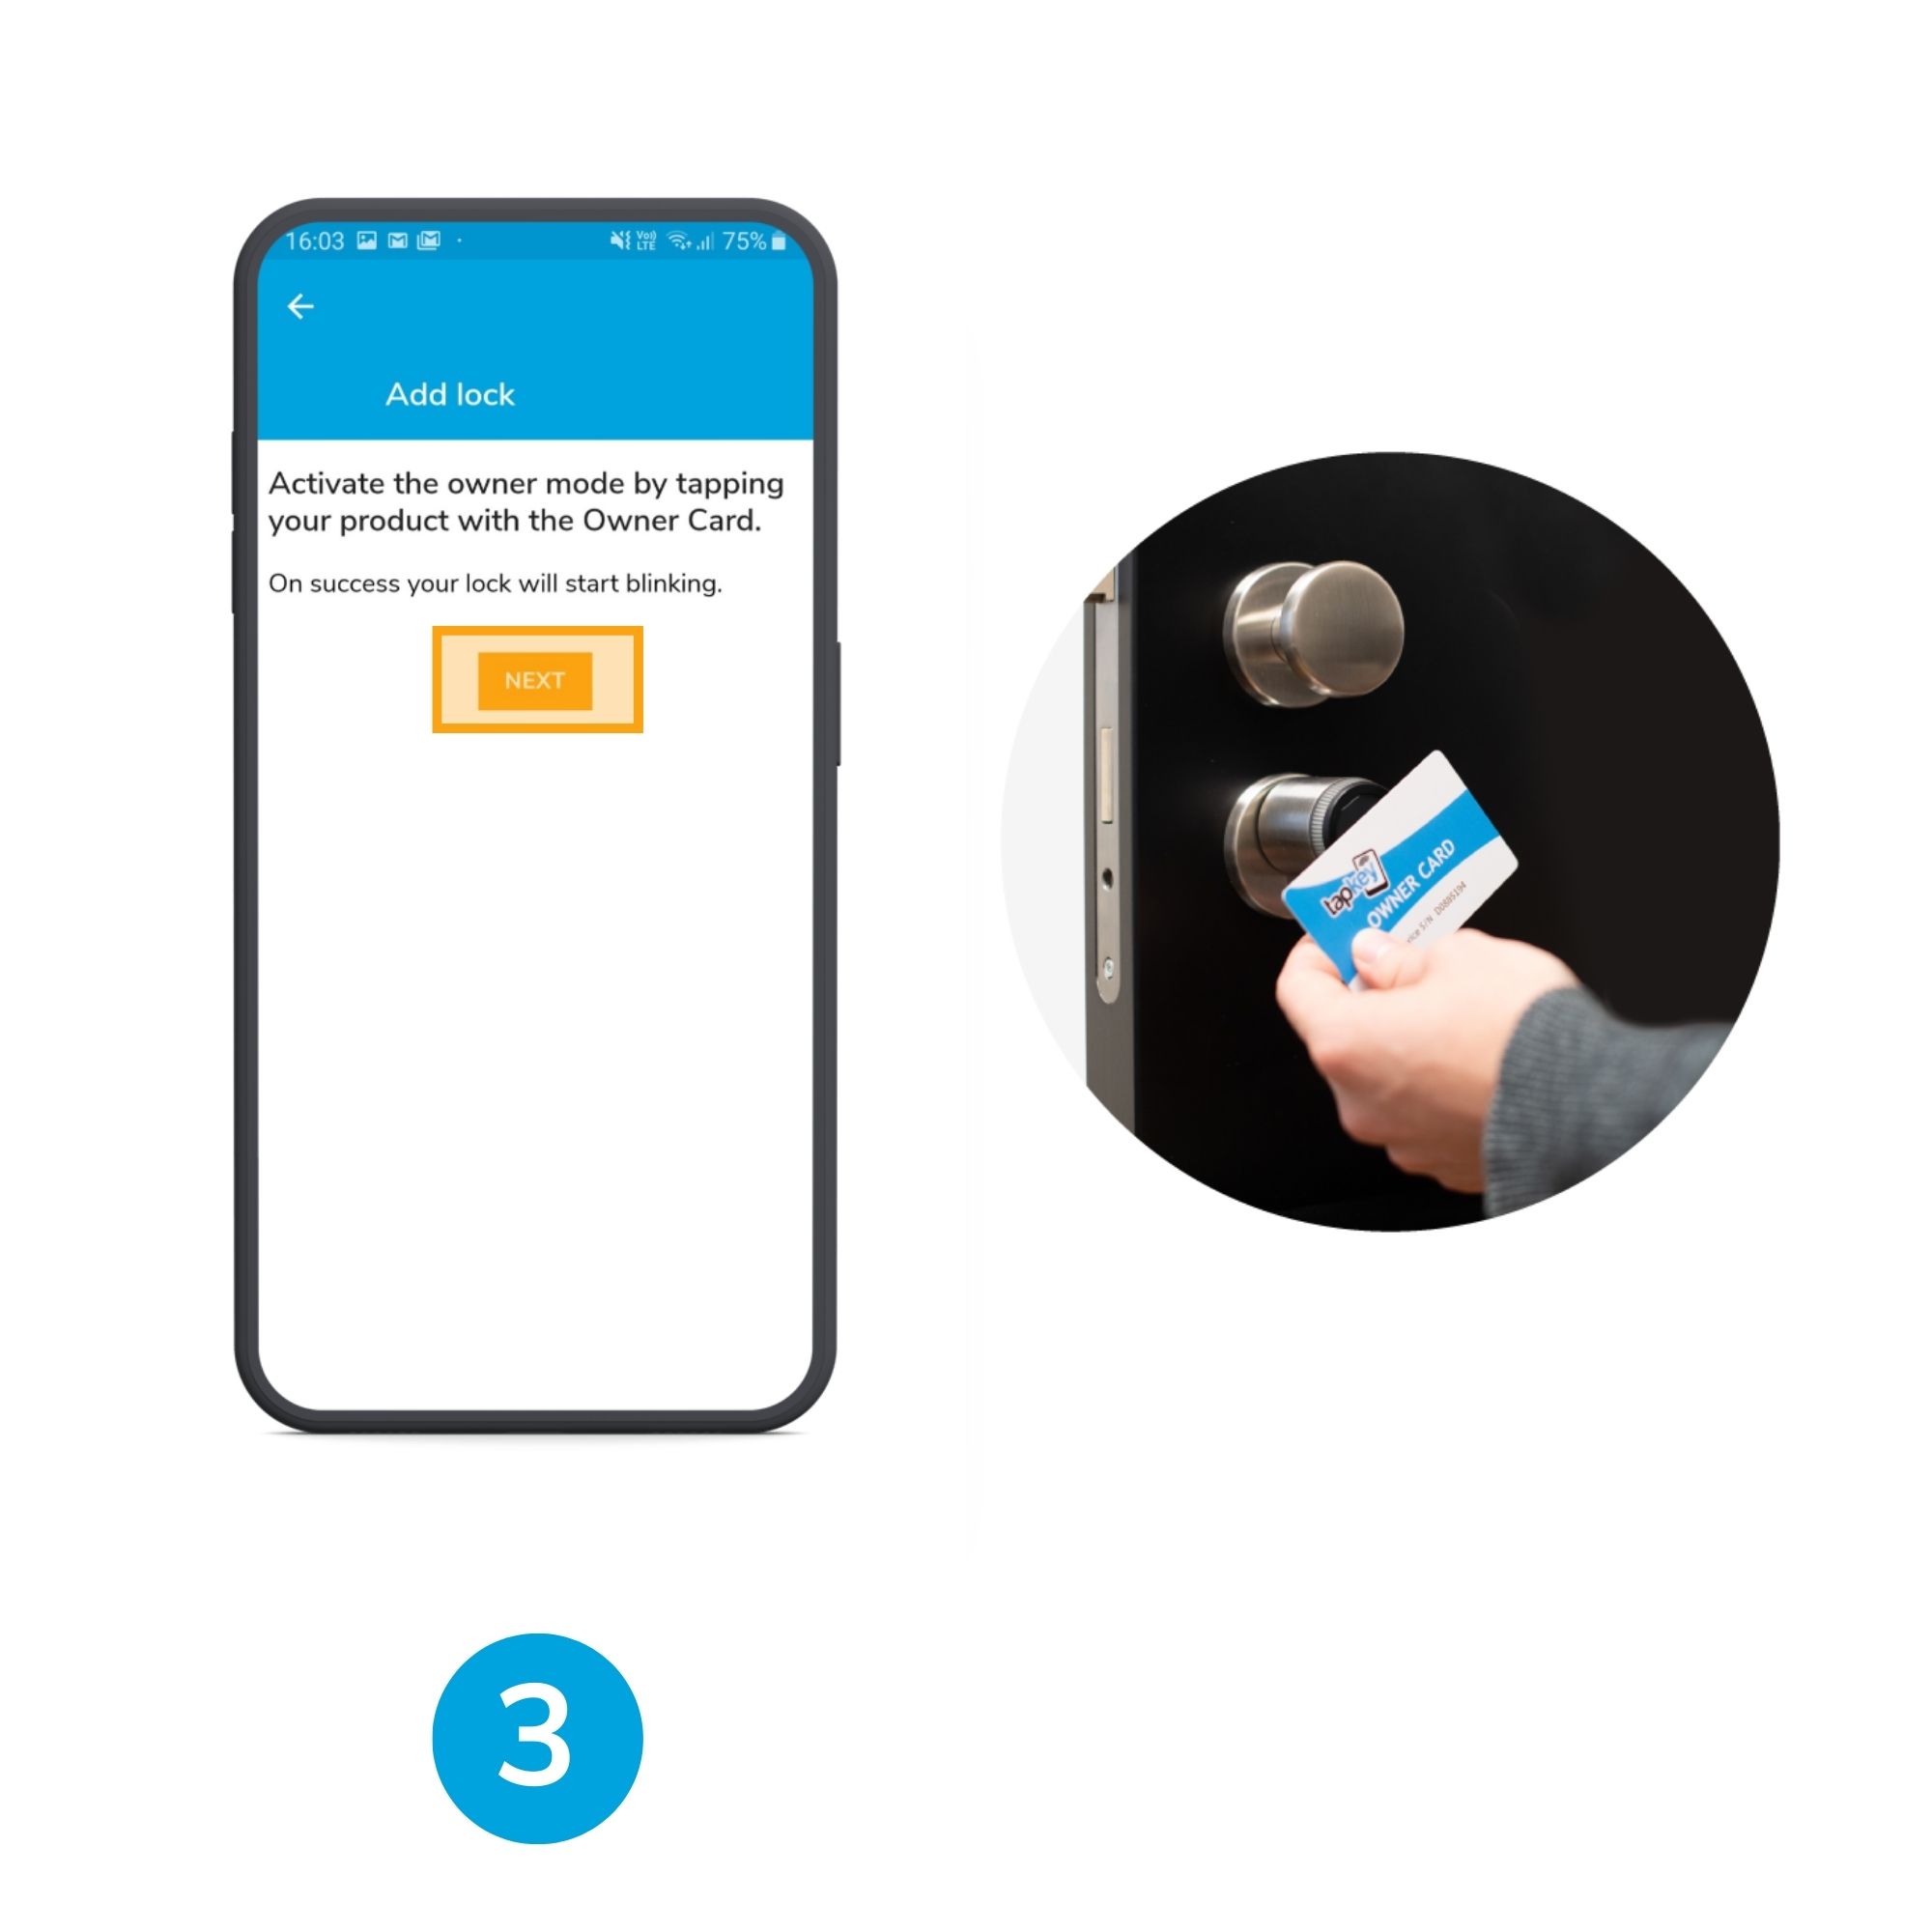
3. Follow instructions on screen
Activate the owner mode by tapping your lock with the Owner Card (no difference between Android phones and iPhones)
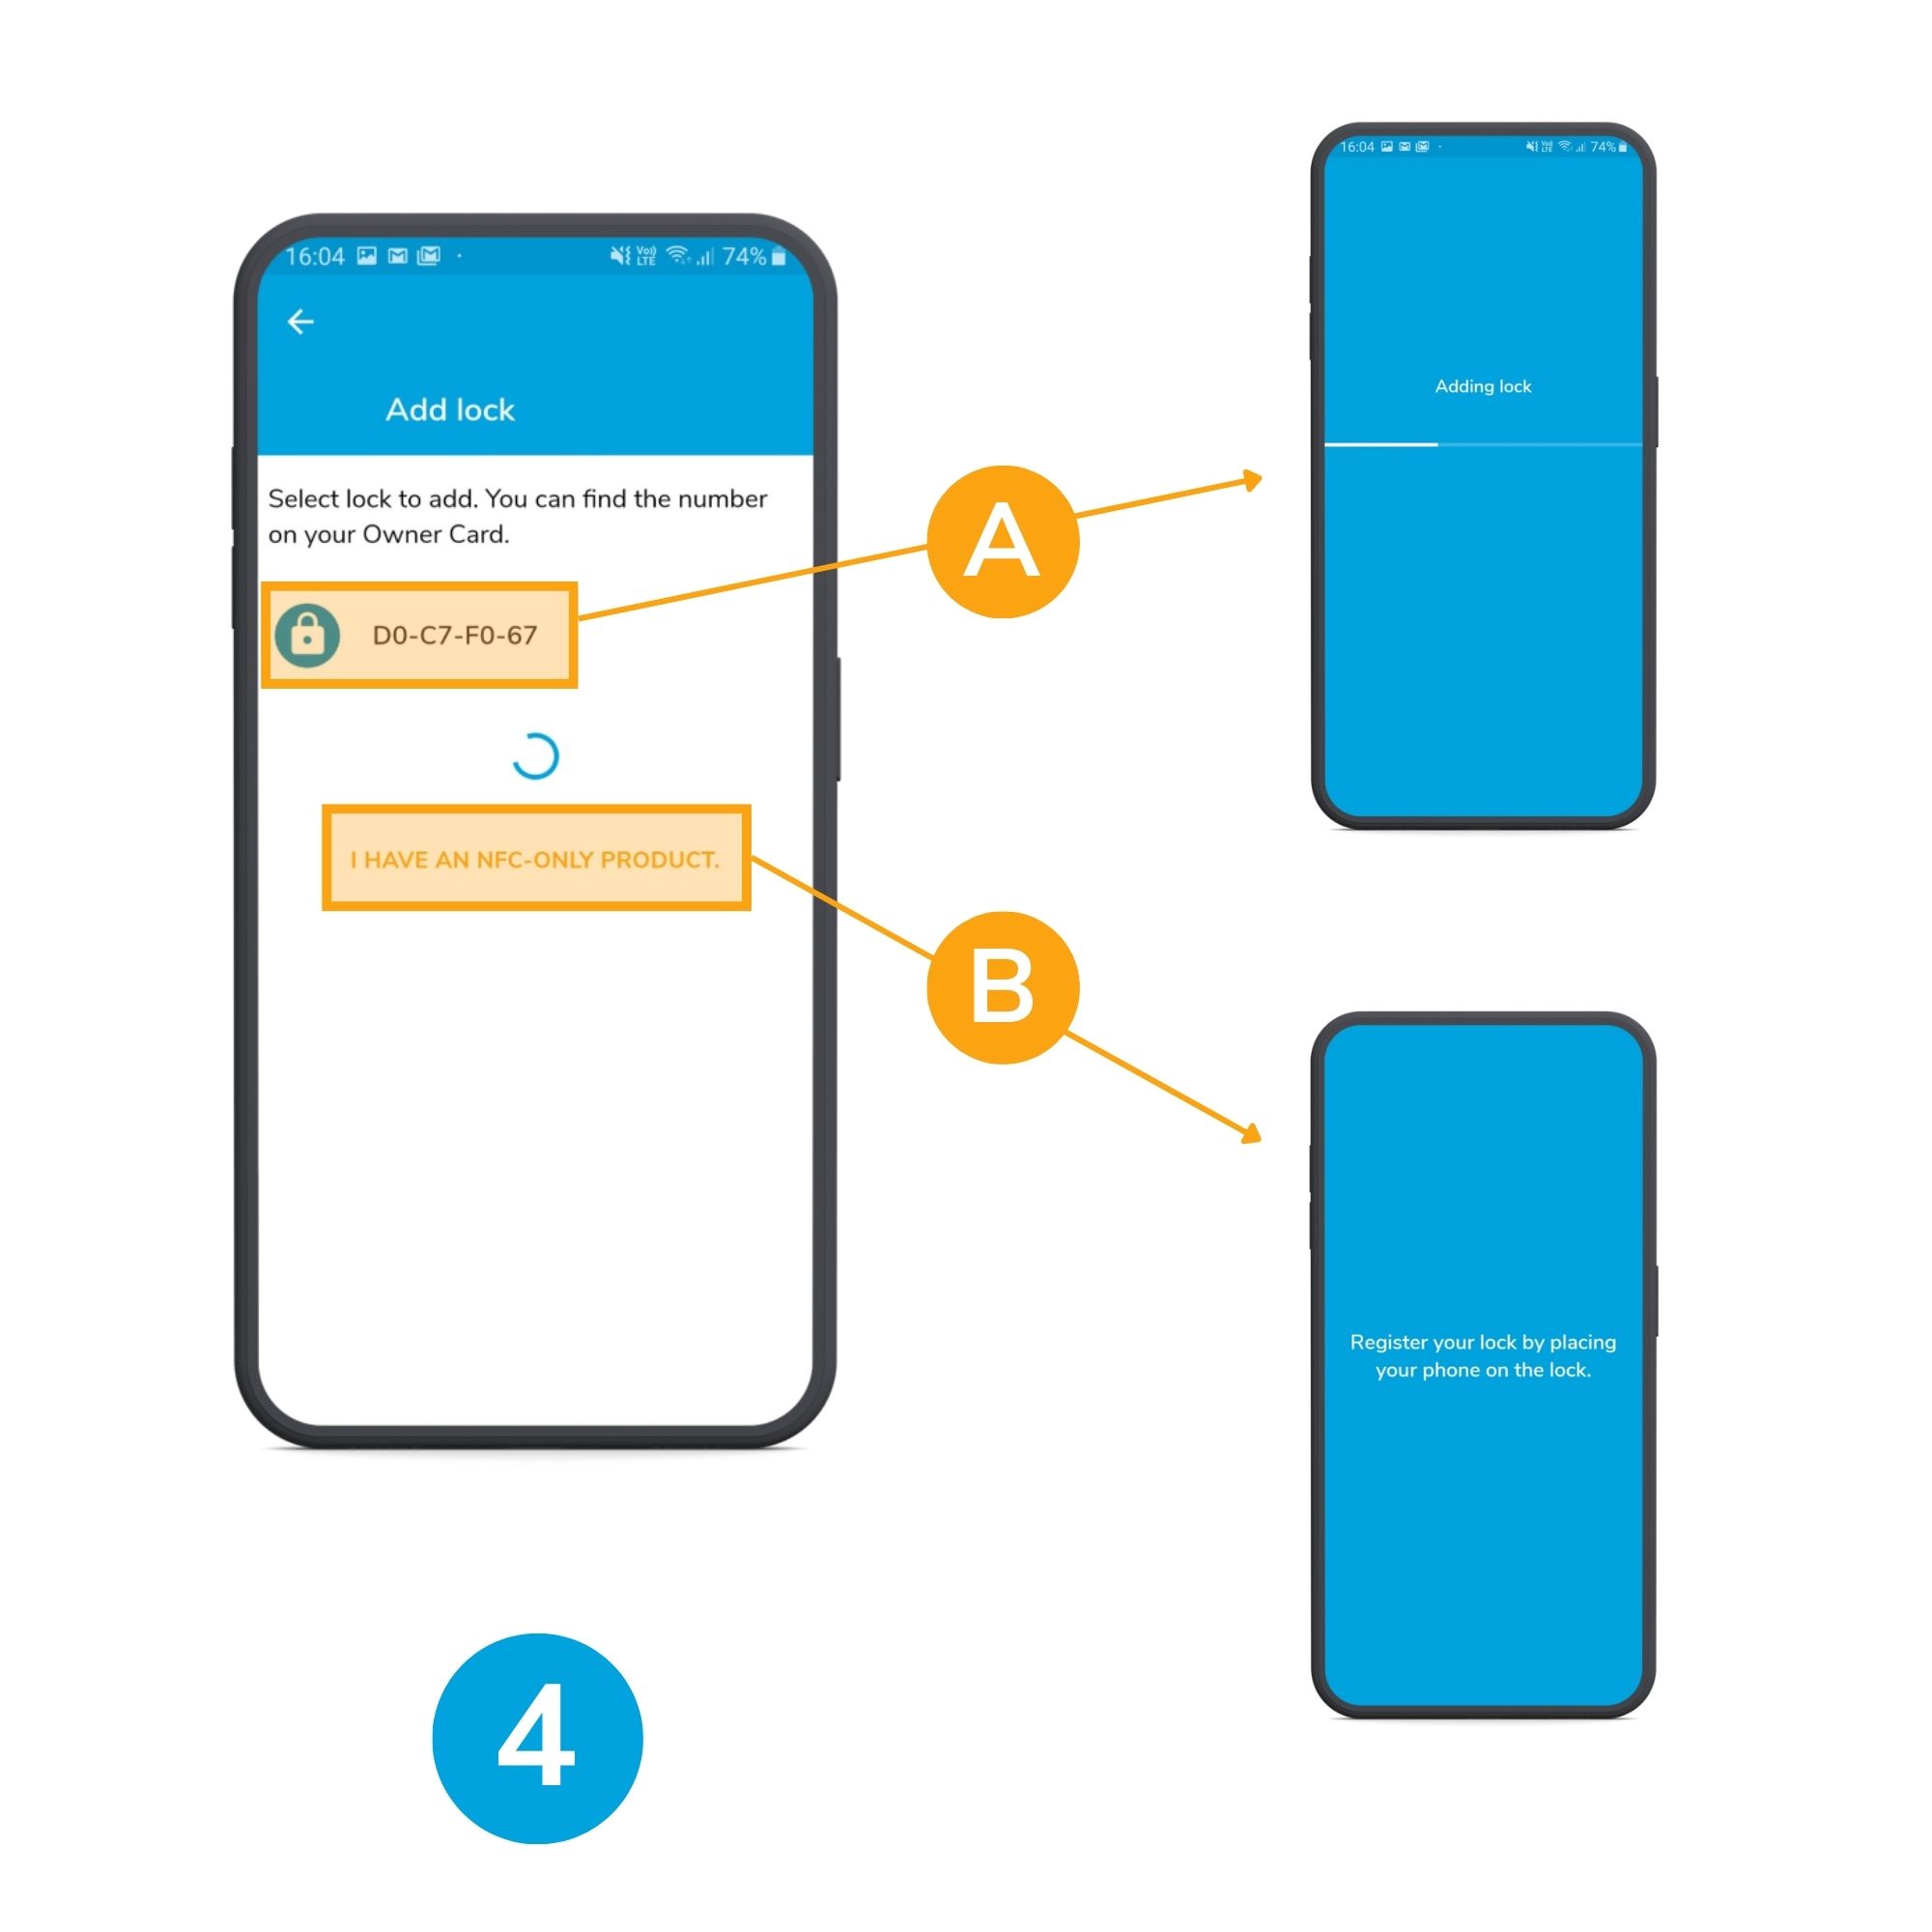
4. Select lock to add
A.) Tap on the lock and register via Bluetooth: You should see the same device number as the one printed in your owner card.B.) If you have an NFC-only product (Smart Lock before September 2018), just register your lock by tapping it with your phone.
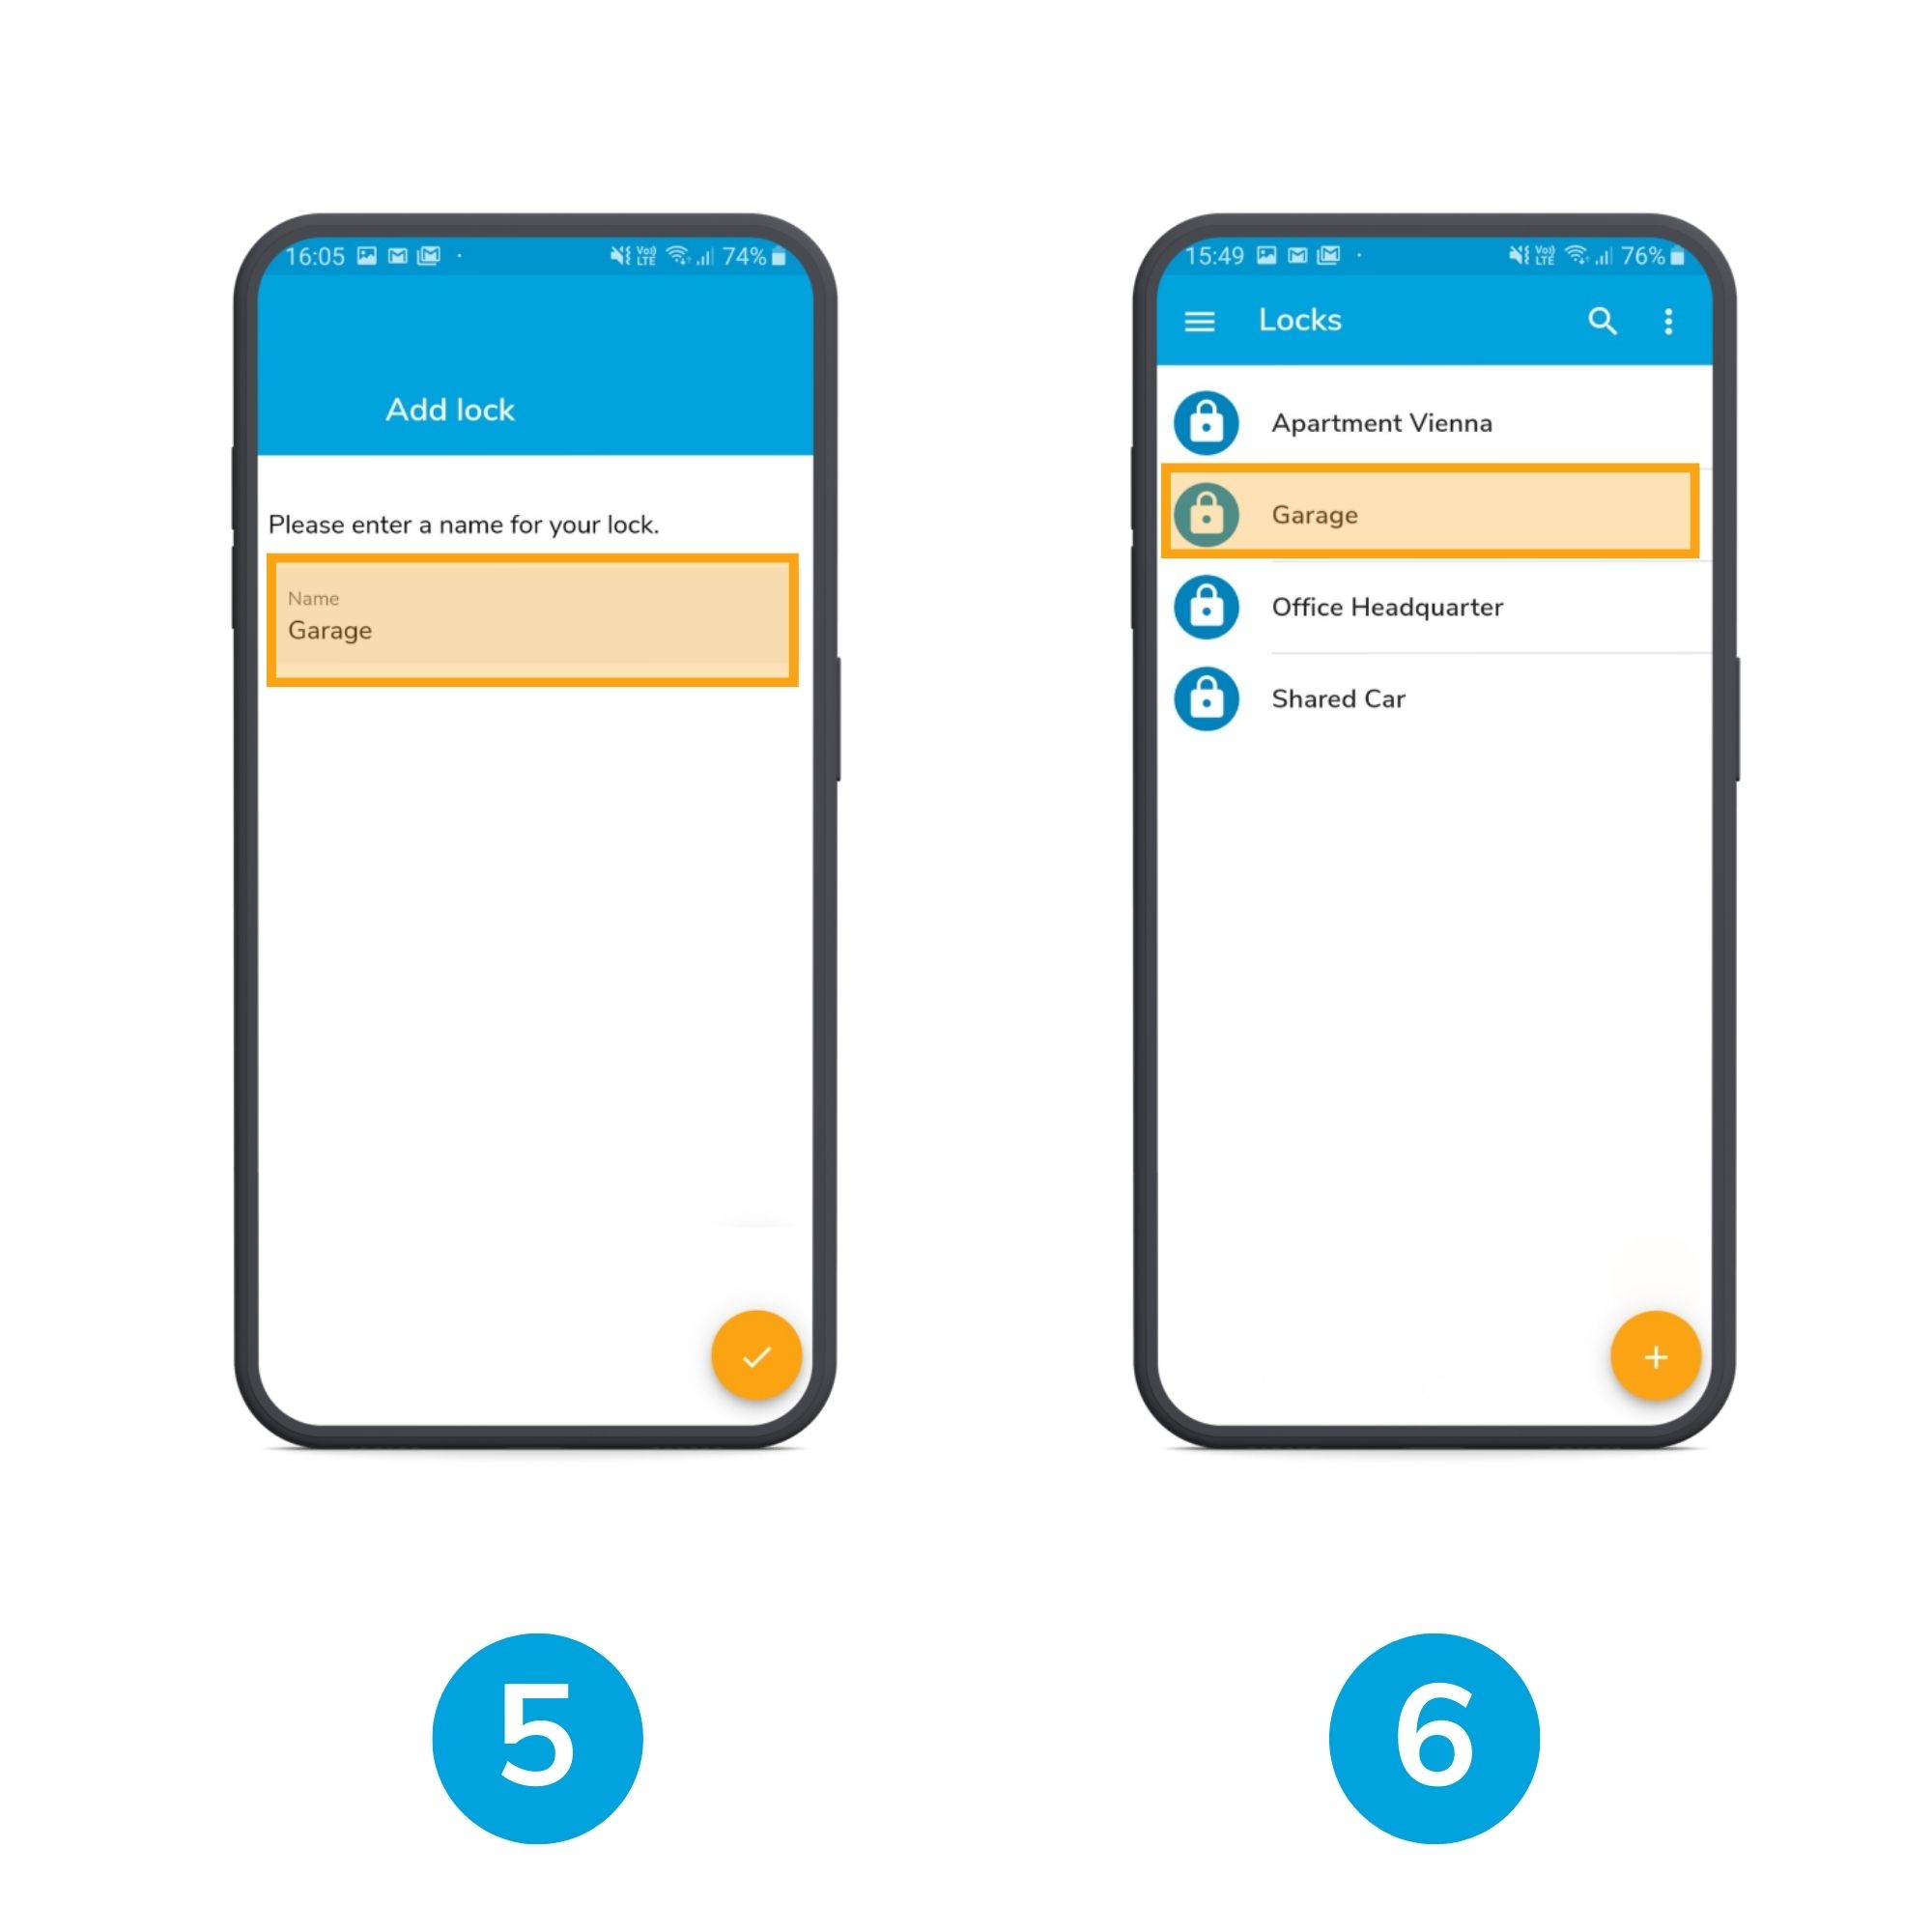
5. Name your lock
6. Registration is completed successfully
The owner can see the new lock in Locks. The lock owner automatically receives unrestricted access for the new lock.
2. Register with Owner Card (QR code)
Some of our Owner cards have QR codes, with these Owner Cards you can use the QR to register the lock into your locking system, or use the Registration Code method with the information in the Owner Card, you can find more information about this below.
Step-By-Step Guide
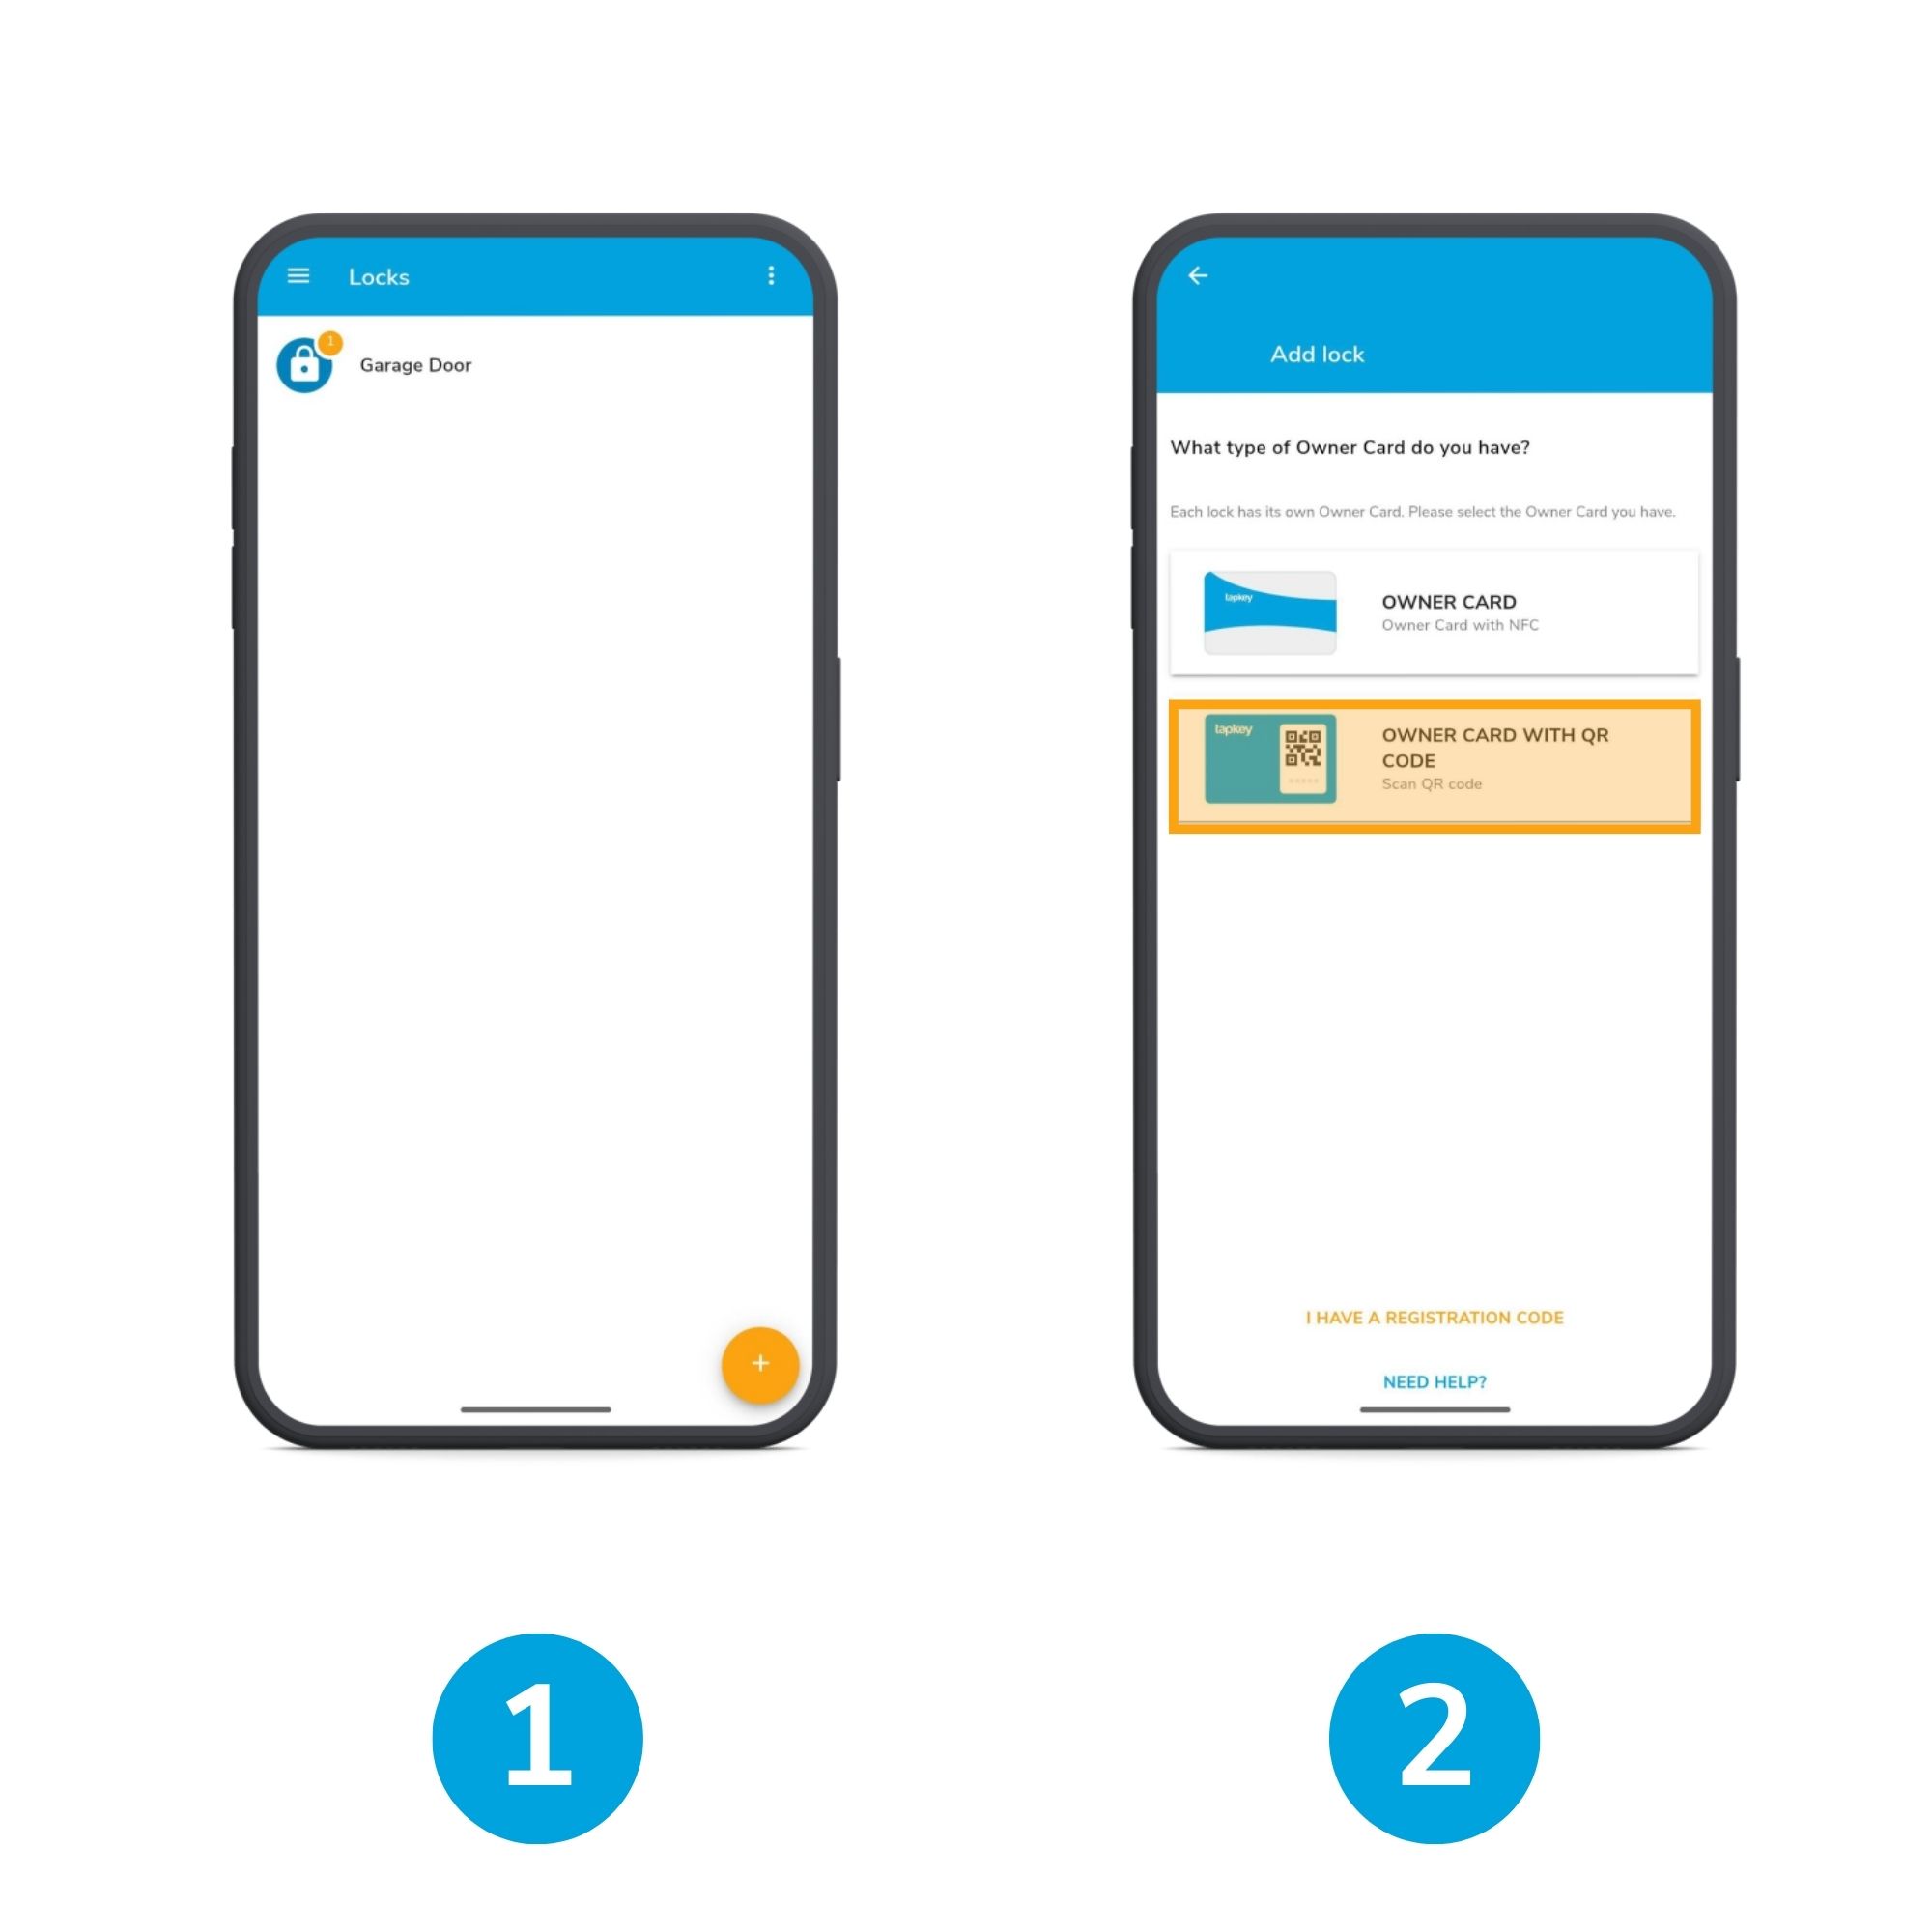
1. Tap the "Add" button in the Locks menu.
2. Choose the "Owner card with QR Code" option.
Note: Add this point the application will ask for permission to enable Camera Access, this is required to proceed with the next steps, so please allow Camera access.
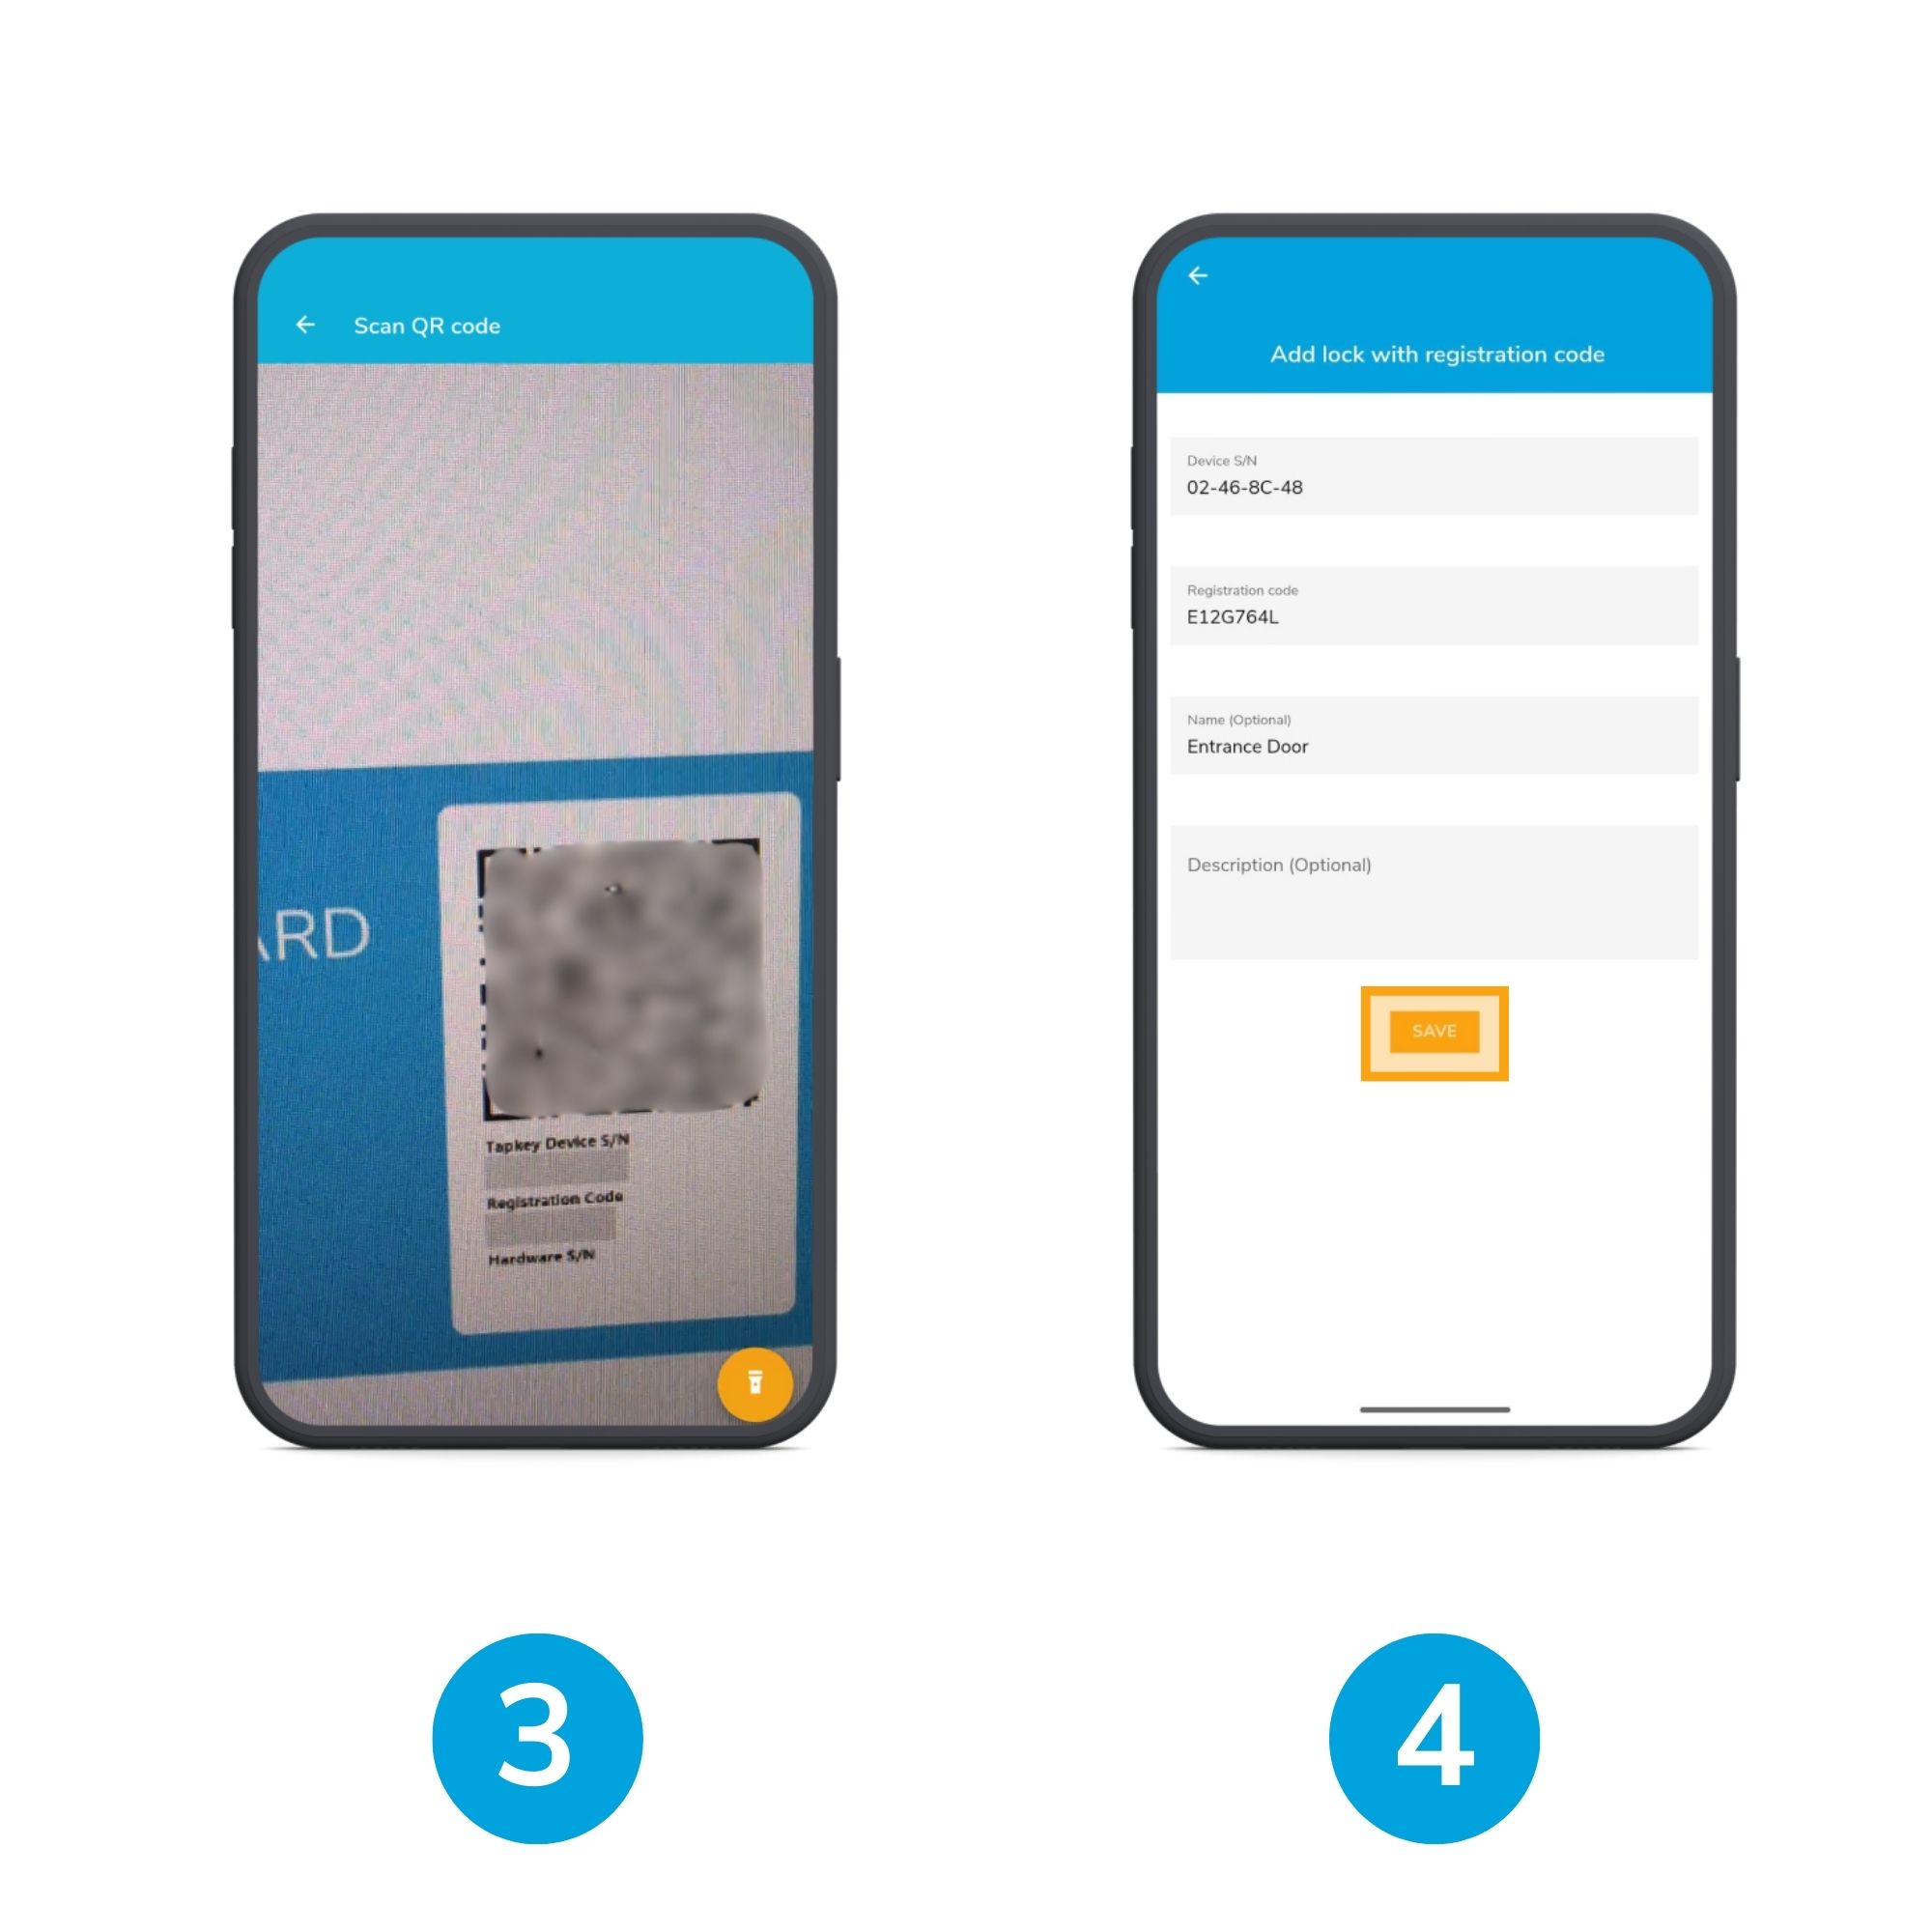
3. Scan the QR code from your Owner card.
The application will redirect automatically to the registration page as soon as the QR Code is read.
4. Set the desired name for your lock and click Save.
5. Synchronise your lock
Last step: After adding the lock to your locking system, it needs to be synchronised to apply all settings and permissions.
3. Register with Registration Code
The registration code is only available for Owner Cards with QR codes where the registration code is printed together with the QR Code or for special orders where the codes are sent directly to customers.
Step-By-Step Guide
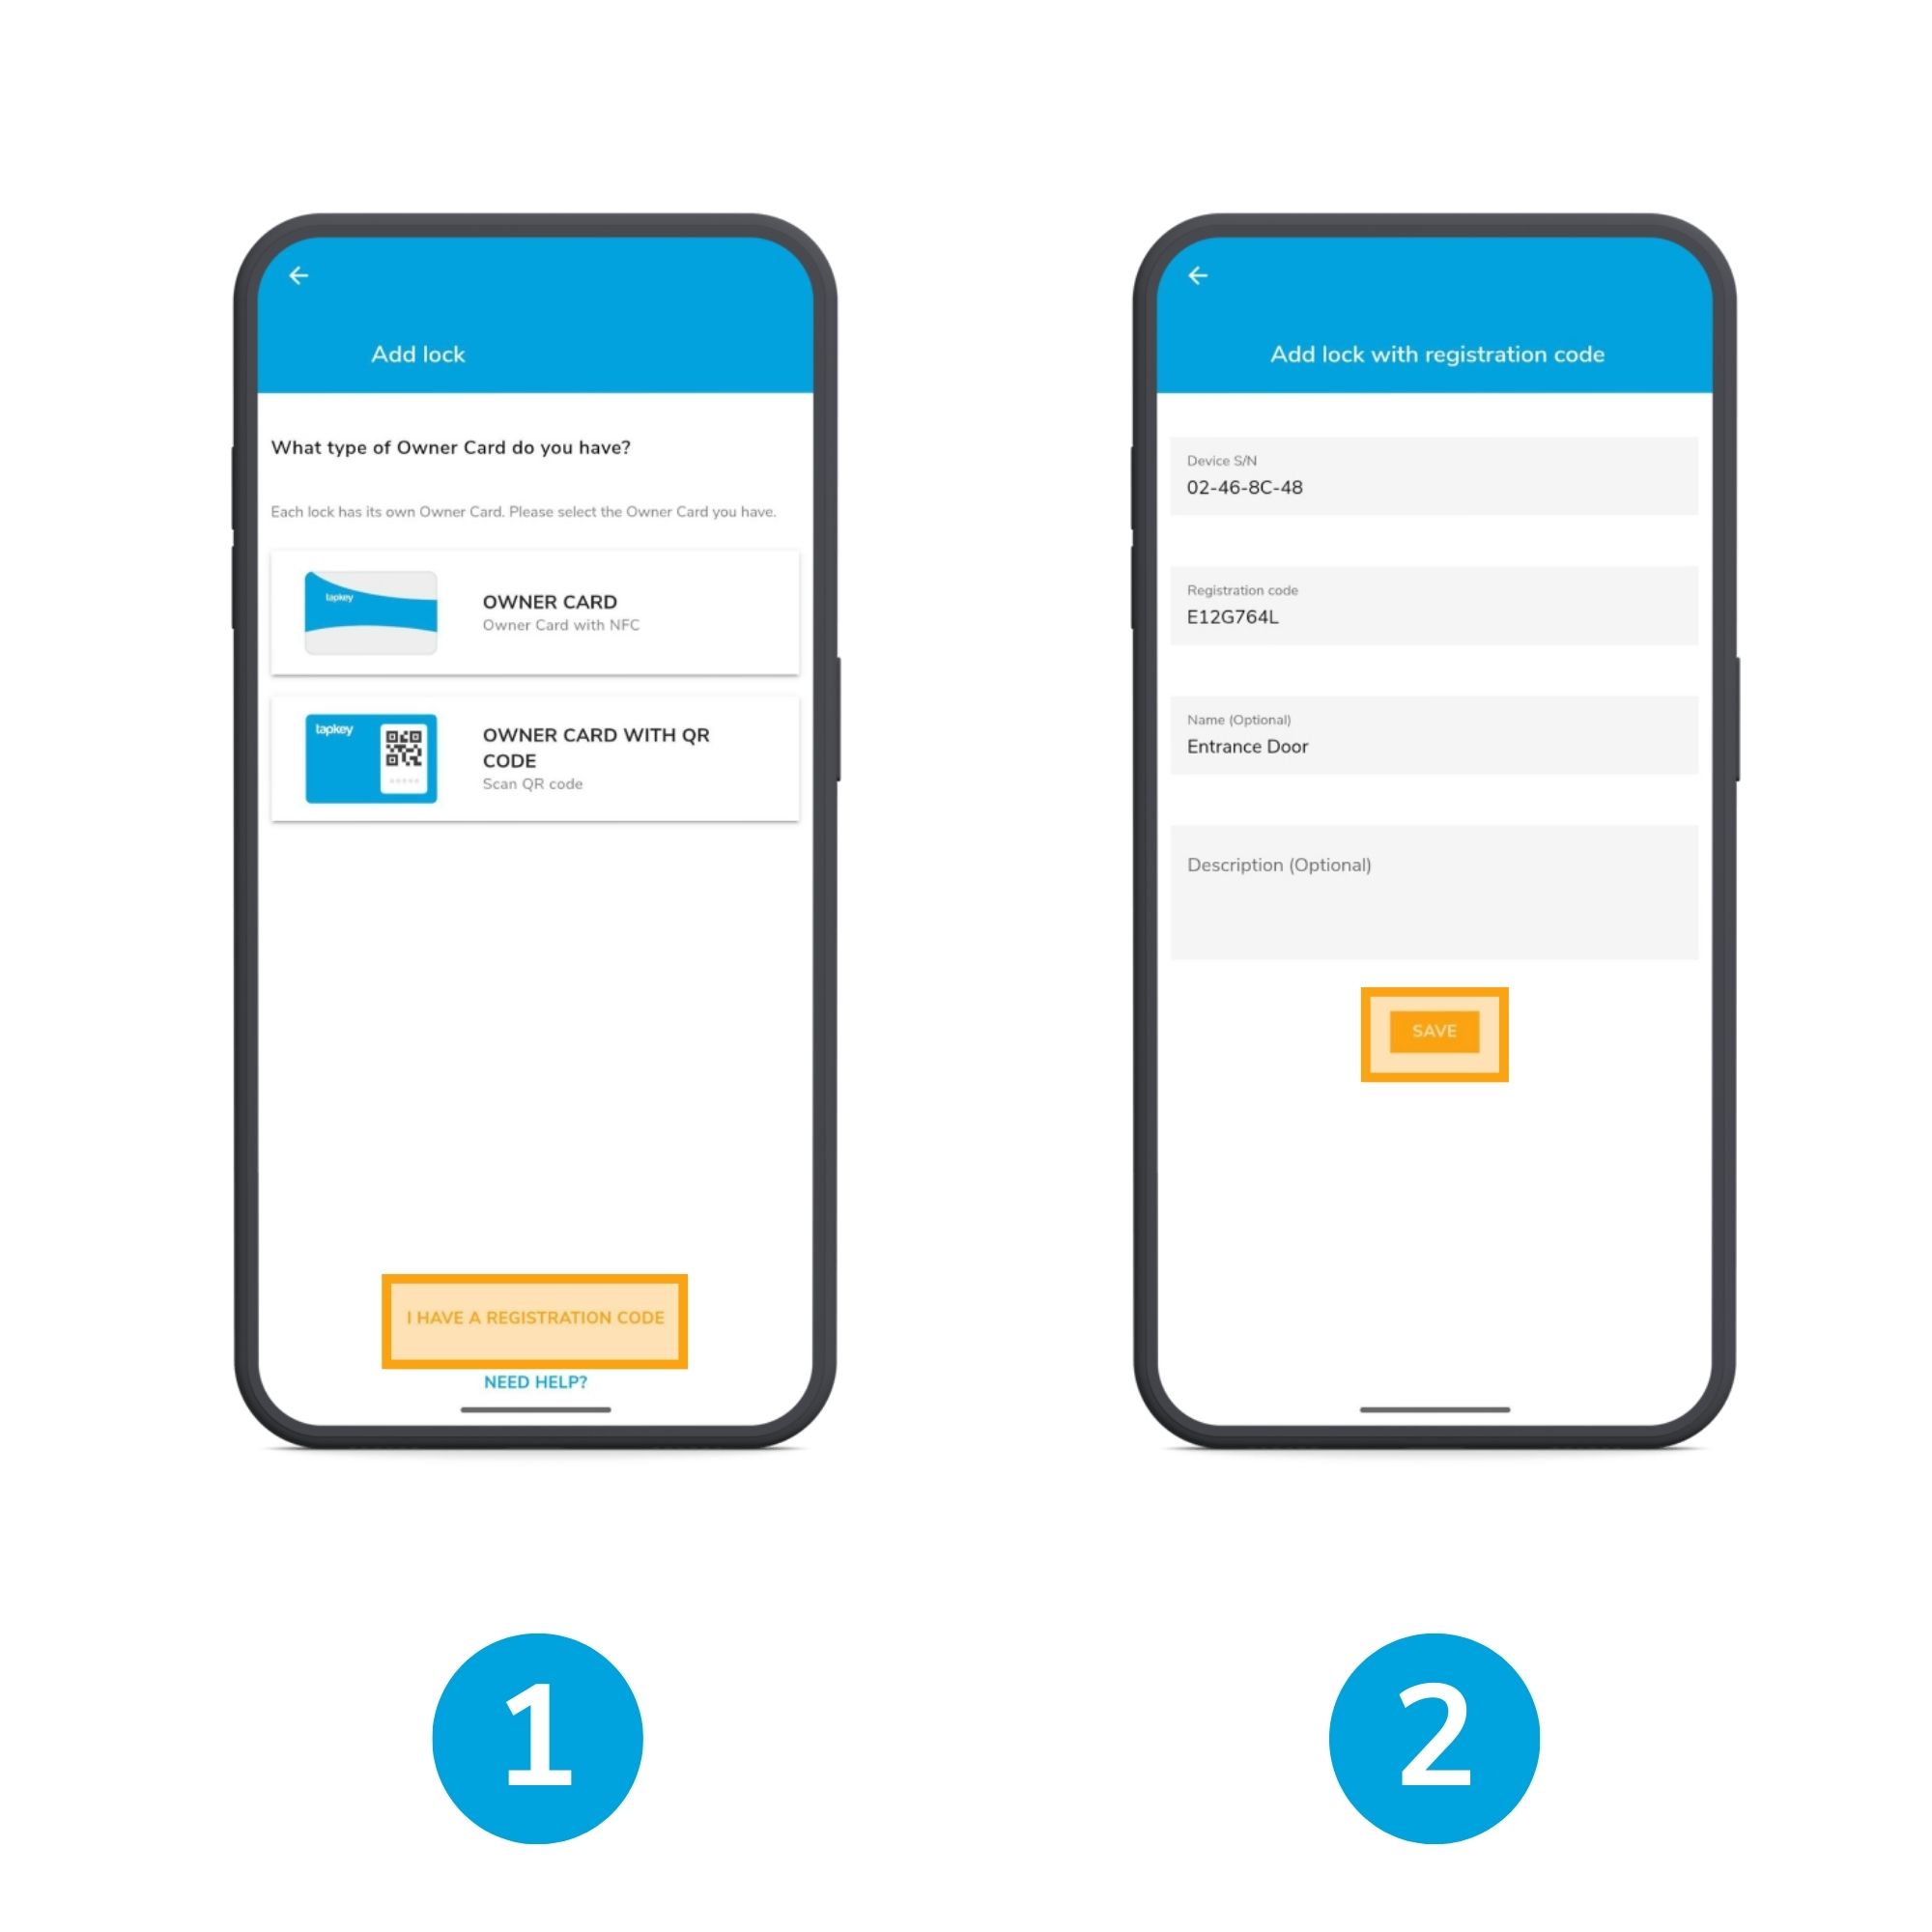
1. Select the option "I have a registration code."
2. Complete all required fields and save your information.
Input the same data from the Owner Card or the data obtained at the moment of purchasing your locks into the form. Adjust the name to the lock.
Was this article helpful?
That’s Great!
Thank you for your feedback
Sorry! We couldn't be helpful
Thank you for your feedback
Feedback sent
We appreciate your effort and will try to fix the article